How to print barcodes?
Overview
Go to CAS --> Transactions --> Inventory --> Warehouse --> Generate Bar Code Label
This function is used to print bar code labels for the items. The type of barcode printed can be either a sheet of labels (such as Avery labels) or ones printed from a roll printer. By checking header display it will also print the header/name on the label. Other options that can be printed on the label include Item ID, Item description, Retail price, Department, Category, Size, Color, Style, Season, Brand. Please note - if the UPC has alpha characters, this portion of the label will be pixilated. (Bar code format is Code128).
Labels can also be printed from the POS

User provides information for and then generates a bar code label. User enters details such as printer type (sheet or roll), label size, bar code format and can check boxes for optional details on label such as item ID, description, retail price, department, category, size, style, and color. User then enters all the item SKUs and their description and quantity and checks if he wants them to be printed, then clicks generate bar code label and is taken to a screen where the bar code will open in an Adobe document. Each item will receive its own bar code.
As is expected, too much data will cause a bar code to continue onto a second page, so the user must select what is to be printed on the label based on what will fit onto it. Below is the number of characters that fit across the label, including spaces (UPCA Roll):
4 x 2.3125 All data will fit (using maximum digits per item)
3.5 x 1.125 All data will fit (using maximum digits per item)
3.1 x 1.8 All data will fit (using maximum digits per item)
2.125 x 1 35 characters across
1.5 x 1 27 characters across
When the label size is 1.5 x 1 (roll) the following bar code formats do not print scannable barcodes, a larger size label must be used:
UPCA (13 digit UPC)
EAN (13 digit UPC)
EAN (Alpha Numeric UPC)
Code 128 (13 digit UPC)
Code 128 (Alpha Numeric UPC)

Roll printers and smaller size labels require much trial and error configuration the first time they are used. Please save the settings once you have configured the printer.!
Access
Access to this function at an enterprise level is limited by default to the System Administrator and Financial users only. Accounting, store managers, warehouse general managers as well as zone managers may modify settings at Venues or Store assigned to them.
Bar Code printing on a 2 x 1 roll paper
This guide is for printing bar codes on a Zebra 2844 printer using 2 x 1 rolls. This will be a one time set up and once you configured the system it will be set to print bar codes without needing further adjustments.
Prerequisite: Chrome Browser and Adobe reader.
Steps :
-
Create a bar code label on CAS, using 1.5000 inch X 1.0000 inch as the label size.
-
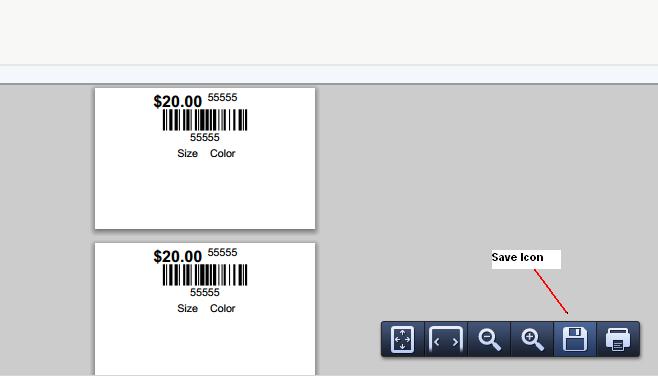
Hit generate bar code label to see the bar code on the screen. Save the bar code label by clicking the save icon on the lower right-hand corner of the screen.
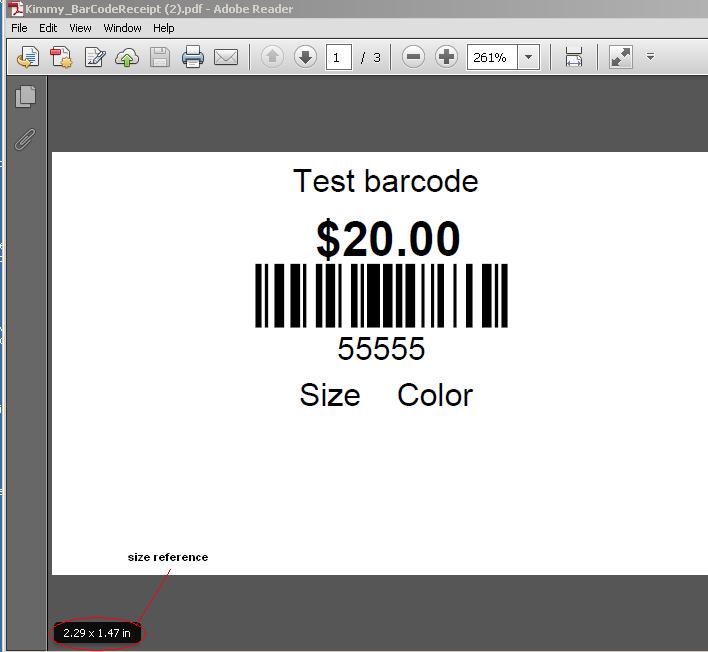
3. Open the save file using Adobe reader. On the lower left hand corner, it will show the page size of the bar code label. Use the size as a reference.
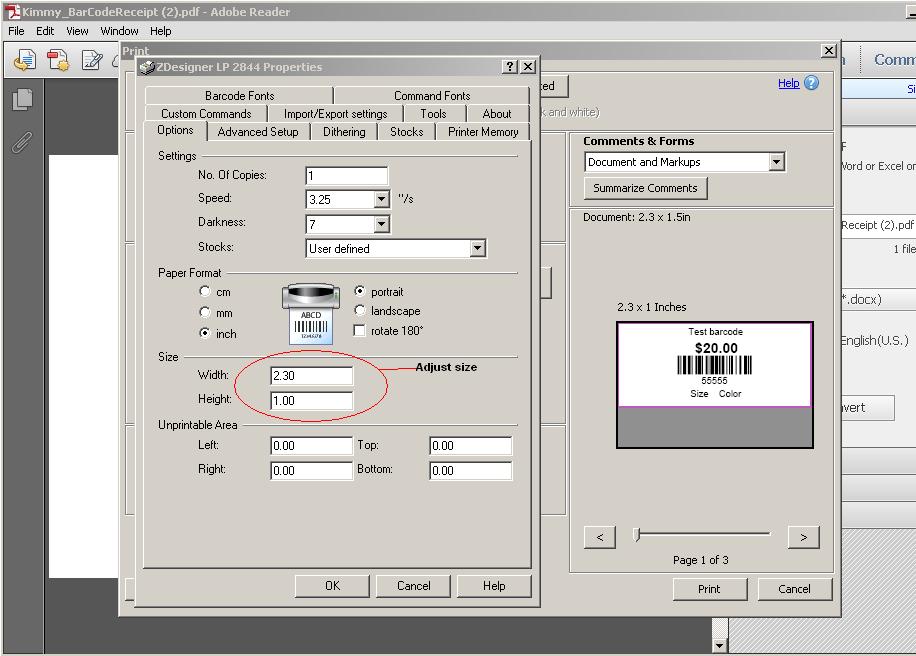
4. Hit the print button on the Adobe reader. Choose the bar code label printer, make sure "actual size" is checked and then go to properties. Adjust the the size using the reference size of the bar code. The width should be close to the reference size and the height should depend on how much gap is on the bottom of the bar code. The more gap it has the smaller the number you should put(this require trial and error), this will reduce the blank space and print the bar code without unnecessary gaps. The gap will be the reason that a blank bar code prints after a printed bar code.
5. Print the bar code label. The bar code label should be be centered and have no extra gap between prints.
6. Go to Printer and Fax on Windows(Windows XP) - and go to the properties of the bar code printer. Set the size to the same value as when configuring the printer on the adobe reader. Restart computer.
7. Once everything is set up, you can directly print on CAS, the only setting that needs to be change is to unclick "fit to page"
Articles in this section
- Overview
- Creating Employees
- Creating Stores and Register
- Master Item
- Transaction Code Creation/Management
- Create Customers
- Create a Purchase Order
- Barcode Label Printing
- Receiving
- Store Orders
Comments
Please sign in to leave a comment.