The 6IX application makes it easy to add products by scanning the barcodes or manually entering the UPC. This is done from the Transaction Cart. New items can also be created using the backend portal, Console.
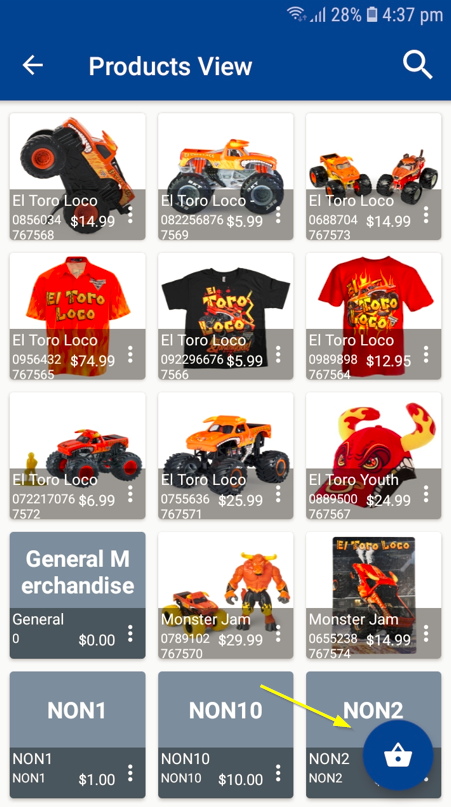
To start adding items - press the 'sales basket' in the lower right
Adding New Products -Scan
Press the Scan Icon located on the top bar. This will activate the camera to scan a barcode and you can enter item information, including opening quantity
Adding New Products - Manually
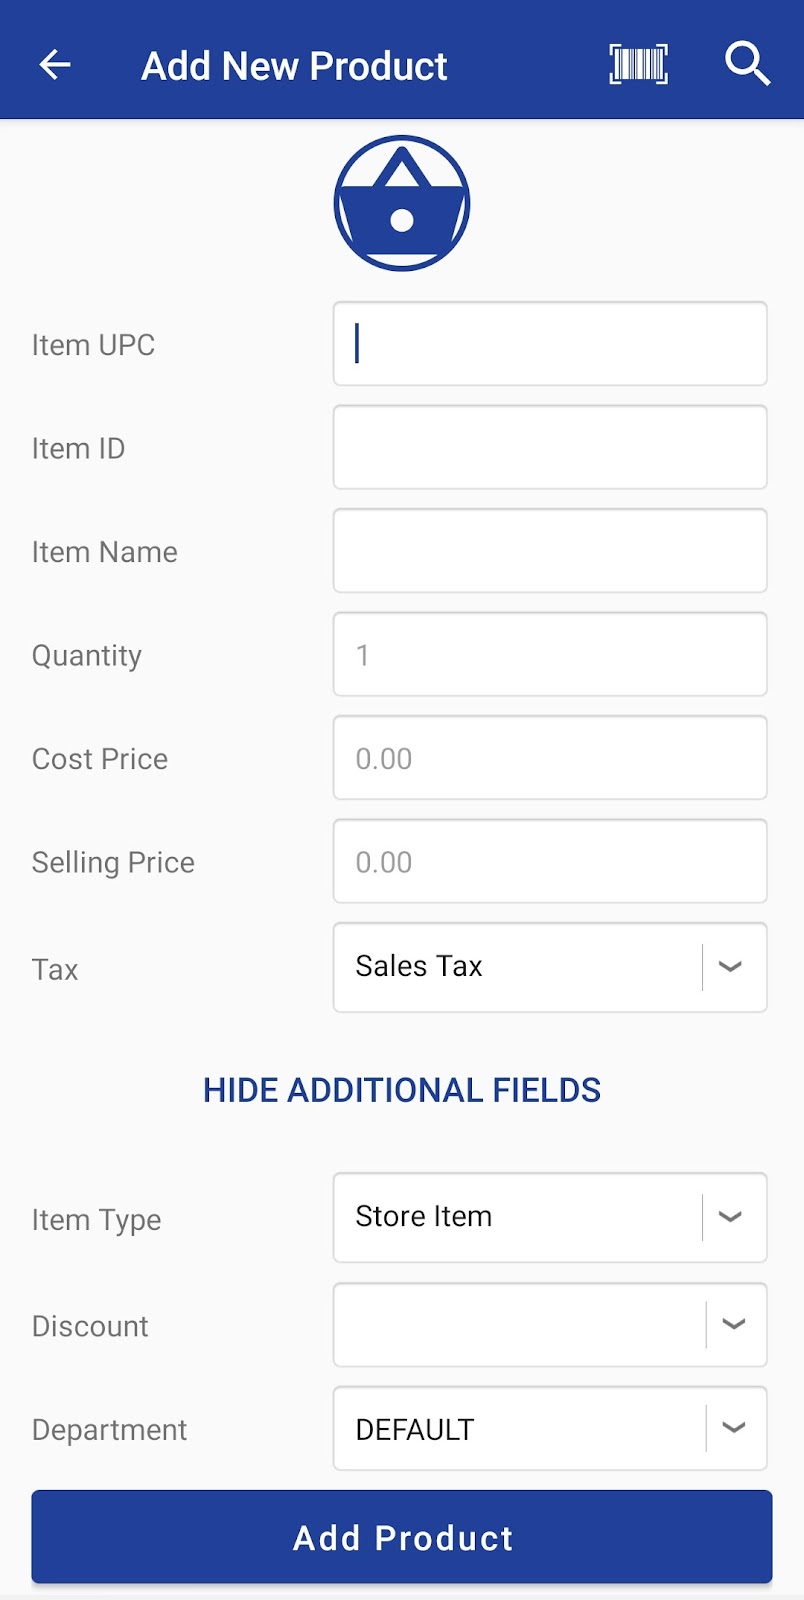
For items without a scannable barcode, just start populating the item information and when completed press Add Product
To view and create products, click on the menu icon from the home screen, Master Data → select ‘Products’. The product list will be displayed.
Adding a new Item
-
To add a new item, click on the ‘sales basket sign’ at the bottom of the screen.
-
Enter the item details in the field provided.
-
Click ‘Add Product’.
Articles in this section
- Zebra RFID Checkout Support in 6IXPOS
- JPMorgan Chase Payment Processor in 6ixPOS
- Tender Rounding in POS
- Phone Order Checkout in 6ixPOS
- FreedomPay in 6ixPOS
- ValorPay Integration on 6ixPOS
- CRM Capture in 6ixPOS
- Suspend & Resume Transaction
- Serialization in 6ixPOS
- Stripe Terminal Integration on 6ixPOS
Comments
Please sign in to leave a comment.