The console has introduced a set of comprehensive features, to streamline the order creation process.
Order Creation Process
Navigate to Console --> Financial --> Orders.
Step 1
Create a new order by selecting create order.
Step 2
- Select customers from an existing list, auto-populating essential details for accuracy. Flexibility to modify customer details at the order level.
- Users choose whether shipping aligns with the customer's address or opt for a different location.
- System generates order numbers automatically or allows users to input specific ones.
- Orders can be associated with events, suites, stores, and mandatory registers for comprehensive categorization.
Users can include notes for context or specific instructions, enhancing communication.
Step 3
- Item lookup feature facilitates easy item selection, auto-populating crucial details.
Note: Item lookup will display only items that are entitled to the selected store.
Step 4
- Items with predefined discounts have them applied automatically during order creation.
- Users can control and update transaction-level discounts.
- System calculates gross amount based on selected item details, providing accurate financial overviews.
- Total discount considers both item-level and additional transaction-level discounts provided by users.
- Step 5
- System validates all required fields before allowing order creation, ensuring data integrity.
- System ensures unique order numbers to prevent duplication and enhance tracking.
Order Grid
A comprehensive order grid, enabling users to efficiently view and filter created orders based on specific criteria such as order date, customer, order status, and payment status. Each order in the grid displays essential details, including a clickable unique order number leading to a detailed view, customer name, order date, net order amount, order status, and payment status. Users can perform grid searches using any values and apply filters seamlessly for a tailored order management experience.
Note: The Order Grid now supports a date range filter for flexible data loading, defaulting to the last 30 days. Users can filter orders by sources like TIKT, Shopify, retailcloud Online, Woocommerce. For Suite orders, additional filters for events and suites are available.
Order Payment
The console now facilitates the marking of orders as paid, supporting "Cash" and "Card on File" payment methods. If a customer with a card on file is associated, the system auto-populates card details for the "Card on File" option. Users can choose between "Cash" and "Card on File," with the latter navigating to the Spreedly gateway for payment. Once marked as paid, orders can not be edited for enhanced accuracy.
View Order Status and Payment History
The console now has an improved Order Details view, allowing users to track order status changes and payment history. The order status history presents chronological updates, including date, time, status, and initiator. Likewise, the payment history shows chronological payment details, including date, time, amount, and method, with the latest payment on top. This feature ensures a thorough overview of each order's lifecycle within the console.
Ability to Refund an Order from Console
The Order Refund feature allows authorized users to issue full or partial refunds directly from the Order Details screen in the Console. Refunds can be processed at the item level, automatically calculate totals, capture refund reasons, and update the order status for clear tracking and reporting.
This ensures accurate financial records while providing flexibility to handle multiple refunds on the same order when needed.
Refund actions depend on the current order status:
Paid (with a completed sale)
A Refund button is available.
Partially Refunded
The Refund button remains available for additional refunds.
A Refund History button is shown.
Fully Refunded
The Refund button is disabled or hidden.
The Refund History button remains available.
Processing a Refund
Step 1: Open the Refund Screen
Go to the Order Details page.
Click Refund in the order header.
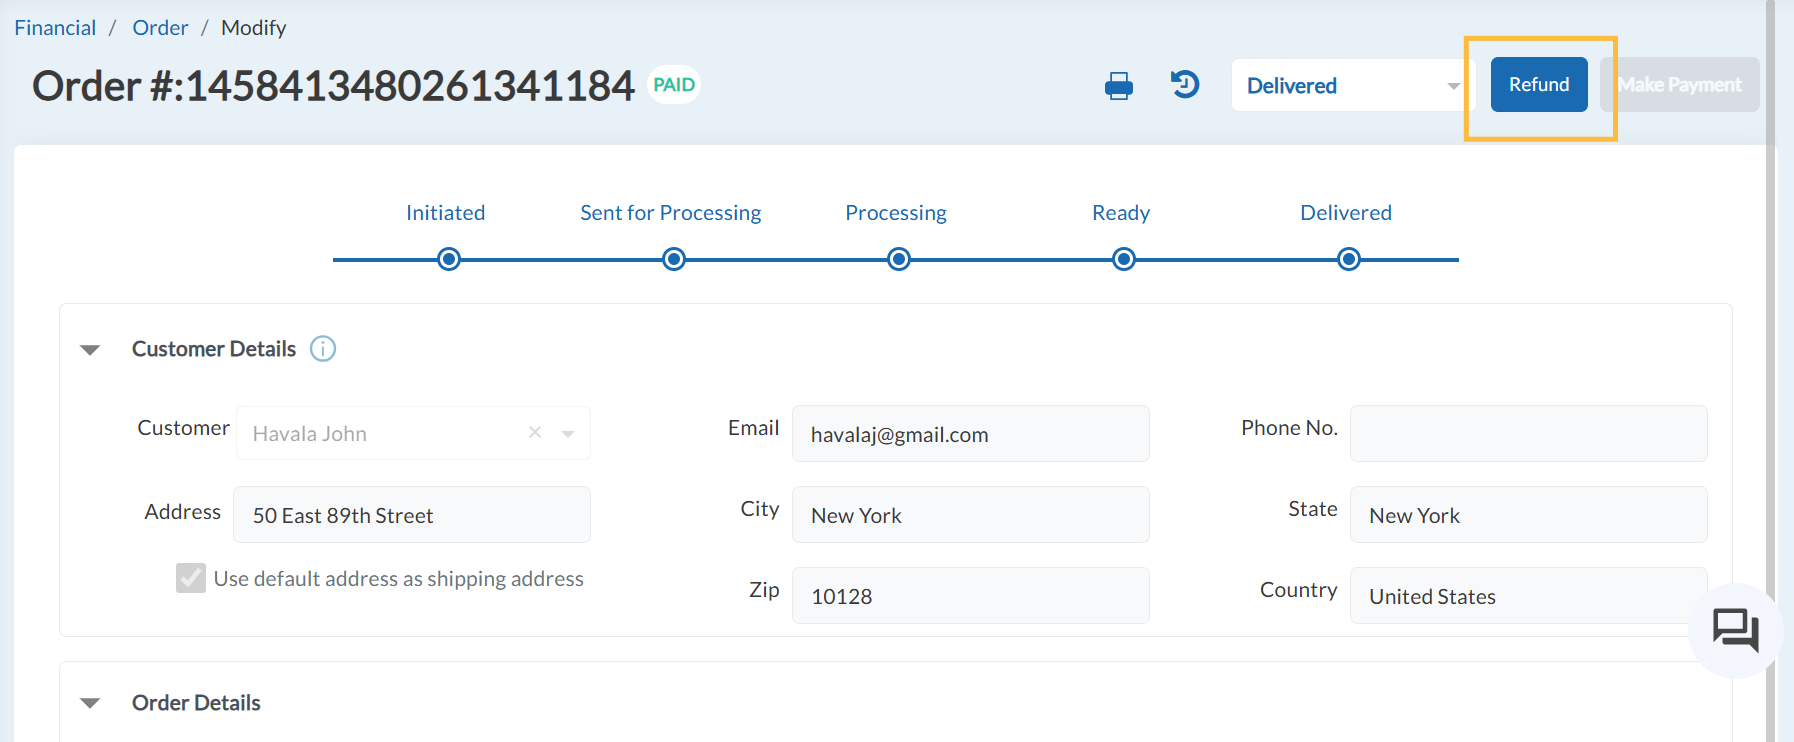
The Process Refund window opens with key order details such as Order Number, Date, Store, and Customer.
If it's Partially Refunded, user will be able to view the "Refund" button along with "Refund History" button to refund the more and view previous refund details respectively.
Step 2: Review Previous Refunds (If Any)
If the order already has refunds, they are displayed at the top of the screen.
Click on "Refund History".
This section shows:
Refund transaction number - clicking on this will redirect to "Sales by Receipt" page to view more.
Date
Original amount paid
Refund amount
Refund status
Refund reason
This helps you understand what has already been refunded before processing a new one.
Step 3: Process Refund from Partially Refund Status
Click on Refund to process the refund
All items from the original order are listed.
For each item, enter the Refund Quantity.
The system automatically calculates the refund amount per item.
You cannot refund more than the remaining available quantity for an item.
The details of previously refunded items will be shown under the option Refund Details shown in the picture given below.
Clicking on Refund Details will show the previous refunded details along with the item details that have not refunded.
Note: Refund from Orders support Cash/Card on File/Store Credit
Step 4: Review Refund Summary
As you enter quantities, the summary updates automatically and shows (shown in the picture given above):
Number of items selected
Subtotal
Discount (if applicable)
Tax
Prepaid amount
Fees (if applicable)
Total Refund Amount
This gives you a clear view of the refund before proceeding.
Step 5: Complete Refund Details
Before submitting, you must:
Select a Reason for Refund (for example: Broken Stock, Wrong Item, Customer Request).
Choose a Payment Method.
Refunds are processed using the same payment method used for the original order.
The refund amount is displayed automatically and cannot be edited.
Step 6: Process the Refund
Click Process Refund to complete the action.
The system validates the details and creates a refund transaction.
The order is updated automatically:
If only part of the order is refunded, the status becomes Partially Refunded.
If the full order value is refunded, the status becomes Refunded.
Processing Multiple Refunds
If an order is Partially Refunded, you can repeat the refund process:
Previously refunded quantities are deducted automatically.
Only the remaining quantities are available for refund.
Each refund is recorded as a separate transaction.
Viewing Refund History
Click Refund History from the Order Details screen.
A read-only view displays all refunds processed for the order.
Each entry shows:
Refund transaction number
Date and time
Original amount paid
Refund amount
Order status after the refund
Refund reason
Clicking a refund transaction number opens the corresponding sales receipt in a new page for detailed review.
Order History Updates
Orders with partial refunds are marked as Partially Refunded.
Once fully refunded, the status changes to Refunded.
These updates are reflected consistently across Order History and reporting.
Print Order as PDF from Orders Page
Users can now easily generate and print a PDF copy of individual orders directly from the order details screen.
Key Features:
- A Print option is available for all individual orders.
- The PDF will always display the most up-to-date order status at the time of printing.
- If the order status changes, the newly generated PDF will reflect the updated status.
This feature ensures that you have an accurate, printable record of each order whenever needed.
Articles in this section
- Item Import Field Descriptions
- Overview
- Merchant Onboarding
- Navigation Bar
- Reports
- Items
- Settings
- Dashboard Overview
- Company
- Register
Comments
Please sign in to leave a comment.