The Configure-to-Order (CTO) feature allows merchants to offer personalized products—such as customized jerseys—directly at the Point of Sale (POS). With CTO, customers can choose their own names, numbers, or patches, while the system automatically manages inventory for all customization components (letters, numbers, and special patches).
This guide explains how CTO works across setup, POS operations, fulfillment, receipts, and reporting.
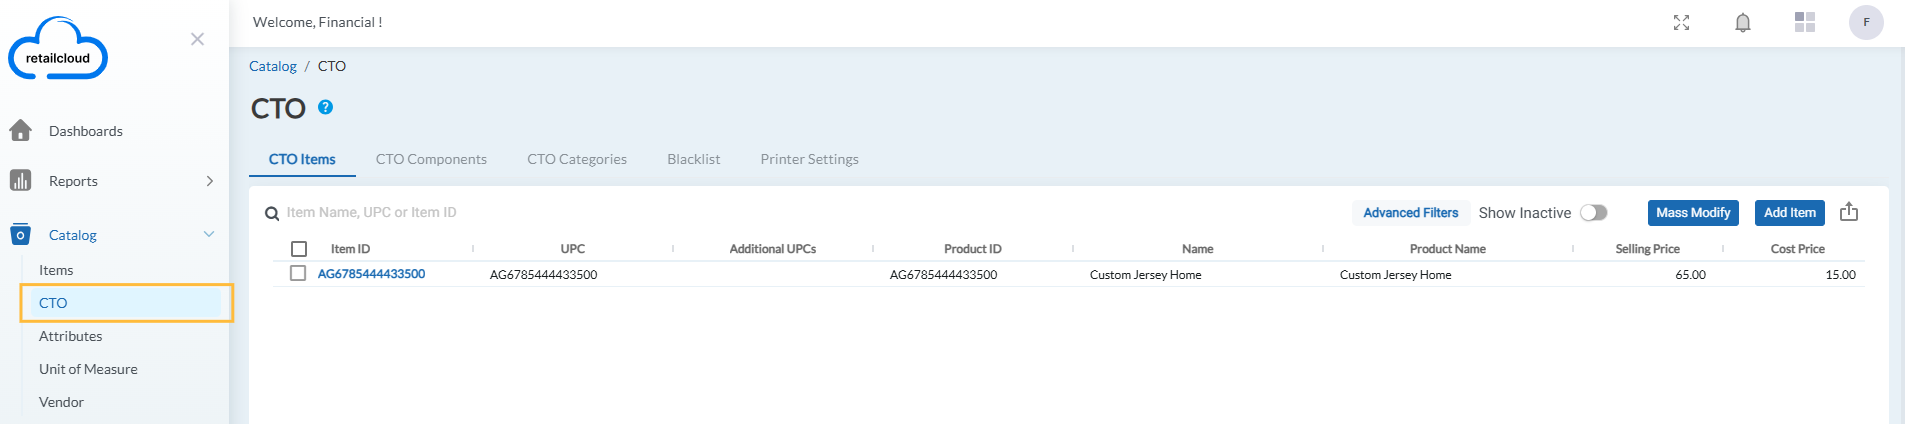
1. Initial Setup & Configuration
Before you can sell CTO items, you’ll need to configure them in the Console under:
Catalog → CTO
You’ll find five key tabs:
CTO Items – Create and manage items that support customization.
CTO Components – The building blocks (letters, numbers, patches) with tracked inventory.
CTO Categories – Customization rules and options.
Blacklist – Restricted words or numbers.
Printer Settings – Configure printers for work orders.
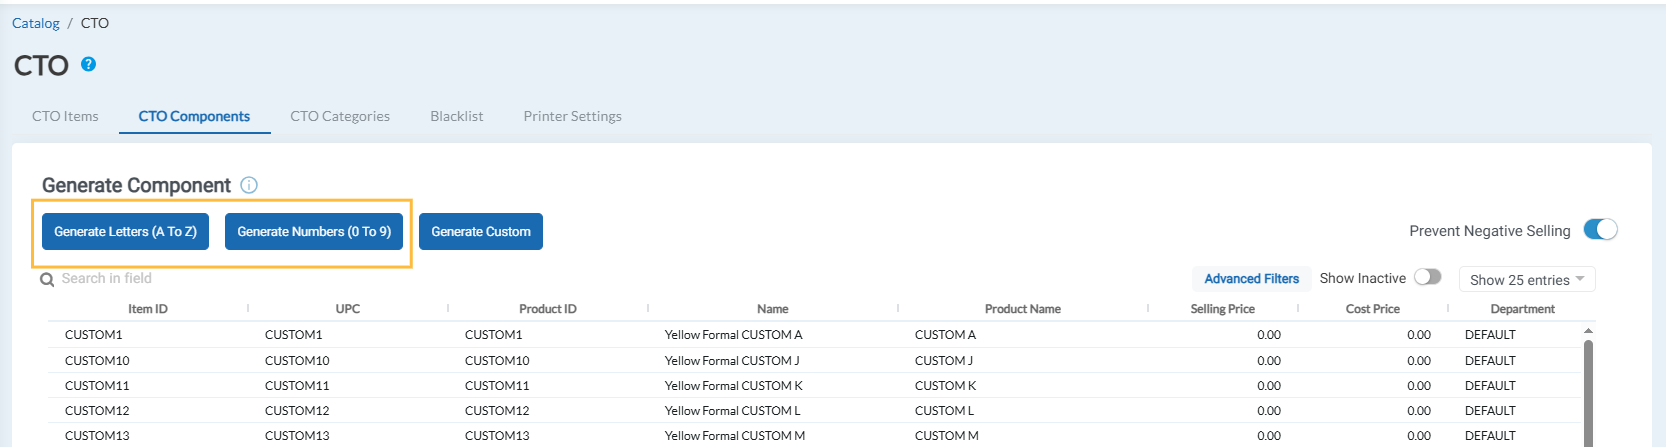
a) CTO Components – The Building Blocks
Components represent the individual inventory units used in customization.
- To create Letters and Numbers:
- Click Generate Letters/Generate Numbers.
- Choose Vendor from dropdown.
- Define the Style (e.g., "Home Kit 2025", "Away Kit Script").
- Define the Color (e.g., "White", "Gold", "Black").
- Choose the Printer Category for each components that is generated.
- Upon creation, the system will automatically generate 26 individual component SKUs for Letters (A,B,C...)
- or 10 for Numbers (0,1,2...) for that specific Style and Color, each with its own inventory.
- Click Generate Letters/Generate Numbers.
- To create Custom Components:
- Click Generate Custom.
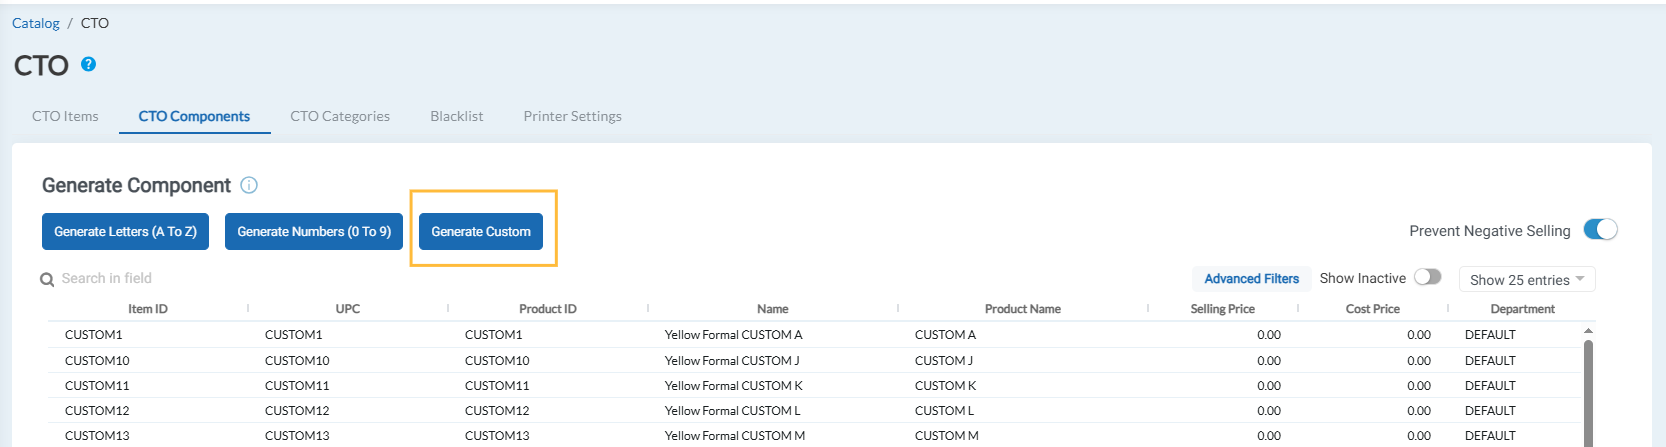
- Enter the Component Name (e.g., "League Badge", "Championship Patch", "Namebar").
- Choose Vendor from dropdown.
- Define the Style and Color as needed.
- Choose the Printer Category for each components that is generated.
- Click Generate Custom.
Note: If you have letters in 3 different styles (e.g., Home, Away, Third Kit), you must create three separate sets of components, each with its unique style. This is essential for accurate inventory deduction.
Prevent Negative Selling
The Custom-To-Order (CTO) feature now supports inventory tracking for jersey customization components — specifically the individual letters and numbers used to personalize jerseys.
This enhancement ensures merchants can manage and validate stock levels for these customization elements based on their operational needs. A new configurable setting in the Console allows merchants to decide whether to enforce QOH (Quantity on Hand) validation for these components during POS transactions.
A new toggle, Prevent Negative Selling, is available in the CTO Components page.
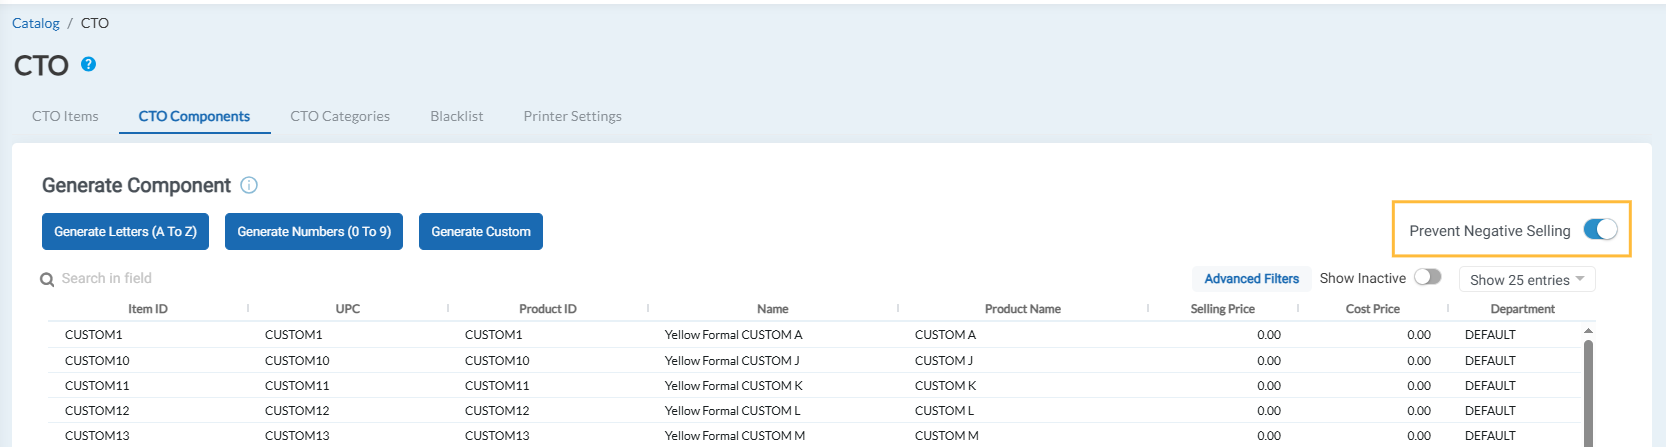
- When enabled, the system validates stock (QOH) for all required letters and numbers before processing an order.
- When disabled, the system skips QOH validation and processes the order regardless of component availability.
By default, this setting is disabled, giving merchants full control to turn tracking on only when needed. Any changes made to this toggle take effect immediately and apply across all connected POS systems.
How does it work at the POS?
When a customized jersey order is created at the POS:
- If Inventory Tracking is enabled, the system checks the QOH for each required letter and number.
- If all components are in stock, the order proceeds as usual.
- If one or more components are unavailable, the sale is blocked, and a clear message appears showing which items are out of stock (e.g., “Insufficient QOH for Letter ‘S’”).
- If Inventory Tracking is disabled, the POS skips the validation step and processes the sale without checking component availability.
This ensures merchants who rely on strict inventory control can prevent overselling, while others who prioritize order flexibility can continue processing without interruption.
b) CTO Categories – The Customization Rules
Categories define the types of customization a customer can choose on the POS. It defines the types of personalization offered on the POS.
CTO Categories define the customization options that can be applied to products at the POS (e.g., adding a player name, number, or patch). Each category must be set up carefully to ensure correct pricing and accurate inventory deduction.
Follow the steps below to create and configure a CTO Category:
Create a New Category
Navigate to Catalog → CTO → CTO Categories.
Click Add New Category.

Fill in the following fields:
Customization Name: The label shown to the cashier on the POS (e.g., Player Name, Sleeve Patch).
Selection Type: Choose one of the following:
Single Select: Customer can select only one option.
Multi-Select: Customer can select multiple options.
Text Box: Allows free text entry or predefined text options.
Description: Internal notes to explain the purpose of this customization.
Display As: Defines how the options will appear on the POS. Choices include:
Text
Button
Image
Dropdown
If “Display As is Text”
Option 1 – Free Text Customization
Toggle Allow Customization ON.
Enter a price.
Select the component Style & Color this text field will use for inventory tracking.
Example: If the cashier types “SMITH”, the system will automatically deduct:
One S
One M
One I
One T
One H
from the chosen style and color inventory.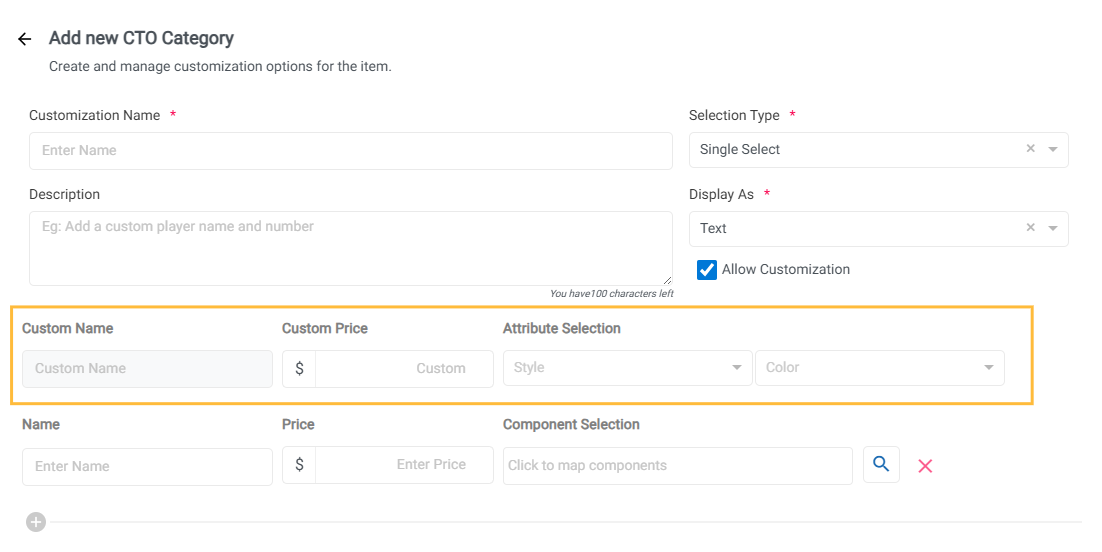
Option 2 – Predefined Names
Instead of free text, you can create a list of predefined options.
For each option (e.g., “JAMES 10”):
Set a total price.
Then Map Components – this step is critical:
To map components, Go to CTO Components and create a Custom component named “JAMES”.
Map this “JAMES” component.
Map the number components ‘1’ and ‘0’ (in the correct style and color).
When configuring your predefined name, you will map that one "JAMES" component, followed by the individual '1' and '0' number components, all of the correct style and color.
Note: If you do not map all the required components, inventory for the unmapped parts will not be tracked.
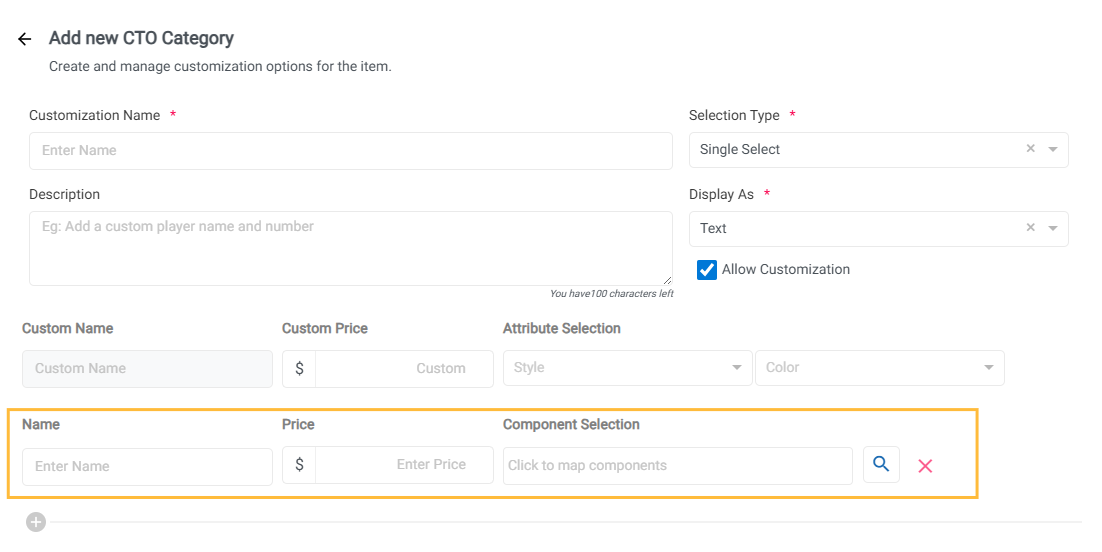
If “Display As is Button/Dropdown”
For each option:
Enter a name.
Set a price.
Map the Component to link it to the inventory item you created earlier (e.g., Championship Patch).
If “Display As is Image”
Enter a name.
Upload an image or provide a URL.
Set a price.
Map the Component to link it to the inventory item you created earlier (e.g., Championship Patch).
c) CTO Items
Now, apply the customization rules to a specific product.
Create or edit an item and set the "Enable Customization" toggle on. Enable this toggle to make this product customizable.
- This will reveal a new "CTO Configuration" section under Advanced Info.
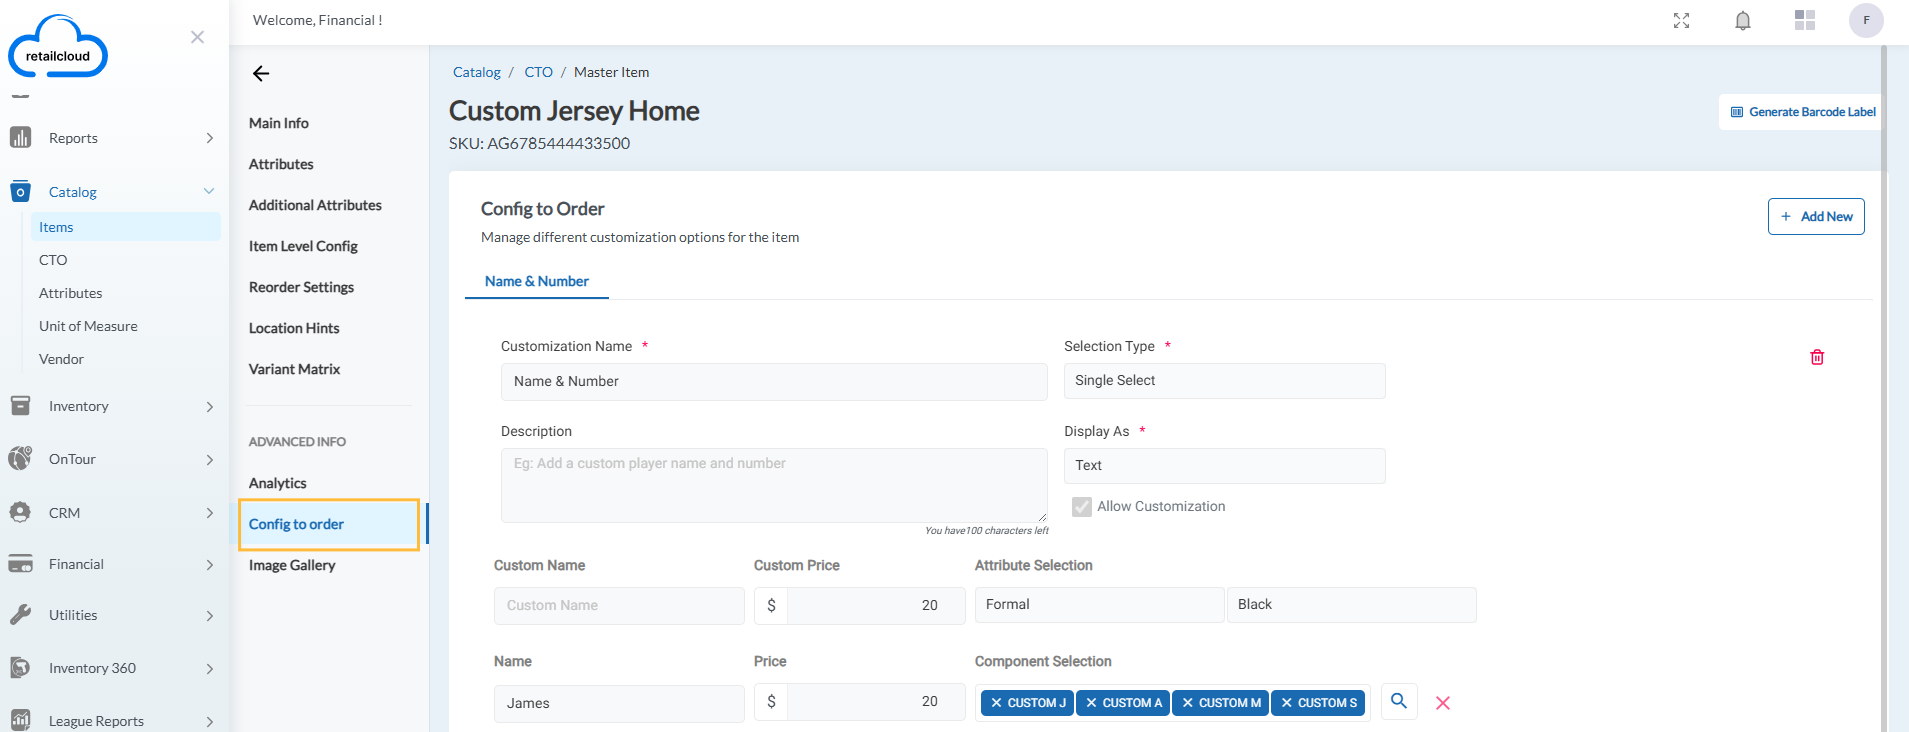
- Click Add New and select all the rules (CTO categories) you want to offer for this specific item (e.g., "Player Name", "Player Number").
- Save the item to complete the setup.
d) Blacklist
Prevent inappropriate or restricted words.
Add banned terms (e.g., profanity).
If a cashier enters a blacklisted word, the system blocks it with an error message.
e) Printer Settings
Work orders for CTO items are routed to configured printers.
Add/edit/delete printer details (Printer Model, Location, MAC Address, Printer Category).
Categories can be set up under Settings → Printer Category and linked to printers.
Printers ensure production teams receive clear customization instructions immediately after a sale.
2. Point of Sale (POS) Workflow
When a cashier adds a CTO item (e.g., “Home Jersey”) to the cart:
Customization Prompt → A screen displays all available categories (name, number, patch).
Make Selections → Depending on setup, the operator can type a name, select from predefined text, or pick from images/buttons.
Confirm & Add → The POS calculates the total price (base item + customization costs).
Complete Sale → Payment is taken, and customization details are saved.
Inventory Deduction → System reduces stock of each mapped component (e.g., letters “S-M-I-T-H”).
3. Fulfillment & Printing
A work order receipt is sent to the cloud printer after the sale, listing customer details, selected text, style, color, and components.
CTO orders appear in:
Console Order Status Report, Financial Orders, and Sales By Receipt (under a new order source: CTO).
Customers receive notifications when their order is marked Ready and again when Delivered.
4. Receipts
CTO receipts are enhanced for clarity:
Show the base product and each customization attribute.
Include exact text/number entered (e.g., “BRYANT 24”).
Itemize additional charges (e.g., +$10 for patches).
Applies to both normal receipts and delivery receipts.
Delivery Receipts
We’ve made enhancements to the Delivery Receipts in the Receipt Portal to provide clearer visibility into Custom-To-Order (CTO) products. These updates ensure that customization details, additional charges, and mixed orders are displayed accurately both on-screen and in printed receipts.
With these improvements, merchants and customers can now see exactly what was customized, along with clear pricing and item details.
CTO Base Product:
Example: A jersey customized with text: "Messi 24"
Receipt Display:
Base product (jersey)
Customization details listed as: Name: Messi, Number: 24
CTO Products with Multiple Attributes
Example: A jersey with text and patch: “James 6”
Receipt Display:
Base product
Each customization attribute (text, number, patch) clearly listed under the product
CTO Products with Additional Charges
Example: A patch added to a jersey costing +$10
Receipt Display:
Patch shown as a separate line item or additional charge
Receipt total reflects base product + $10 charge
Mixed Orders (CTO + Normal Items)
Example: A customized jersey + a regular cap
Receipt Display:
CTO item shows full customization details
Normal item (cap) shows as a standard product line
Delivery Receipt Export
Export or print the delivery receipt for an order containing CTO items
5. Inventory & Reporting
CTO provides full visibility into stock and sales:
Inventory Balance Report → Track remaining letters, numbers, and patches by style/color. IBR will show the current stock levels for all the CTO Components.
Reorder Levels → Set minimum and preferred stock for both CTO components and base items. User can set reorder points and preferred stock levels for all components, just like any other inventory items.
Sales Reports → Show CTO sales, including customization revenue, for profitability analysis.
Articles in this section
- Item Import Field Descriptions
- Overview
- Merchant Onboarding
- Navigation Bar
- Reports
- Items
- Settings
- Dashboard Overview
- Company
- Register
Comments
Please sign in to leave a comment.