Adding modifiers to an item is a 2-way process:
- Step 1: Importing Modifiers
- Step 2: Mapping Modifiers to items
If you have already added the modifiers you can skip Step 1 and directly go to Step 2 for mapping the modifiers to items
Step 1: Import Modifier using Template
Navigate to Utilities → Import
You can map the same modifier to multiple items or vice versa, into the app one by one or use the item-modifier template to import in one shot.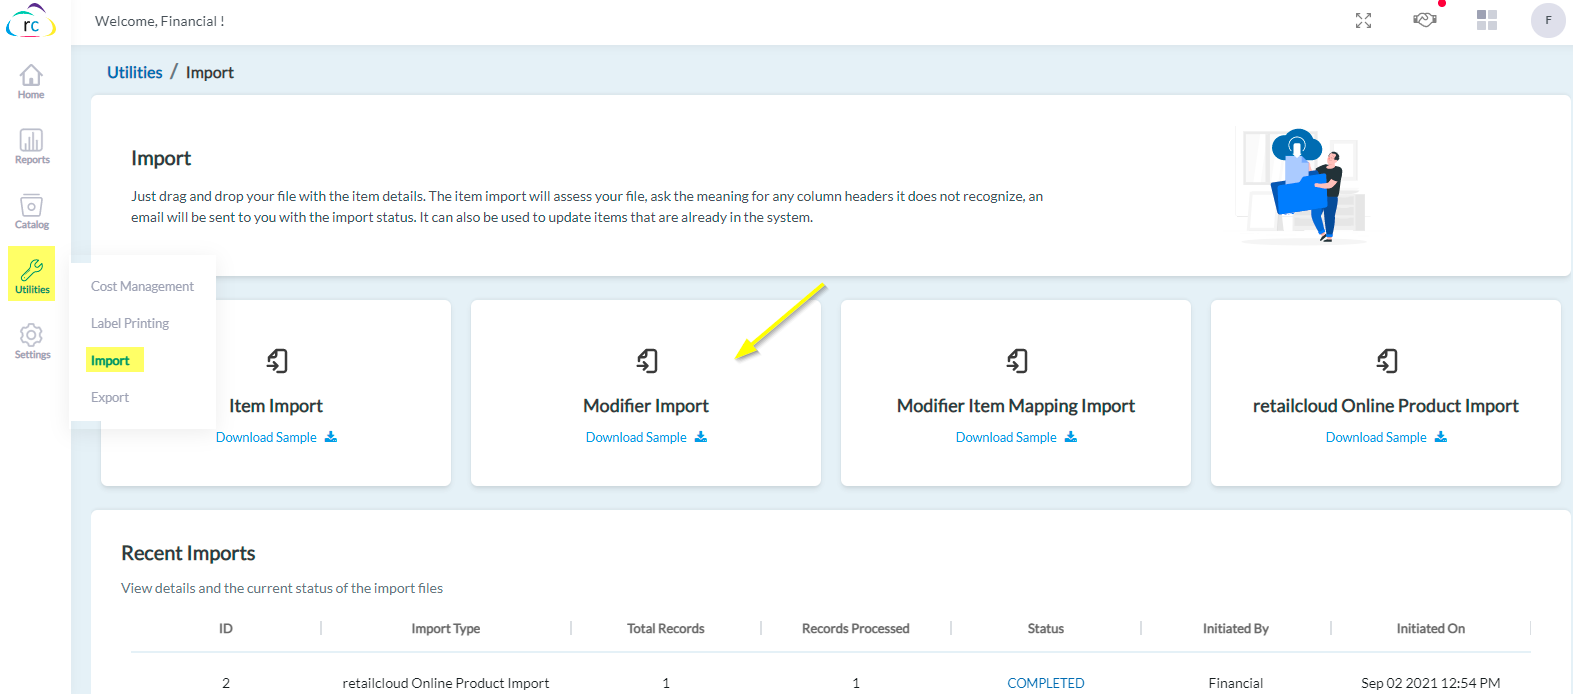
It's as simple as drag and drop of your item file.
The Import will assess your file, ask the meaning of any column headers it does not recognize.
An email will be sent to you with the import status, how many items successfully import, how many fail with the reason for the fails.
Getting Started
You'll need access to a spreadsheet program that supports CSV files such as Excel or Google Sheets. Any other file type will not import.
Choosing an Import Template
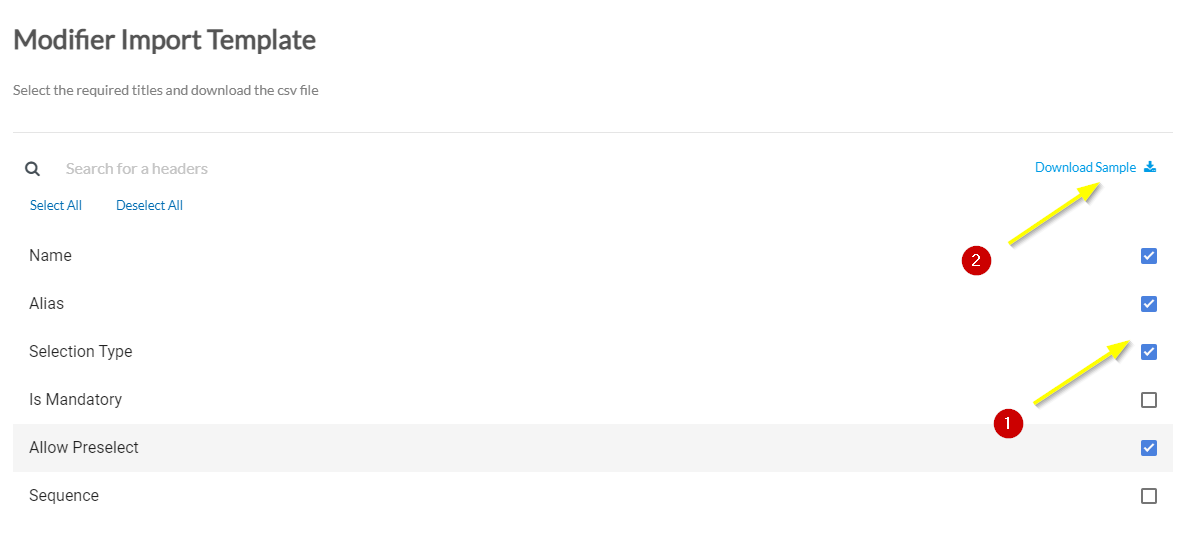
You can download the sample template by clicking on the Download Sample link.
You can also create your custom import templates, and select only the product fields you want to include.
Select the required titles and download the CSV file.
These are just a few examples of the requirements you'll need to be aware of before importing. If you have any issues, see Troubleshooting | Data Import for help with several common scenarios that can occur.
Now, when you are ready with the import file, process with the steps below.
Importing Modifiers
- Go to Utilities → Import→ Click on Modifier Import
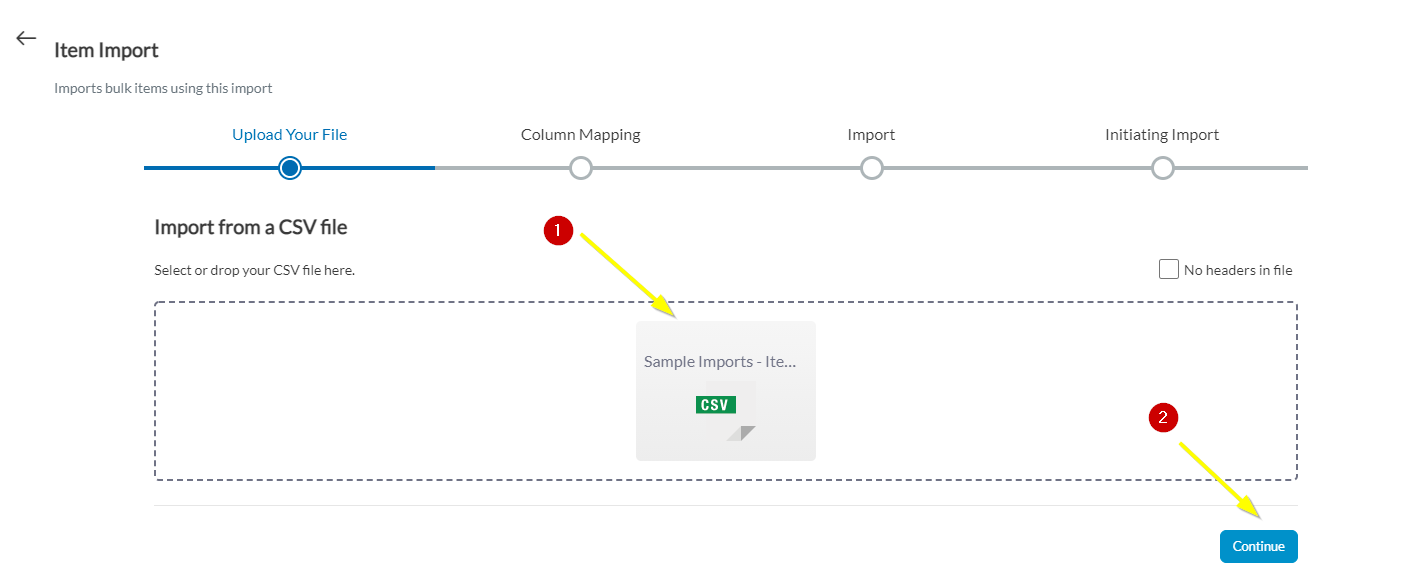
- Upload Your File: Attach the Item file by simply Drag & Drop or upload your CSV file directly from your computer by browsing for it.
- Click Continue when done.
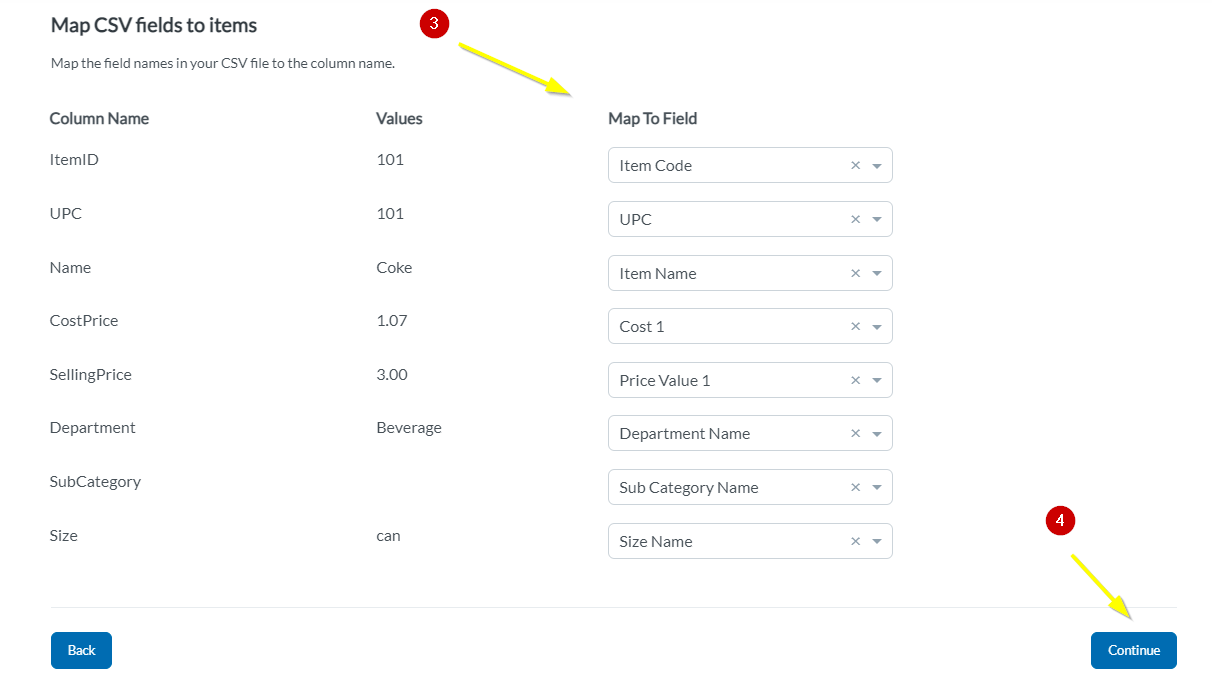
- Column Mapping: Once the file is loaded the column headers from the file will be displayed below the heading Column Name. In the case of the column header from the file exactly matching the Console field name this will be automatically mapped and this is displayed in the Map to Field.
- You can map and make sure all of the column fields data you're importing has been matched to its equivalent setting on Console.
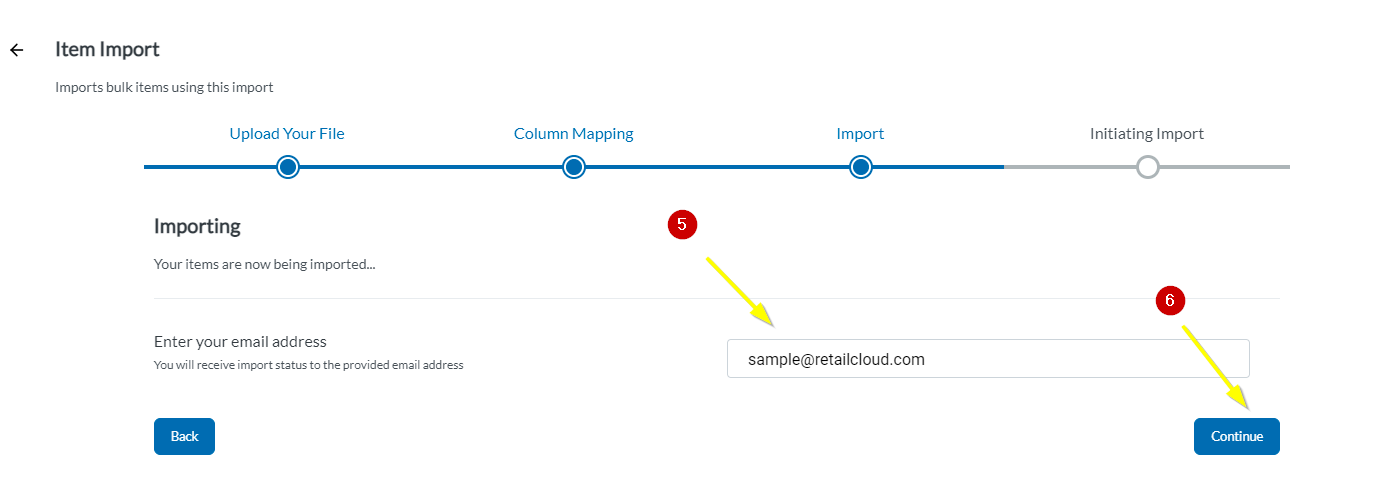
- Enter the email address to which you will receive the status of your import.
- Click Continue.
- Import will be Initiated → Click Finish.
- You will be taken back to the Import page, where at the bottom you can see a section 'Recent Imports' which will show the details and current status of the imported file.

- Click on the Status (highlighted in blue color) to view the Status Report- This will list both Imported Records as well as Failed Records with a reason for the failure. You also have the option to Download the Failed Records by clicking on the Download button. You can correct the remaining failed record and precede to reimport them.
- Once done you can see the Status as COMPLETED
Step 2: Import Modifier Item Mapping
Once we have added the modifier, now you can map the same modifier to multiple items or vice versa.
Importing Modifier Item Mapping
- Go to Utilities → Import→ Click on Modifier Item Mapping Import
- Upload Your File: Attach the Item file by simply Drag & Drop or upload your CSV file directly from your computer by browsing for it.
- Click Continue when done.
- Column Mapping: Once the file is loaded the column headers from the file will be displayed below the heading Column Name. In the case of the column header from the file exactly matching the Console field name this will be automatically mapped and this is displayed in the Map to Field.
- You can map and make sure all of the column fields data you're importing has been matched to its equivalent setting on Console.
- Enter the email address to which you will receive the status of your import.
- Click Continue.
- Import will be Initiated → Click Finish.
- You will be taken back to the Import page, where at the bottom you can see a section 'Recent Imports' which will show the details and current status of the imported file.
- Click on the Status (highlighted in blue color) to view the Status Report- This will list both Imported Records as well as Failed Records with a reason for the failure. You also have the option to Download the Failed Records by clicking on the Download button. You can correct the remaining failed record and precede to reimport them.
- Once done you can see the Status as COMPLETED
Articles in this section
- How to Avoid Void Transactions After Batch Close?
- How to Generate On Hand Report?
- How to Generate Sales Roll Up Report?
- How to Generate Sales Forecast Report?
- How to Create KDS Register?
- How to Enable/Disable eCommerce for online products?
- How to List & Export Ecommerce enabled Items from your Product Catalog?
- Offline Mode
- How to Set up Payment Processor?
- How To Manual Entry CC details?
Comments
Please sign in to leave a comment.