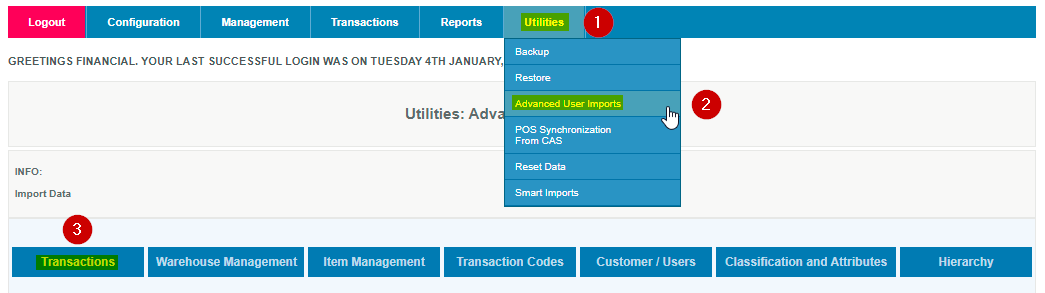
Go to CAS → Utilities → Advanced User Imports → Transactions
Inventory Adjustment through Import is also a 2 step process:
Step 1: Initiate Adjustment (Through Advanced User Imports)
Step 2: Commit Adjustment
Note: Before import make sure your import file is in the proper format and no headers are adjusted in any way and data must be formatted exactly as specified or the import will not be successful.
A sample file layout can be found by highlighting the type 'Adjustment' and clicking the Download Sample CSV button.

These fields need to be completed to identify the # of pieces on hand, and which location these are located.
Source ID: When Inventory quantities are being added, indicate which store or warehouse you want the inventory added to (normally Store ID 1)
Source Type: When Inventory quantities are being added, enter the source Id (S for Store or W for Warehouse) depending on where you want the quantity added
ItemID: Unique item ID should be entered here.
Quantity: This should be the new quantity for the item.
Remarks:(optional) Any comments/remarks for the particular entry.
Step 1: Initiate Adjustment (Through Advanced User Imports)
Go to CAS → Utilities → Advanced User Imports → Transactions
Select the Type Adjustment from the drop-down.
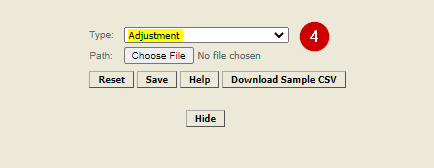
Choose the CSV file path and hit Save.
Once successfully imported you will see the Initiate Adjustment Receipt. Please note the transaction number for further proceeding with committing the adjustment.
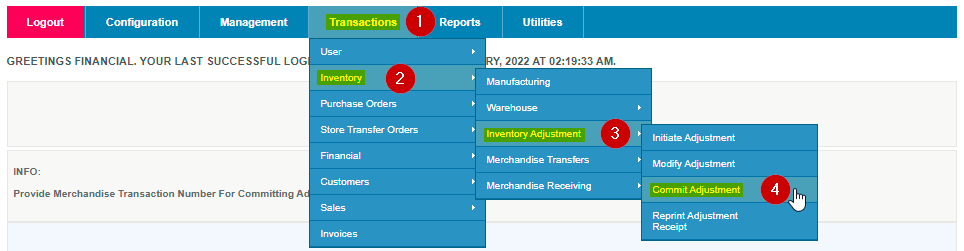
Step 2: Commit Adjustment
Go to CAS --> Transactions --> Inventory --> Inventory Adjustment --> Commit Adjustment
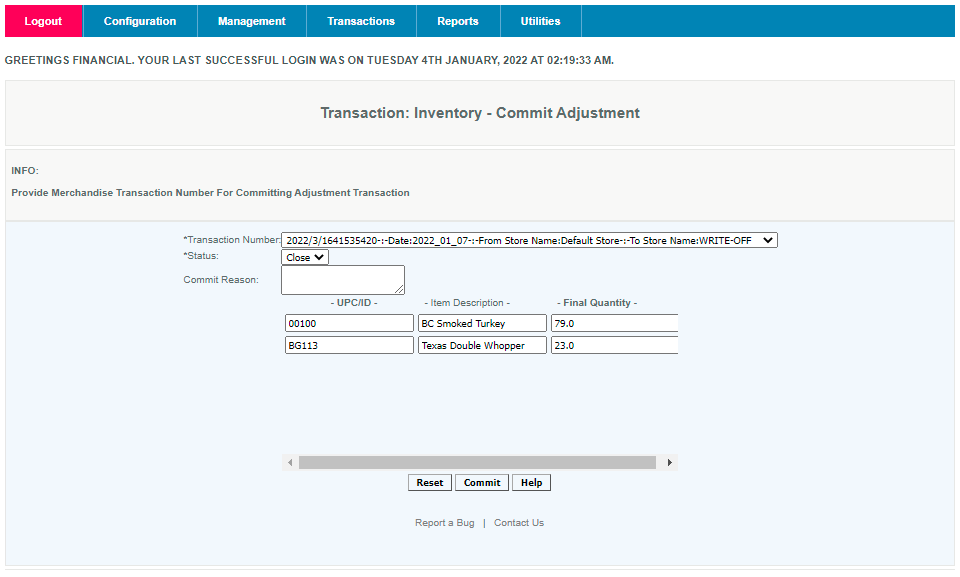
You can commit the inventory adjustment by selecting the Transaction Number and Status(Closed) and providing a commit reason by typing it into the box(optional). Review items and Final Quantity then hit Commit.
No receipt is generated as it presumes you already have one. If you do not have one or wish to have one with more detail than the import initiate adjustment receipt then you can do so using the reprint receipt function.
If a modification is made to an item after an adjustment is initiated and before it has been committed, the adjustment will be made reflecting the new data and will differ from the initiate receipt. Thus the item detail may be different from what was initiated.
Articles in this section
- How to Avoid Void Transactions After Batch Close?
- How to Generate On Hand Report?
- How to Generate Sales Roll Up Report?
- How to Generate Sales Forecast Report?
- How to Create KDS Register?
- How to Enable/Disable eCommerce for online products?
- How to List & Export Ecommerce enabled Items from your Product Catalog?
- Offline Mode
- How to Set up Payment Processor?
- How To Manual Entry CC details?
Comments
Please sign in to leave a comment.