Overview
The Configuration page provides a way to configure various settings related to different aspects of the POS system.
The configuration tab includes:
Device
This page allows you to configure your device settings.
- Consolidated Checkout: This allows merchants to turn off/on consolidated checkout, which means whether the same item is consolidated when rang up or each item will show per line.
- Customer Facing Mode: This allows merchants to turn off/on customer-facing mode, which means if they want to have the customer sign on the tablet screen or have them sign the receipt when doing credit card sales.
- Enable Grid View: This allows merchants to turn off/on Grid View, which means how the items are being displayed on the items screen. If disabled the items will be shown as List View.
- Enable Quick Pick View: This allows the transaction cart to show the quick pick by default (Only works if using the old transaction screen)
- Enable Transaction Screen 2: This allows the user to switch from the old transaction screen to the new transaction screen.
- Enable Variable Item Quantity KeyPad: This allows the user to enable/disable the variable item quantity keypad.
- Arrange Item by: This allows merchants to arrange their default item screen, by default is Style. If a merchant does not have any Styles and wants to see a different Classification (Dept, Cat, SubCat) or Attribute (Size, Color, Brand, Vendor) on the item screen just select from drop-down and it will save.
-
QuickPick Layout Customization: You can now customize how many QuickPick buttons appear per row on your POS cart screen—making it easier to navigate based on your preference or device size.
Choose from the following layout options:
- 1x4 – Shows 4 QuickPick buttons per row (Default)
- 1x5 – Shows 5 QuickPick buttons per row
- 1x6 – Shows 6 QuickPick buttons per row
- 1x7 – Shows 7 QuickPick buttons per row
Once selected, the change is saved per device and instantly reflected on the POS.
The POS will display the selected number of QuickPick buttons per row.
Layout adjusts automatically without affecting cart functions or other on-screen elements.
Receipt
This page allows merchants to configure what store information they want to be printed on receipts. The Receipt Header and Footer text can be added/modified here.
Merchants can set this up on the portal but changes made here will supersede the settings on the portal.
Receipts Settings can be restricted based on Departments configured from the backend portal Console. If you don't want to print receipts for items under any departments you can configure from Console --> Catalog --> Attributes --> Department --> Enable Restrict on Receipt.
-
Header: This allows the merchant to configure the header of the receipt
-
Footer: This allows the merchant to configure the footer of the receipt
-
Promotional Message: This allows merchants to add a Promotional Message to display on the customer receipt. Promotional Message (can be up to 250 characters).
-
Receipt Settings: This allows merchants to Enable the POS to print Tax1 and Tax2 on the receipt printer if you have it set up that way.
-
Global Comments: This allows merchants to add global comments (Upto 10 comments)
-
Custom Labels: This allows merchants to add receipt custom surcharge labels.
Payment
This allows merchants to set up their payment gateway credentials. We recommend setting this up on CAS so once it's saved on CAS it will push to your POS and you don't have to manually add the information.
-
Credit Card: This allows merchants to manually add their credit card gateway credentials on the tablet so they can ring up credit card sales
-
Gift: This allows merchants to manually add their gift card credentials on the tablet so they are able to ring up and activate gift cards and let people purchase with gift cards from their store.
-
Settings: This allows the merchant to configure payment & cash drawer settings.
Hardware
This is where you set up your peripherals, including printers, types of hardware, credit card devices, pole displays, and scanners.
-
Receipt
- Primary Receipt: This allows merchants to select what printer they want their receipts to print. The default is set to USB, but you can choose Network or Bluetooth Printers. We support Star and OTG USB Printers, Bluebamboo and Star Bluetooth Printers and Star Network Printers.
- Secondary Receipt: This allows merchants to set up a Secondary Printer. This is useful for Merchants that want Kitchen Printing which lets you print a copy of the transaction receipt to a secondary location like the kitchen. We support Star Network Printers.
- Note: Please make sure to Enable QSR Mode from Configurations --> General to support the kitchen printers.
-
Devices
- This allows you to choose to use other devices to pair with your tablet. You can choose from supported devices like Elo or PAX POS.
-
Connecting Star Wifi Printers
- Step #1: Connect to wifi and get an IP address.
- Step #2: Once you have the IP Address, you can pair it with retailcloud as below
- Go to Configuration → Hardware → Search for Kitchen Printing. Enter the IP address in the field provided.
-
MSR
- This allows you to choose what device you want to use to take credit cards. You can choose from supported HID Swipers (IdTech S.Mag or Magtek uDyn) or if you have a PAX Terminal device you just enter the IP address and you are ready to take credit cards.
- For automatically pairing PAX devices, Select PAX POS LINK → TCP and click on the Pair button to fetch all the available PAX devices. Select the desired PAX device (MAC address). This will auto-pair the device to your POS terminal.
-
Pole Display
- This allows you to choose what Pole Display you are using. We only support Bixolon and OTG.
-
Scanner
- This allows you to choose if you are going to use a socket scanner. Scanners are plug-and-play so don't need to be configured, but the socket scanner is Bluetooth so will need to be configured before use.
-
Scales
- This allows to set up scale configuration. Users can search devices from the device list.
-
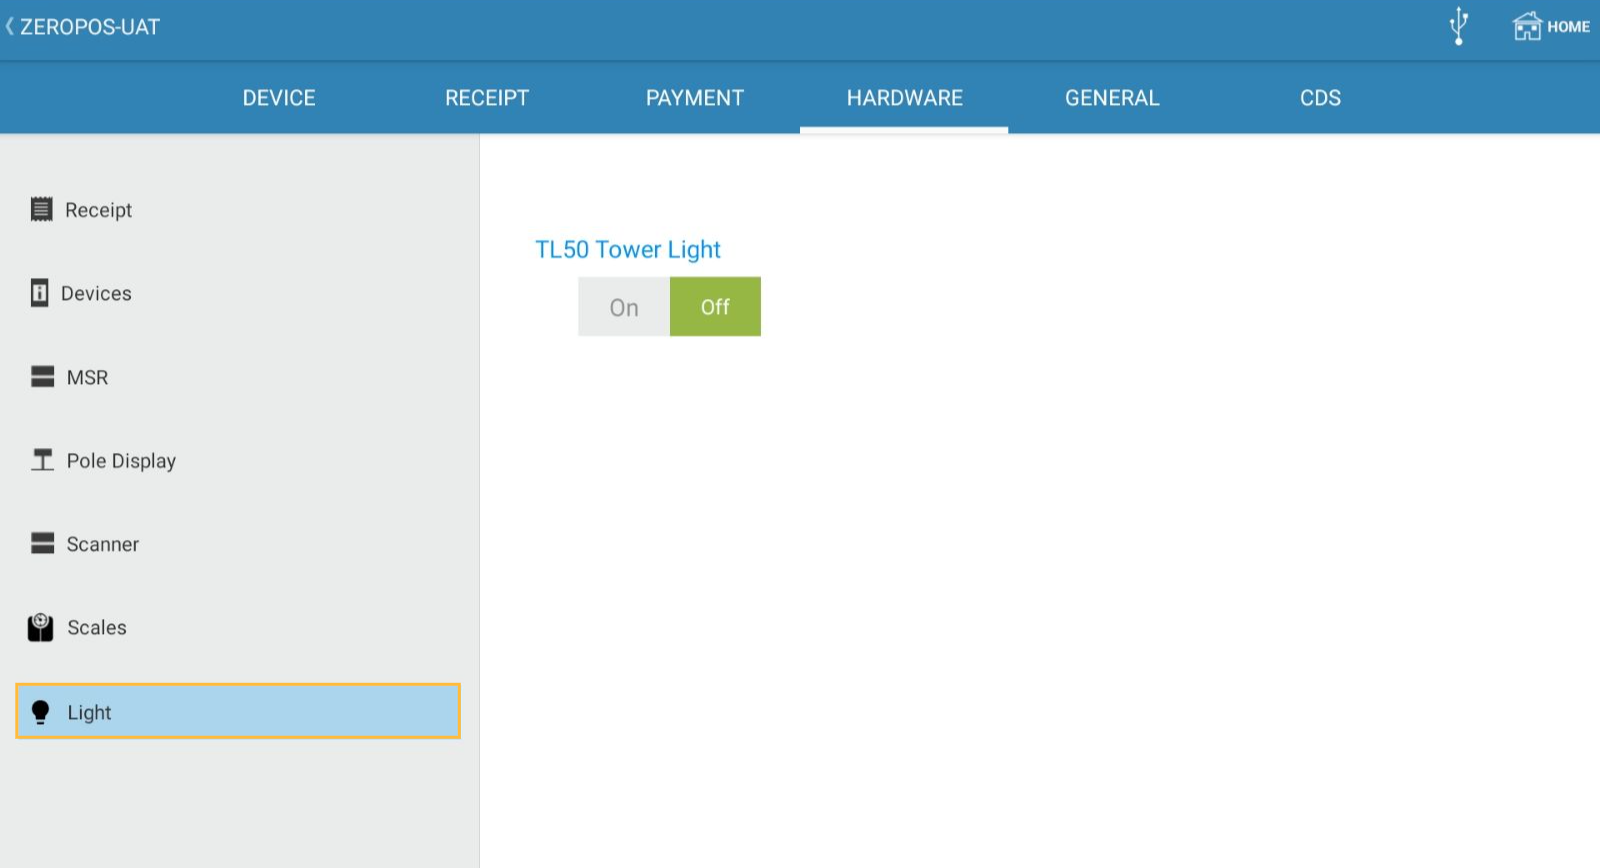
Light
- The POS system supports integration with the Banner TL50 Pro USB Tower Light to provide a visual indicator of the POS device status to help users to quickly identify whether a register is currently in use or available improving operational efficiency in busy environments.
-
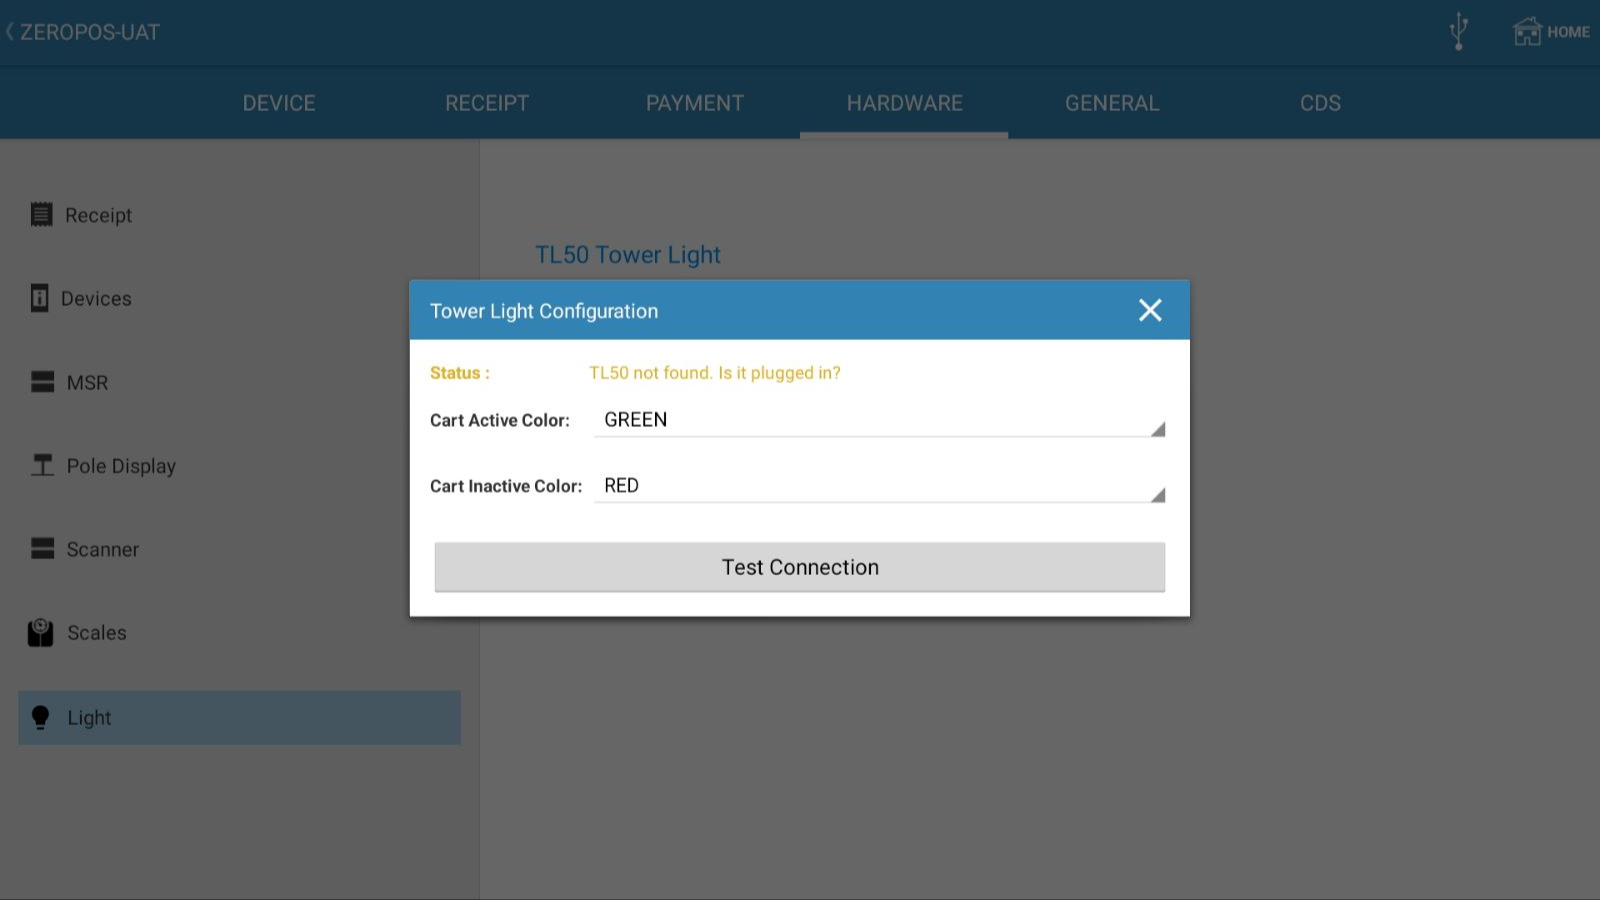
How does the Tower Light Work?
- Cart Inactive (Free State) → Light displays Red by default (or users can configure another color).
- Cart Active (Busy State) → Light displays Green by default (or users can configure another color).
- The light automatically updates whenever the cart is empty or not.
-
Light Configuration in POS:
- The tower light can be configured directly within the POS application.
- Navigation: POS → Configurations → Hardware → Light
-
Available settings under “Light”:
- User can configure the following under TL50 Tower Light:
- Light Mode: ON/OFF
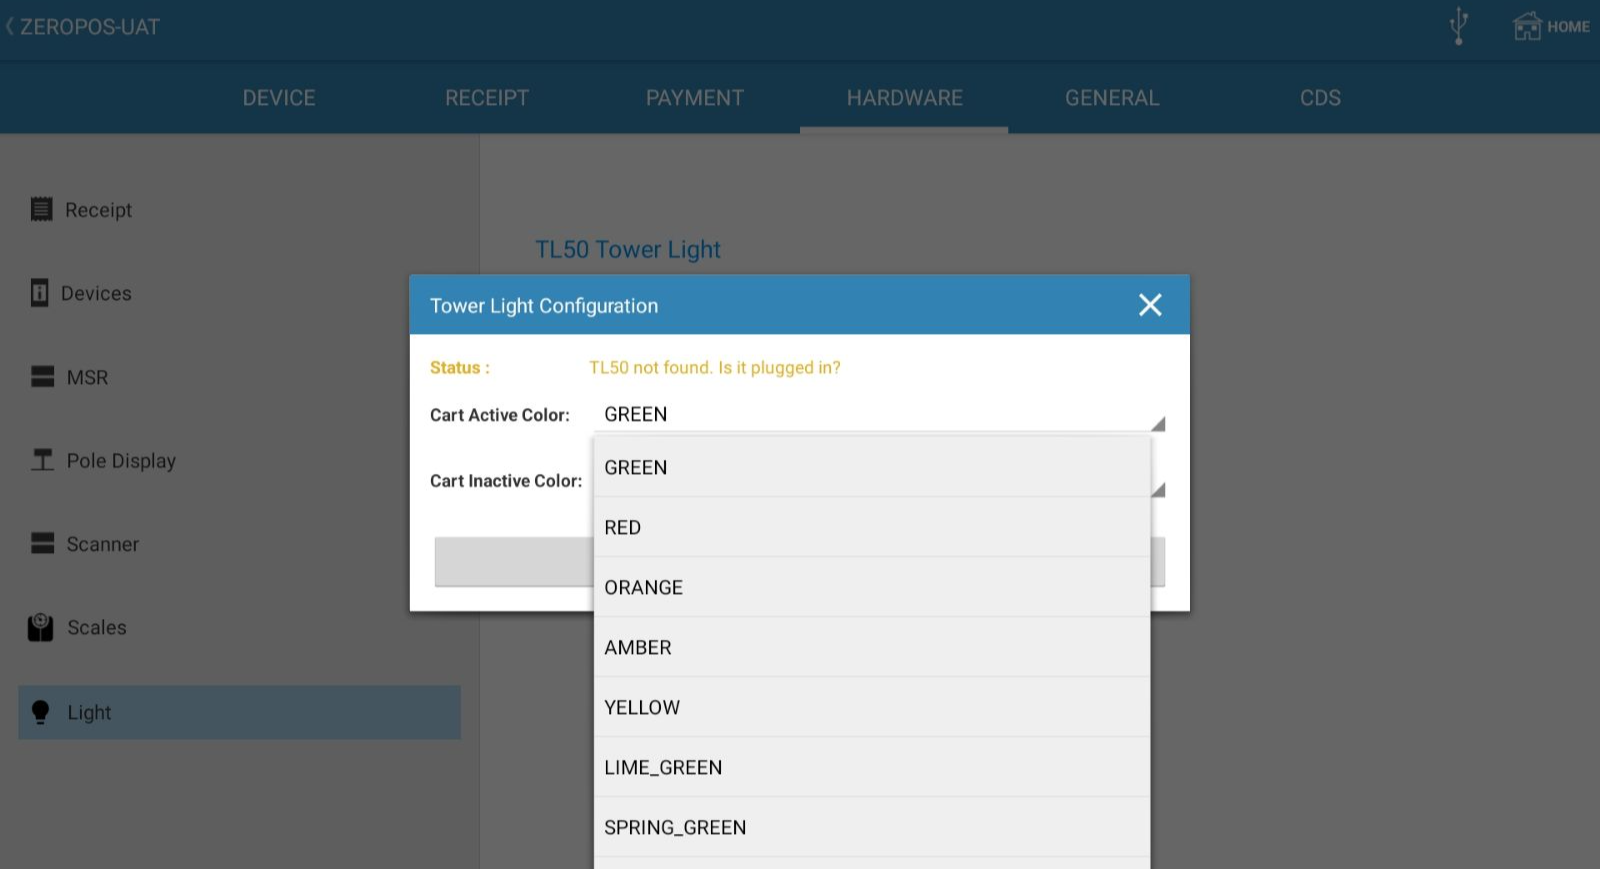
- If the Light Mode is ON, then it will trigger a pop-up where the user can set up the Cart Inactive and Cart Active color and test the connection.
- Once configured, the POS automatically controls the tower light based on the cart activity.
General
This page allows you to configure your general settings on ZeroPOS.
-
Transactions
- Enable QSR Mode: This allows the merchant to enable our Quick Service Restaurant Mode.
- Enable All Items QP: This setting allows you to enable or disable the All Items tab in Quick pick. By default, it is enabled.
-
Enable Quickpick 1.0: This setting allows you to choose between CAS quickpicks(1.0) and Console quickpick(2.0). It is enabled by default, meaning CAS quickpicks are used. Disabling this option will switch to Console quick picks.
Note: To streamline the onboarding process in ZeroPOS, QuickPick 2.0 will now be the default configuration for all newly registered devices. This change only applies to new device registrations. Devices already using QuickPick 1.0 will retain their current configuration and will not be affected by this update. This ensures a smoother setup experience for those who've adopted QuickPick 2.0, which is centrally managed through the Console. - Enable Decimal Mode: This allows you to enable decimal. By default is disabled Decimal will allow for inventory in decimal numbers. The decimal application is used for businesses that use bulk sales
- Enable Negative QOH: This allows you to sell items that have 0 or negative QOH. By default is Enabled. If you disable you will not be able to sell items that have 0 or negative quantities.
- Enable Verified Refund: This allows you to do only verified returns, meaning that you will need to see the receipt. By default is Enabled. If you disable you will be able to return items without having to verify the receipt.
- Auto Sync on DSR: This allows your app to sync transaction data when the Daily Sale Report is run on the POS
- Multi Item Discount: This allows the app to recognize that multiple item discounts should be accepted on the app (By default this is turned off - so if you are doing multiple item discounts you will need to turn it on)
- BOGO Popup Enabled: This enables a "Buy One, Get One" (BOGO) popup in the POS system.
- Disable Suspend Reason Prompt: This disables or bypasses a prompt asking for reasons when suspending a transaction in the system.
-
Checkout
- Enable Auto Print Receipt: This allows you to enable auto receipt prints. By default is disabled. If enabled the app will always print the receipt it will not prompt you if you want to Email, Print, or Skip the receipt.
-
Disable Signature Capture: This allows you to enable/disable signature capture. By default is Enabled. If you disable you will be turning off the signature capture and customers will not have to sign on the payment terminal when doing a credit card transaction swipe.
- Enable Tip: This allows you to Enable Tip. By default is Disabled. If you enable it you will now be able to take Tips when you are doing credit card sales.
-
Enable Easy Pay: This allows you to Enable Easy Pay. By default is Disabled. If you enable any retail or QSR merchants will be allowed to skip the signature panel if the total transaction amount is under $25.
-
Inventory
- Hide Quick Pick OOS: This allows you to enable quick pick out of stock. By default is disabled - so you will be able to sell items from quick picks if they have zero QOH or negative QOH, If enabled, all quick pick items that are zero or negative QOH will not show up on quick picks and won't able to be sold.
-
CRM
-
CRM Builder: This allows you to Enable CRM Builder. By default is Disabled. If you enable it you will now be able to add customers to your system on the transaction screen.
-
CRM Builder: This allows you to Enable CRM Builder. By default is Disabled. If you enable it you will now be able to add customers to your system on the transaction screen.
-
Enable Loyalty Popup: The toggle button ‘Enable Loyalty Popup’, enables or disables the Loyalty popup in pos.
- When Loyalty is ON, and if no customer is attached to the cart and the toggle button is ON when the user presses a tender button the loyalty popup will be displayed.
- When Loyalty is ON, and if no customer is attached to the cart and the toggle button is OFF when the user presses a tender button the loyalty popup will not be displayed.
-
System
-
Purge Data: This allows you to change numbers when you need to purge your old data. By default is 500 transactions. So after the 500th transaction, it will ask you to Purge Data.
-
Sync Interval: This allows you to change when you want your system to sync with the CAS. By default, it is every 15 mins.
- System Reports
- Topics: Subscribe/Unsubscribe to the pushy notification from the POS. It displays the device token.
-
Purge Data: This allows you to change numbers when you need to purge your old data. By default is 500 transactions. So after the 500th transaction, it will ask you to Purge Data.
-
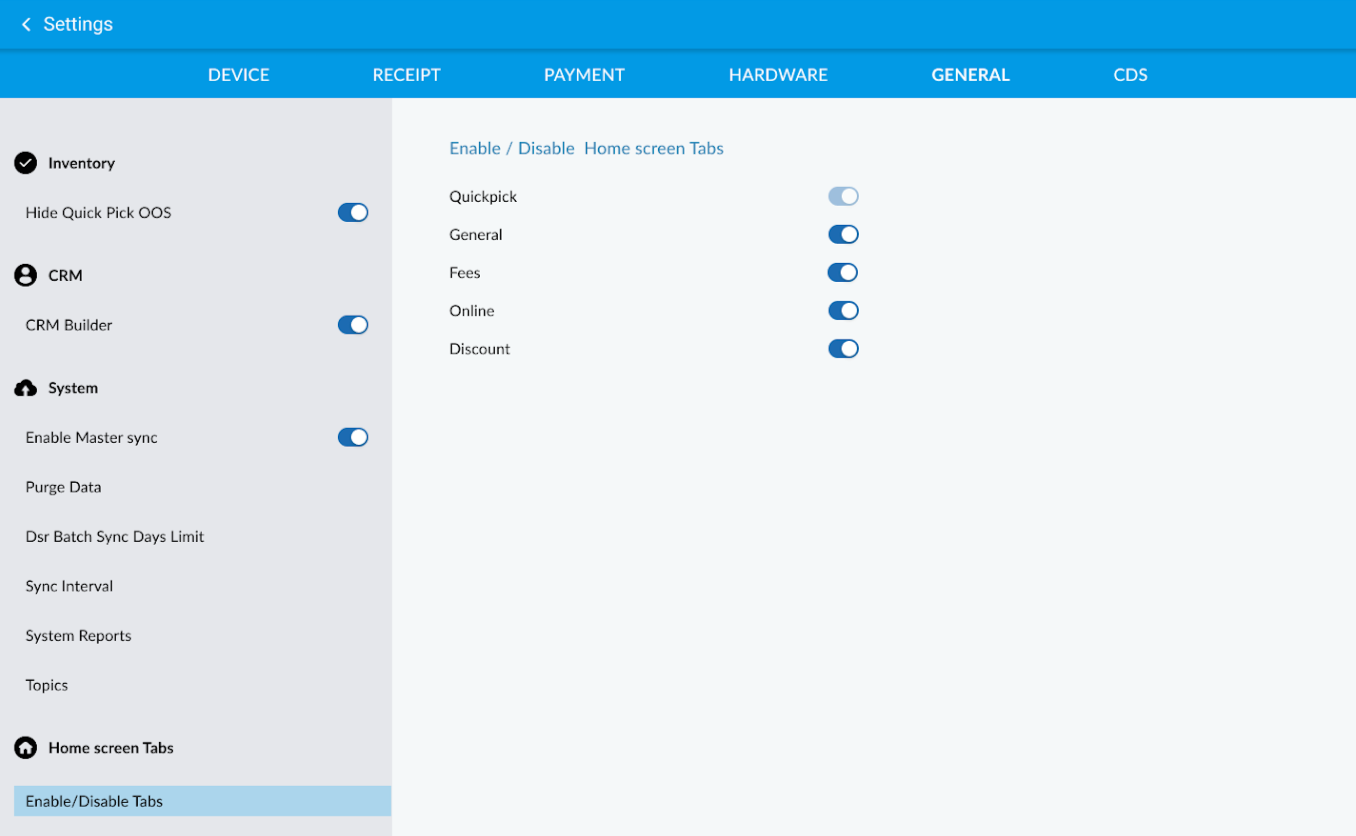
Home Screen Tabs
- Enable/Disable Home Screen Tabs: You can now personalize your POS screen by selecting which cart sections to display—making your interface cleaner and more relevant to your business needs. Simply use the checkboxes to turn on the sections you need:
- Quickpicks will always be visible by default and cannot be turned off.
- Other optional sections—General, Fees, Online, and Discount—are hidden by default and can be enabled as needed from the POS settings.
- Quickpicks will appear in the list as well but will have a greyed-out enabled toggle to indicate it’s always active.
- This helps streamline the cart view for each store and improve staff efficiency.
QSR Settings
-
This allows configuring department exclusion QSR settings.
CDS
The CDS (Customer Display Screen) configuration page provides various options to customize the settings of the customer display screen on ZeroPOS.
Go to Menu (navigation bar) → Configuration → CDS
Here's a brief explanation of each configuration option:
-
Resting Screen: This setting allows you to choose what is displayed on the customer display screen when it is not actively showing any other content. It can be set to show digital display text, digital display image, digital display carousel (a rotating set of images), or any other suitable content. The Resting Screen has five display options available:
-
Digital Display Text: This option enables you to configure specific text messages that are displayed on the customer display screen. You can customize the content, font style, size, and color of the text to convey information or promotional messages.
-
Digital Display Image: With this setting, you can select and display specific images on the customer display screen. It can be used to showcase products, advertise promotions, or display any other visual content that enhances the customer's experience. Enter the logo image URL in the field provided or upload a logo from the device by simply clicking on the 'tree' icon.
-
Digital Display Carousel: This configuration allows you to create a rotating slideshow of multiple images on the customer display screen. You can add multiple images(3) to be displayed on the CDS.
-
Company Logo: This option lets you upload and display your company's logo on the customer display screen. It helps in branding and gives a professional touch to the overall appearance of the screen. Enter the logo image URL in the field provided or upload a logo from the device by simply clicking on the 'tree' icon.
-
Promotional QR: This feature allows you to generate and display a QR code on the customer display screen. Customers can scan the QR code with their mobile devices to sign up and access promotional offers, discounts, or additional information. There is the option to hide the QRC from the CDS by toggling the 'Hide Promotional QR' button.
-
Digital Display Text: This option enables you to configure specific text messages that are displayed on the customer display screen. You can customize the content, font style, size, and color of the text to convey information or promotional messages.
-
Theme Settings: Here, you can enable or disable light theme/web view. The CDS Web View URL can be updated here to match your brand identity or create a desired aesthetic.
-
Recommended Items: This configuration enables you to showcase recommended or popular items on the customer display screen. It can help promote specific products and increase sales by drawing attention to items that customers may find appealing.
These configuration options provide flexibility and customization for the customer display screen, allowing businesses to engage customers effectively, promote products or services, and enhance the overall shopping experience.
Articles in this section
- Getting Started
- Settings
- Transaction Tab
- Item
- Customer
- Reports
- QSR
- retailcloud chat
- Re-Registering ZeroPOS
- Common Issues
Comments
Please sign in to leave a comment.