With No App to download it's really simple for your customers to not only place the first order but keep ordering without the hassle of lining up.
We’ll provide you with the QR code, that you can print on your tables. You can have one QR code for each location, and let guests type in their table number, or if you prefer a unique QR for each of your tables, we can do that too.
The Tikt Order process goes like this:
- Scan the QR code on the table/standee - this automatically opens up your Restaurant Menu.
- Browse the menu and select items to order
- Place an order and make payment using the preferred payment method
That’s it!
Orders are instantly sent to your POS (point of sale) system, so you’ll immediately get each of your customer's orders as soon as they’re successfully placed.
And if you have enabled the Loyalty program, customers can easily sign up for it to earn points.
This will encourage them to keep coming back to your store.
And for you, the merchant, enabling Tikt and Loyalty is great because now you can automate and streamline your ordering and CRM process, both at the same time!
Scan the QR Code on the Table
When a customer scans the QR code from the smartphone, he will be taken to the screen below, where he has to enter this Name and Phone Number. An OTP will be sent via SMS to the number to validate. Enter the OTP to proceed. You can also use the CALL ME button to get the Voice OTP.
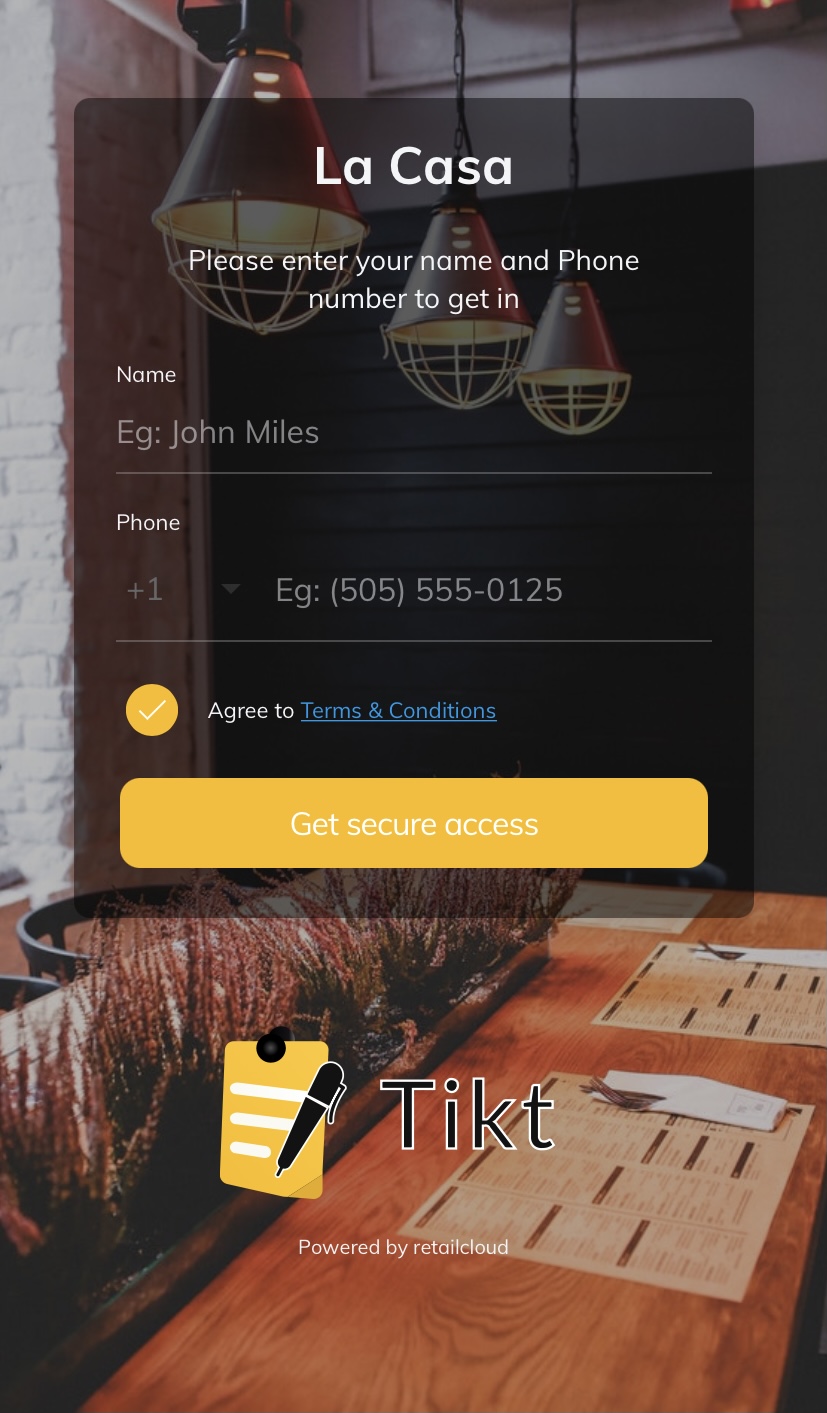
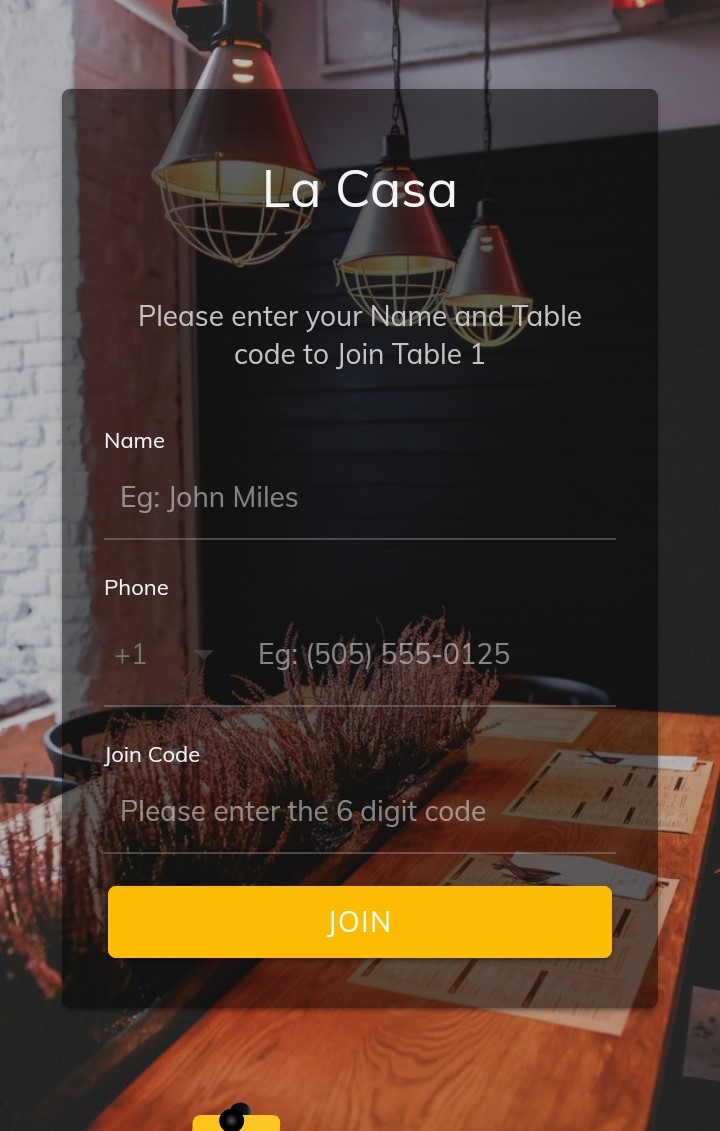
Note: The Primary Guest/Customer who scans the QR Code will get a Table PIN (6 digit code), which he can share with other guests accompanying him, sharing the same table.
Other guests can also scan the same QR Code, proceeding by entering the Name and Table Pin.
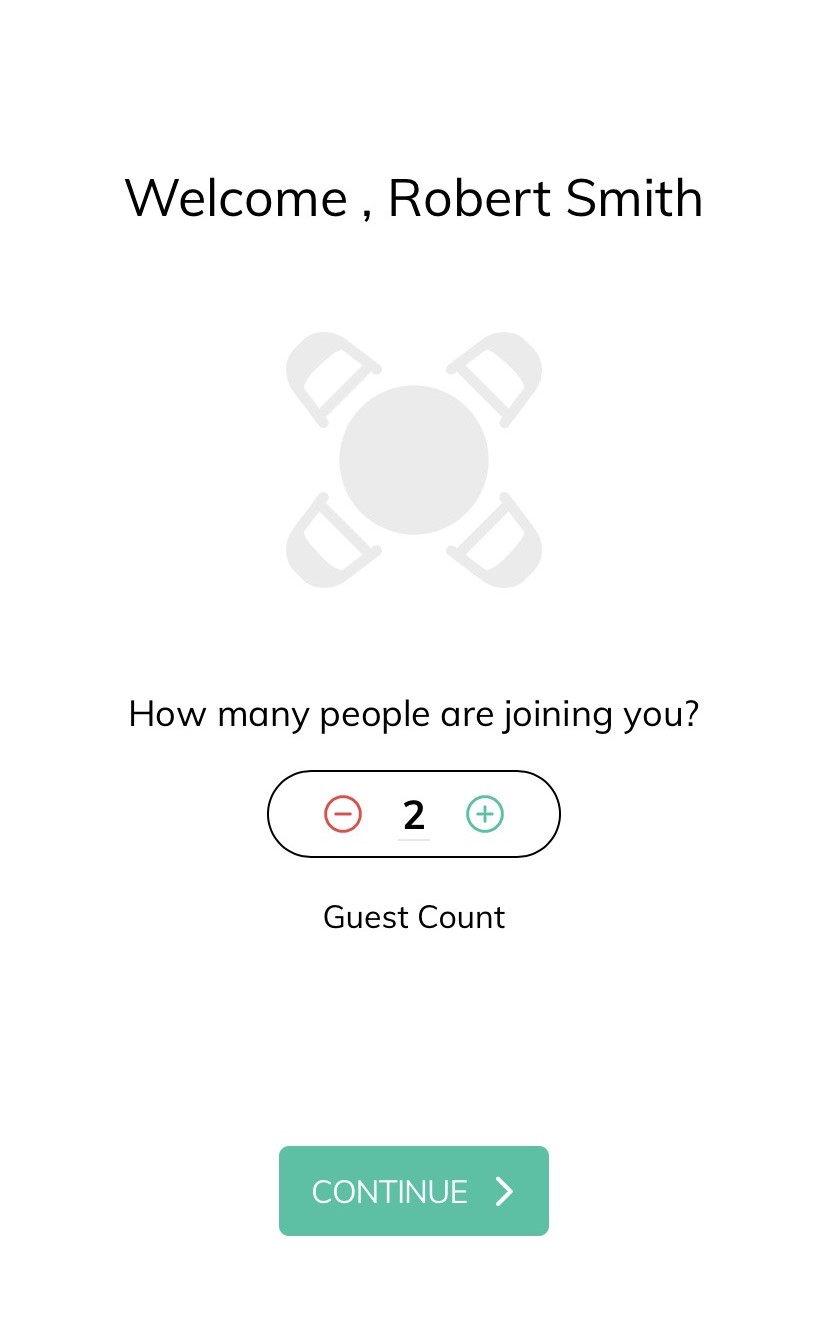
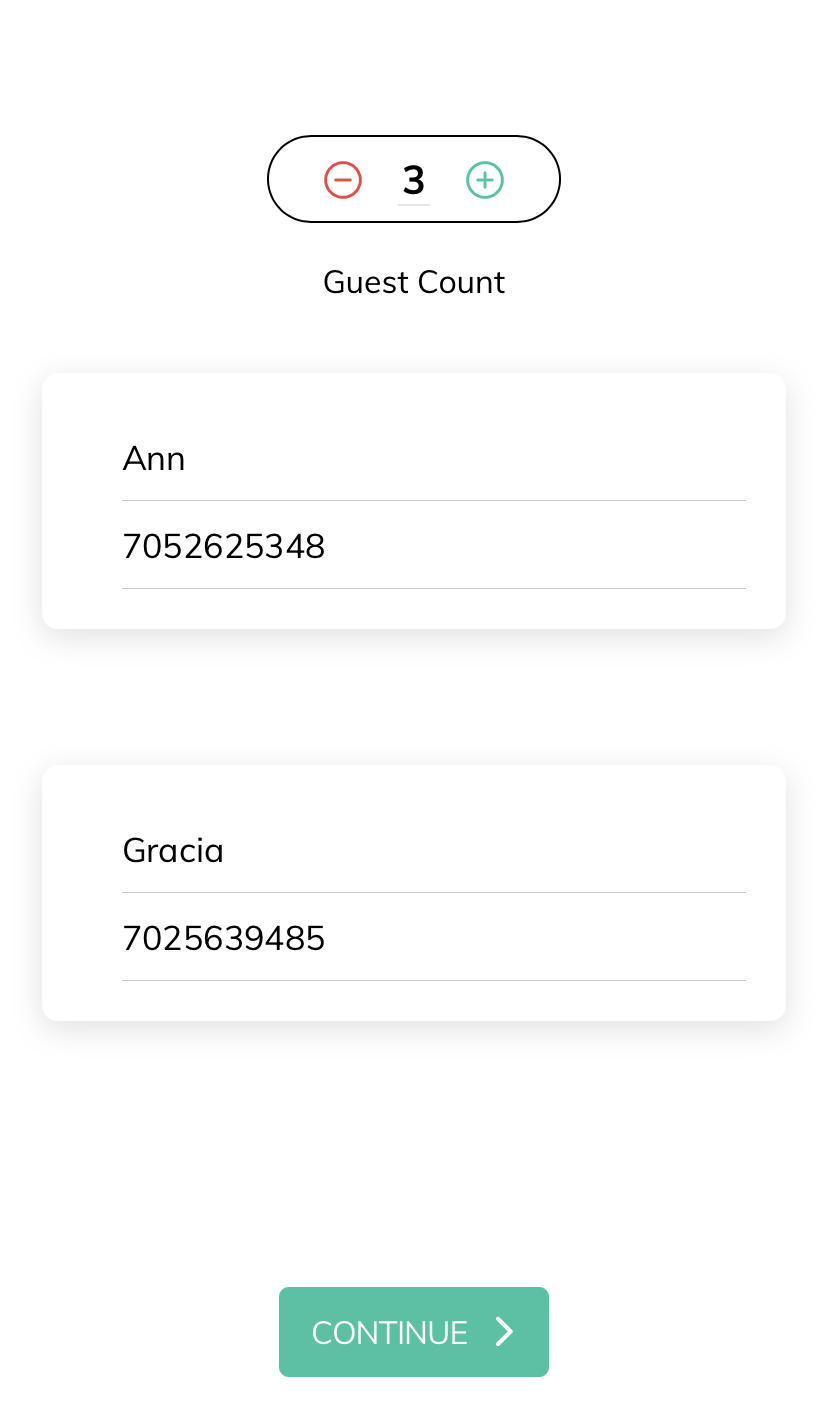
Guest Count & Contact Tracing
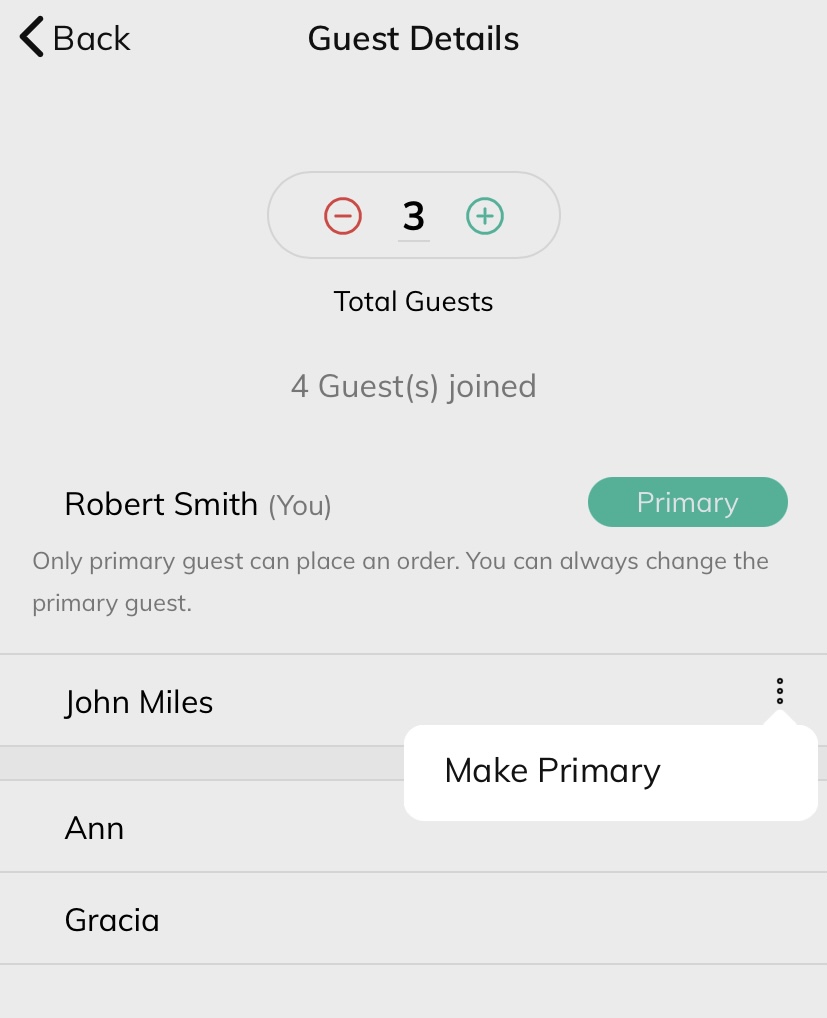
Each guest upon successful login can proceed further by entering the guest count. This will be the number of people joining the primary guest.
Use the '-' or '+' button to increment or decrement the number. (Up to 50 guests)
Guests will be receiving a prompt to provide contact details (name & phone number) of all the other guests joining him and you can keep records up-to-date.
Click 'Continue'. This will automatically take you to the restaurant menu.
You can configure contact tracing by store location level as well. Click here to know more
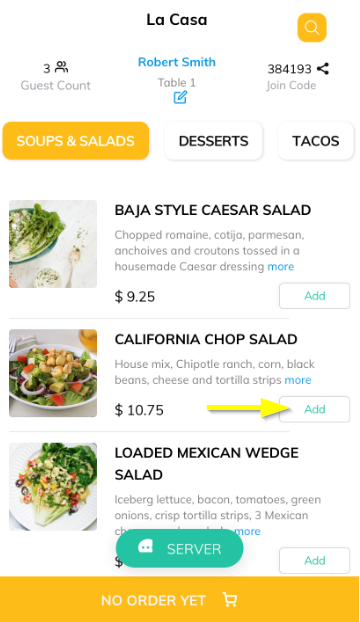
Tikt Home Page - Restaurant Menu
Tikt flawlessly displays the digital menu of the restaurant on your smartphone when you scan your table QR Code. Customers can now spend less time searching on the menu and more time enjoying your food.
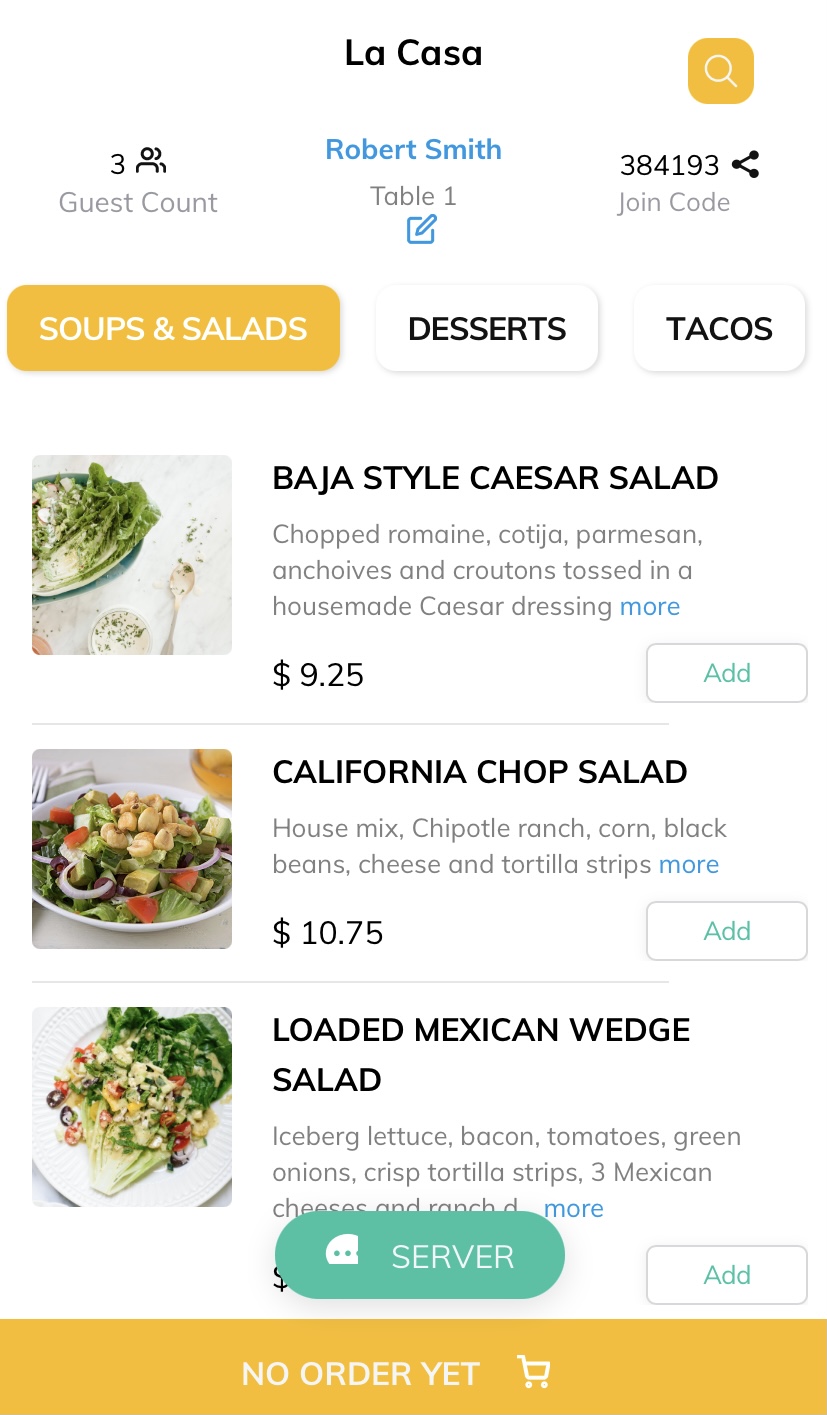
Guest Count: Displays the total number of guests joined with guest detail such as name. The primary guest will be highlighted with a 'Primary' button. You can always change a non-primary guest by clicking on the 3 dots provided near the guest name and select 'Make Primary'.
Session Time: Shows how much time elapsed since the session started. It will be in the format HH:MM:SS.
Table Pin: The 6-digit unique Table Pin let other guests join the cart.
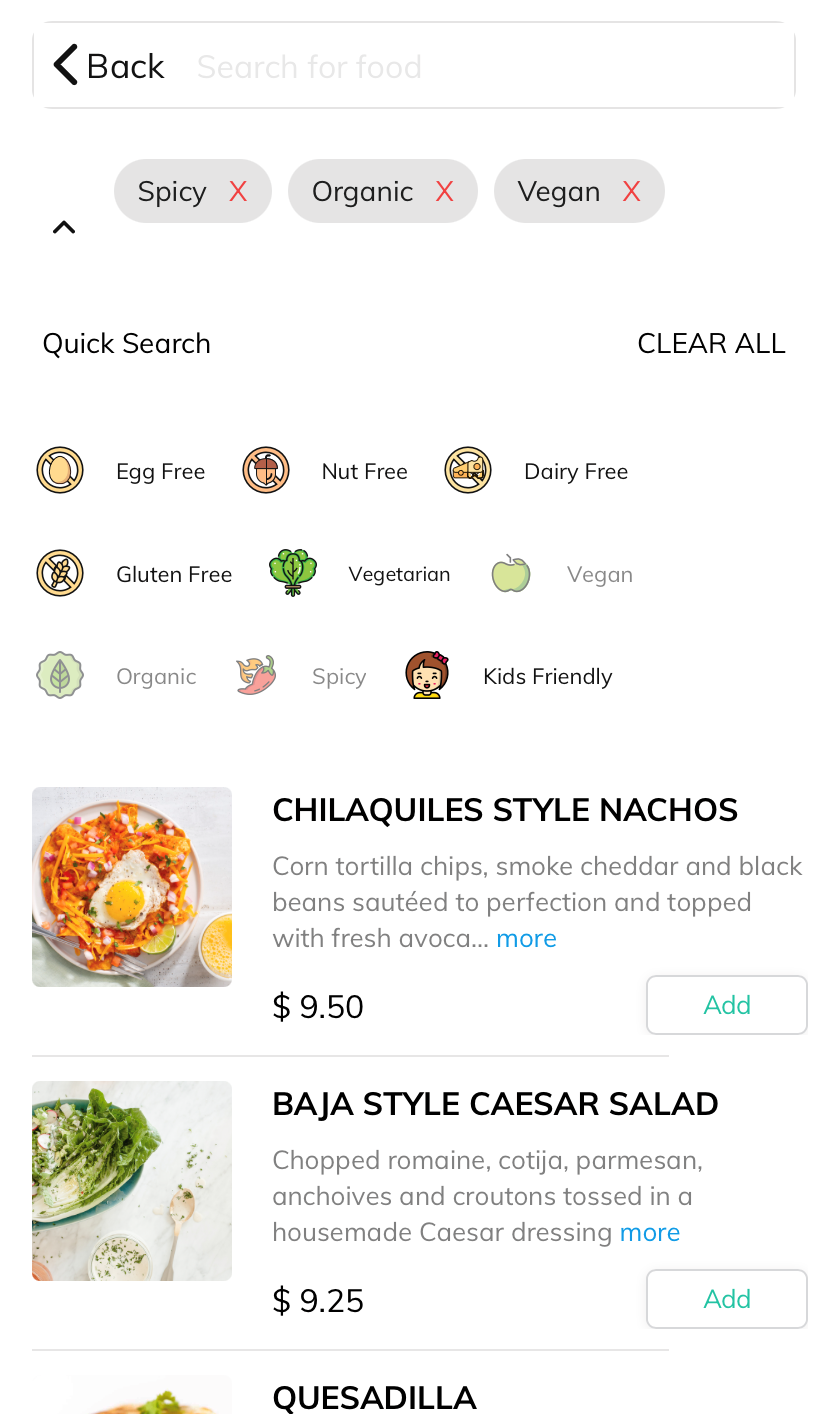
Search Item: Your customers can search or filter your menus by choices such as Vegan, Gluten-free, or any other keywords.
Group Code: The Primary Guest/Customer who scans the QR Code will get a Table PIN (6-digit code), which he can share with other guests accompanying him, sharing the same table.


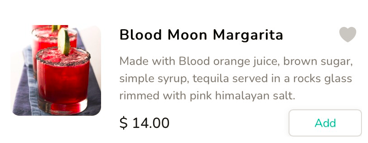
Item Description
Description of the item will be displayed under Item Name by default if an item has already description added. You have the option to hide the description under the i (info) button which can be set up from the backend portal.
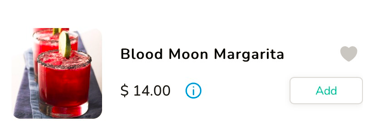
Item with Description Item with Info Button
Quick Search
Quick Search / Emoji search help users quickly locate Items instantly by predefined keywords. Quick Search offers a search filter to limit search range and narrow down the search results. For example, if you are looking for a Vegan dish, you can just click on the Vegan keyword/emoji, which will display all the available vegan items.
Menu Tabs: The customizable menu can be configured through the backend portal 'Console'. Click here to know more. Menus can be auto timed to display specials, day or night time offerings.
![]()
Adding Items to the Cart
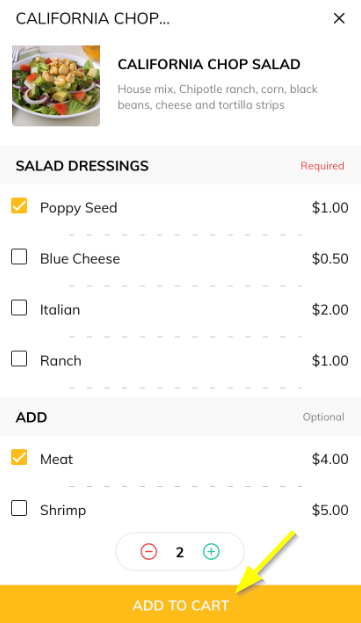
Browsing the menu categories, your guests can simply click on the ADD button to add items to the cart.
Items with modifiers will be taken to another screen for choosing the options.
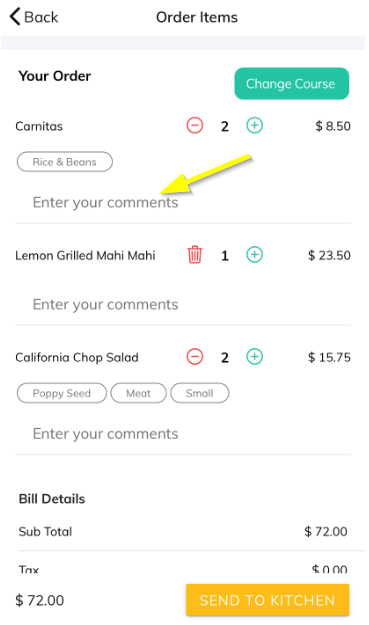
Viewing Cart Items
To view the items added to the cart, click on the Review Order cart icon at the bottom of the screen. To add the number of items, click on the + button which will increase the quantity. The delete button will remove the item from the cart.
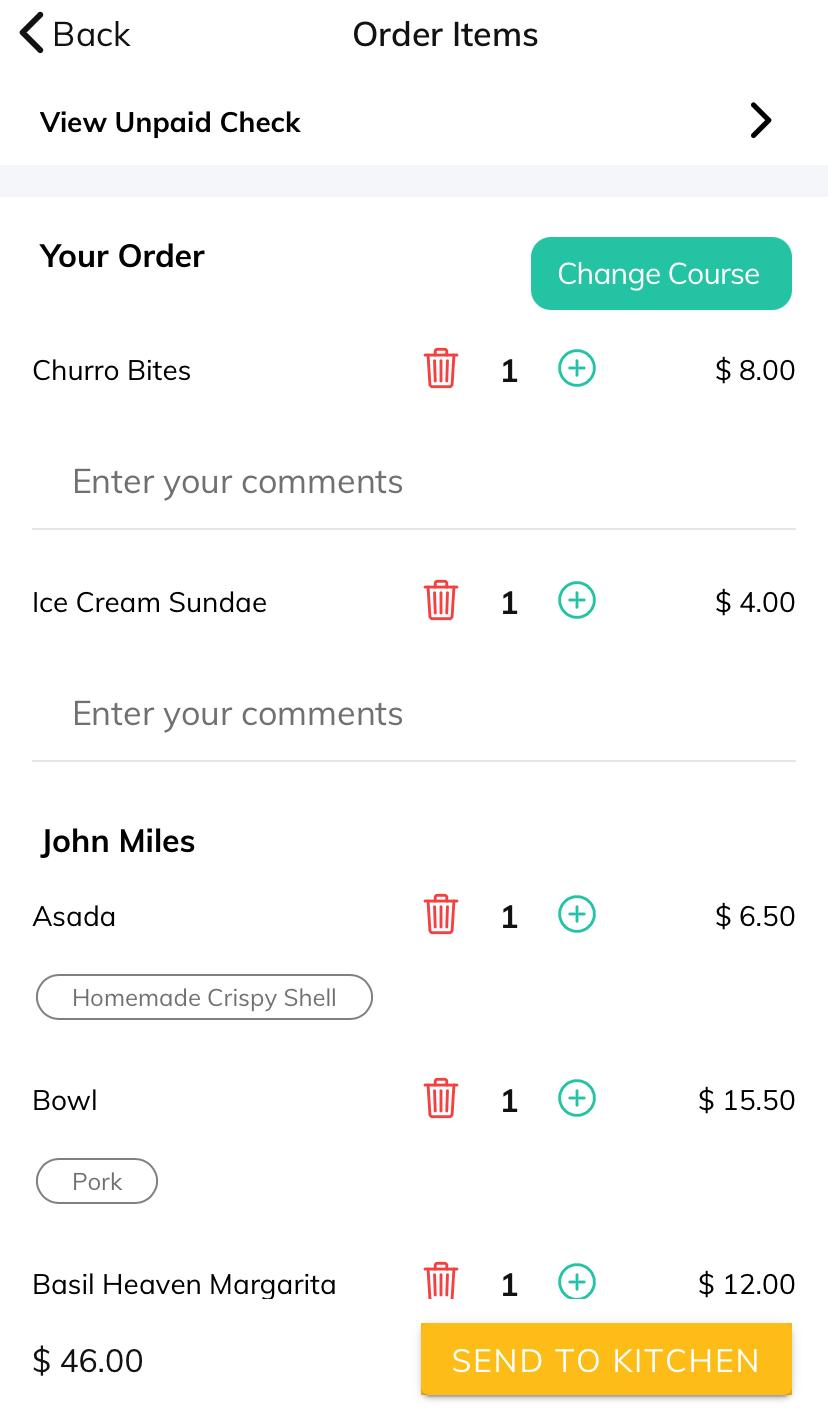
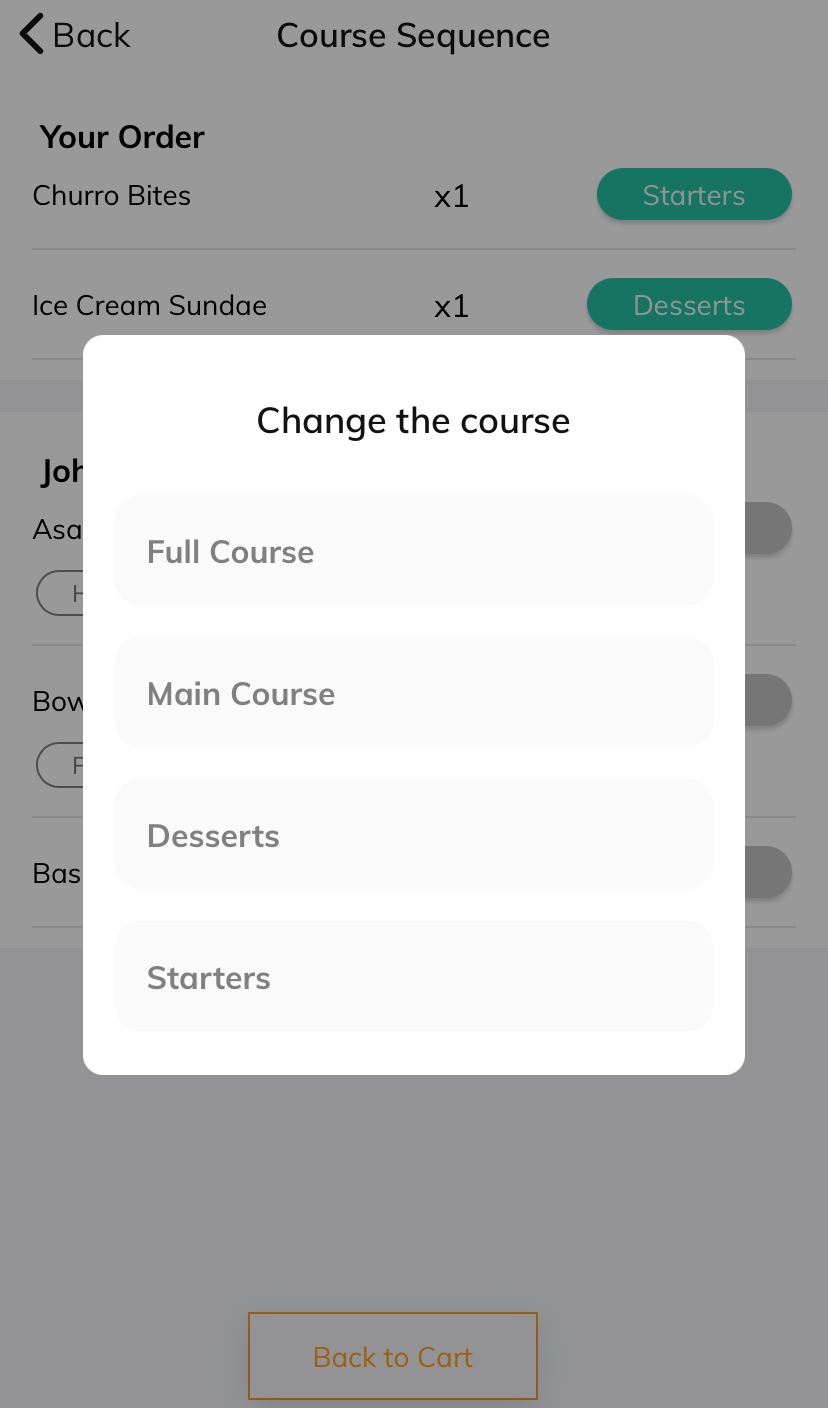
Changing the Course
From the Order Items screen, click on Change Course to change the course of the items in the cart. Courses are set up through the backend portal, Console.
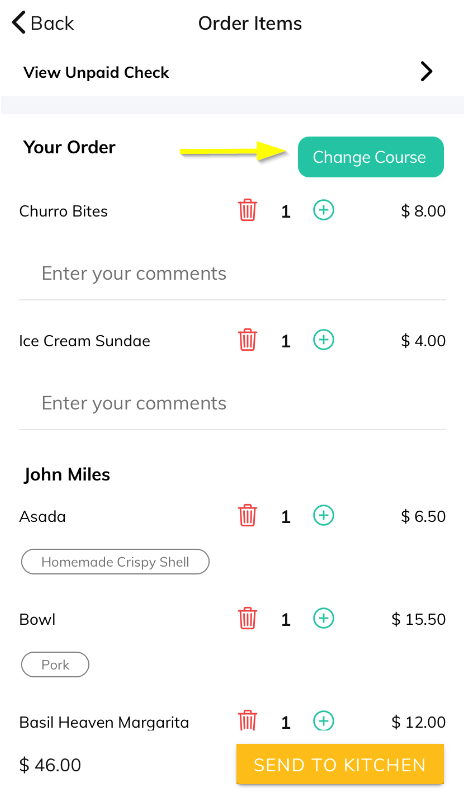
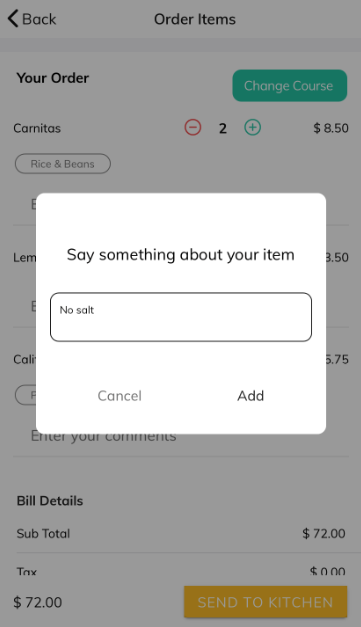
Adding Comments
Click on the comment icon under the item price to add the comments for each item.
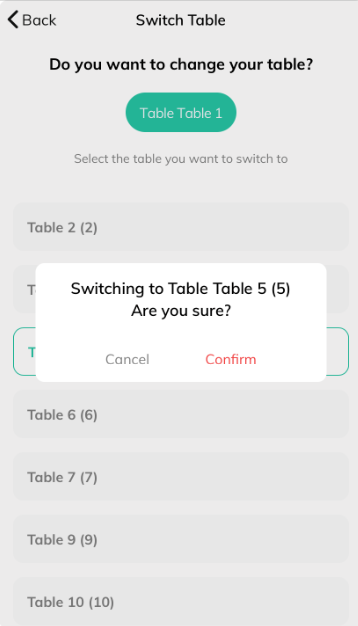
Switching Tables
If in any case, you want to transfer or change the tables, you can do that by clicking on the blue table edit button.  which will take you to another screen to select the available table and assign it to your order.
Placing the Order
Tikt lets you offer the ultimate in-house dining experience for your customers. Customers just scan a QR code on their table to view the smart menu, place an order, and pay at the Table.
Once the items are added to the cart by the guests, it's time to place the order.
Note:- Only the primary guest can Place the orders.
Click on the 'Review Order' button to View the Orders. All the orders with order details will be listed here.
Click on the 'Send To Kitchen' button and enter your card details to proceed to place your order. If you have already saved the card, saved card info will be displayed, you can enter the CVV number and proceed by clicking Continue. Your Order will be sent to the POS and a success message will be displayed once the order is placed.
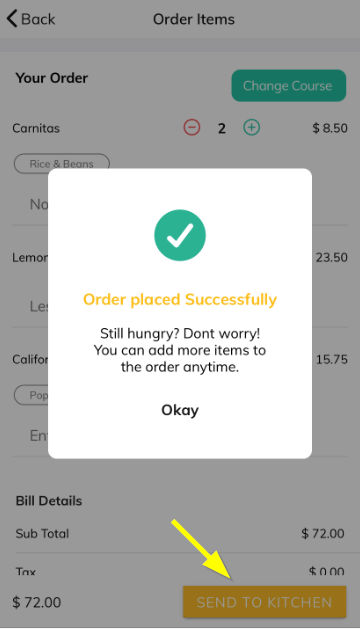
If you have your printer settings configured to accept orders directly from Tikt, the orders will be sent to the kitchen/bar, else the orders are sent to the Expeditor App(Servio). Servers will get instant notifications on the inServ App when every order is placed.
ID Verification Prompt
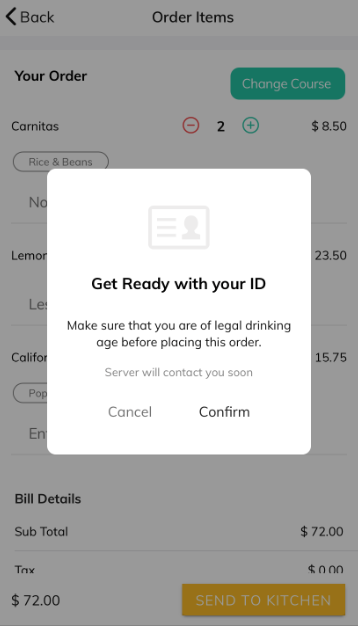
If a guest places an order with any age-restricted products in their cart, Tikt will prompt a message to confirm the age before placing the order and when confirmed the server will get notified and he can verify the Id. These age verification features let your staff keep out the under-21 crowd and only serve legal adults. You can configure ID verification through the Console portal.
Reorder Items
To reorder the item you already placed, click on the ORDER IN PROGRESS button and navigate to the Order Again. You can see the orders you already placed in batches. Click on the Reorder button and you can reorder the same items.

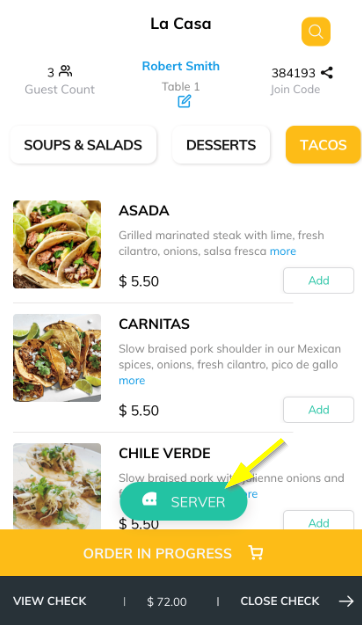
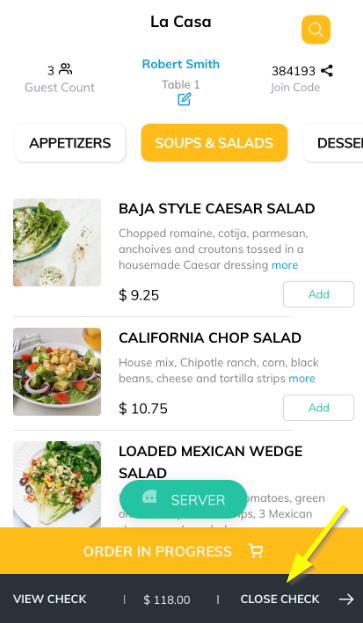
Calling Server
Meanwhile, if you want to call the server to the table, for tasks like cleaning the table or bringing water the guest can click on the SERVER button at the bottom of the screen.
You can configure some pre-defined Tasks buttons to be displayed on the server screen along with the comment text field.
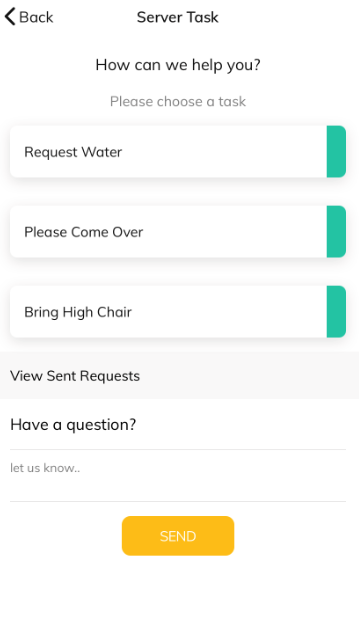
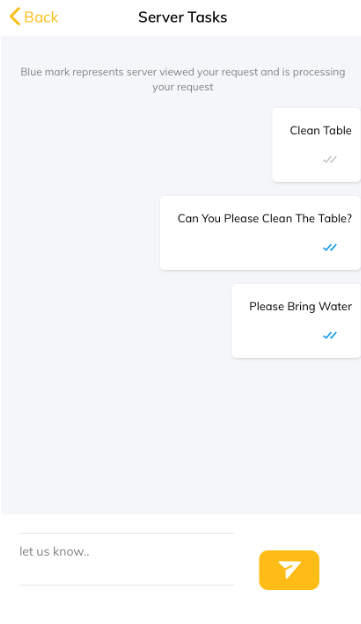
View Sent Requests
To view all the send requests to the server, click on View Send Request'. The blue double tick mark represents the server has viewed your request and is processing your request.
Check Out
When the guest is ready to checkout, click on the CLOSE CHECK.
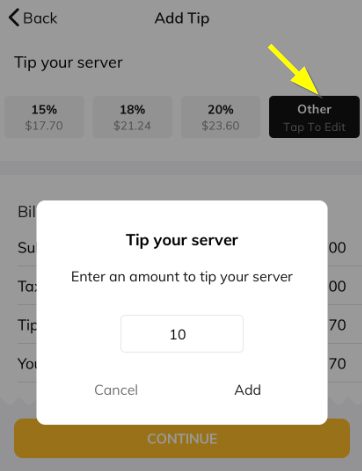
CLOSE CHECK button will take you to an Add Tip page where you can tip your server, you can select from the predefined tip amount/percentage or can enter the desired amount by selecting the 'Other' option.
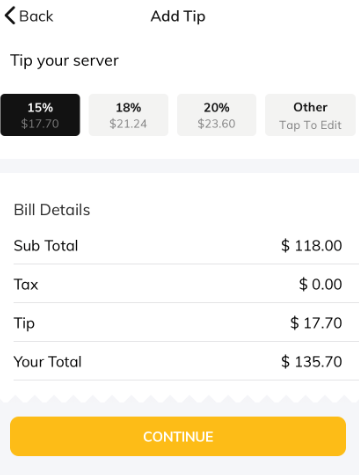
Click Continue
You will get a payment successfully message once done.
After a successful transaction, a guest can provide feedback using smiley ratings.

Guests can also send the digital receipt to their mail by providing their email id. Or there is an option to resend the receipt to another phone number.
Click on Resend Receipt to another number, enter the phone number and click on the Send SMS button.

Articles in this section
- Overview
- Tikt Merchant Portal
- Tikt Configurations
- Open Auths
- How to Add Transaction Fee?
- Pick-Up Orders
- Menu Creation & Setup
- How Tikt Works?
- Scan the QR Code on the Table
- Guest Count & Contact Tracing
Comments
Please sign in to leave a comment.