Menu Settings
You can set up or make changes to your menu directly through the merchant portal, ‘Console’. Simply log in with the credentials provided in your welcome letter.
From the home page navigate to ‘Menu’ on the left-hand menu bar icon which will take you to the Menu Settings page.
You can create and manage, Menus, Menu Categories, Courses, Items, and Modifiers here.
Menu
When creating menus for restaurants that offer more than one menu type or dining period (Breakfast, Lunch, Dinner, etc.) you can create multiple menus to ensure that customers only order time-sensitive items during the correct business hours. If a menu source indicates that a particular category is only served at certain times, you can create multiple menus to accommodate these categories.
If your restaurants have a shared menu that is used across multiple locations, you can configure it here.
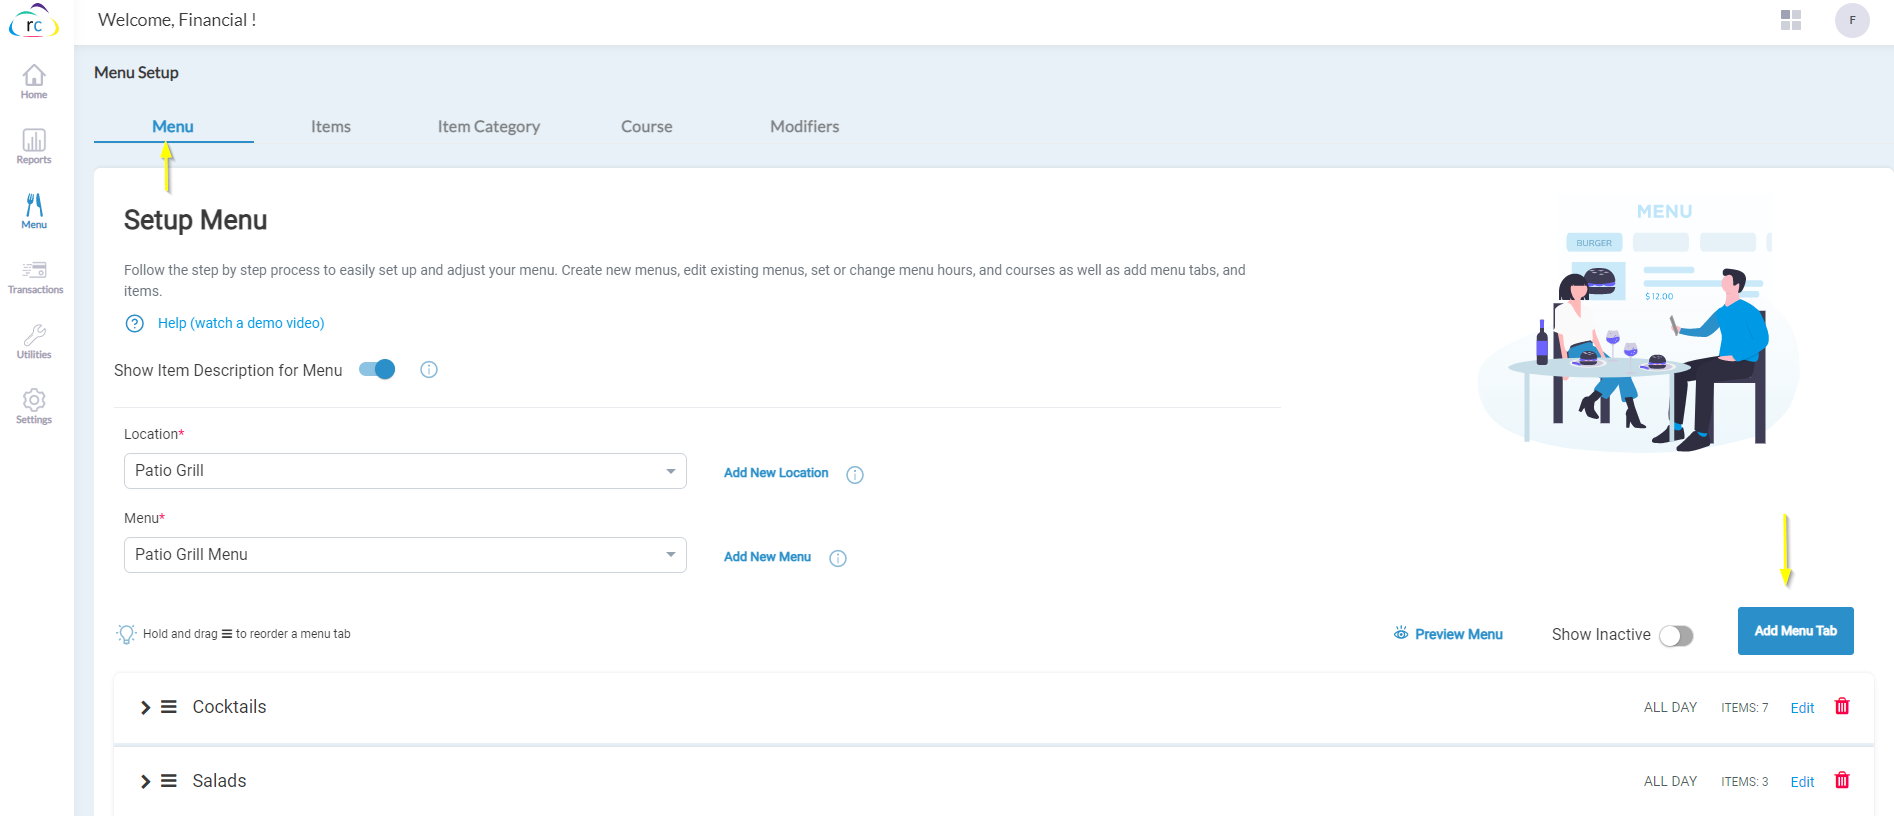
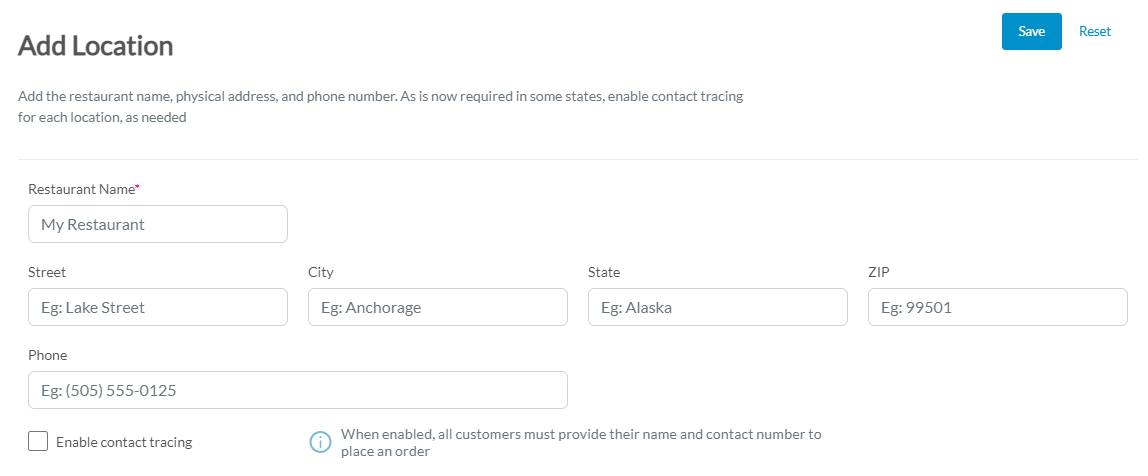
Location: Select the location/store from the dropdown menu to which the menu has to be assigned. If you want to add a new location, click on the ‘Add New Location’ button. Enter the location name, address, phone number & click Save.
Menu: Menus that are already created will be listed in the dropdown. Select the Menu to modify.
You can add a new Menu here. For instructions on how to do this, follow the steps below.
Creating a New Menu
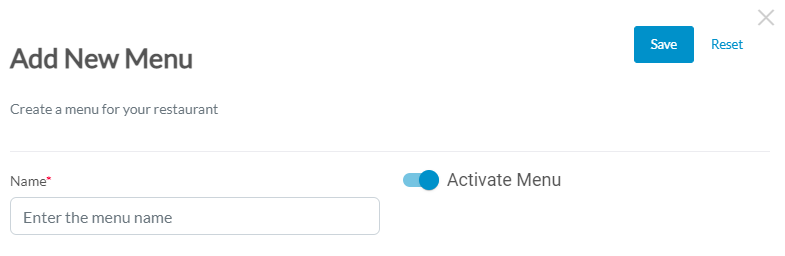
- Click the Add New Menu button near the menu drop-down box.
- Type in the text box to add the Menu Name and select the location from the dropdown to which the menu has to be assigned.
- The menu will be Activate by default. Toggle the ‘Inactive Menu’ if you want to prevent this menu from showing up. For example, if a certain Menu is only used during the summer season, you could make it inactive for all other seasons, thus eliminating the possibility of order/billing mistakes.
- Click Save to save your new Menu.
Under Menus, you can assign your Menu Categories into specific menus, such as a dinner menu, a lunch menu, a breakfast menu and so on.
Menu Tab
The menu tab reflects how your physical menu is organized. For example, you might have categories like Appetizers, Sandwiches, Mains, Desserts, Soft Drinks, Beer, Wine. Each category can have some basic default settings that get applied to actual menu items added to the category.
This page will list all the categories you already created with Category Name, Status, Start Time, End Time, and the option to edit/delete the selected category.
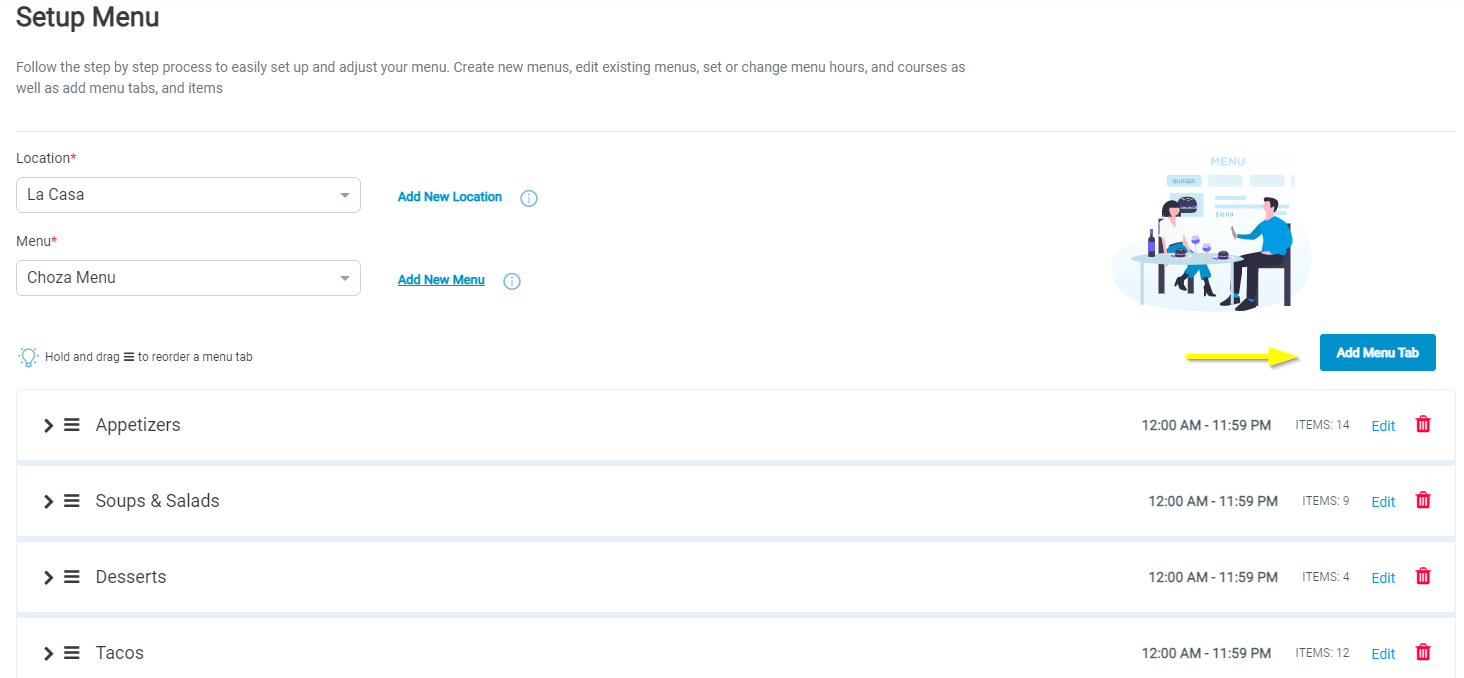
You can add a new tab to your menu here. For instructions on how to do this, follow the steps below.
Menu Tabs on Tikt
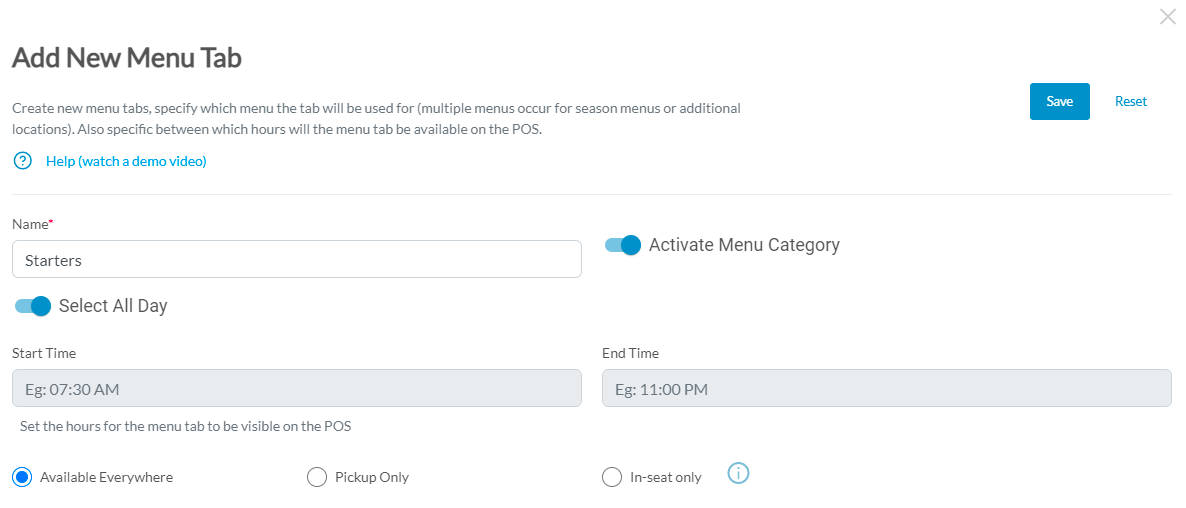
Adding Menu Tabs
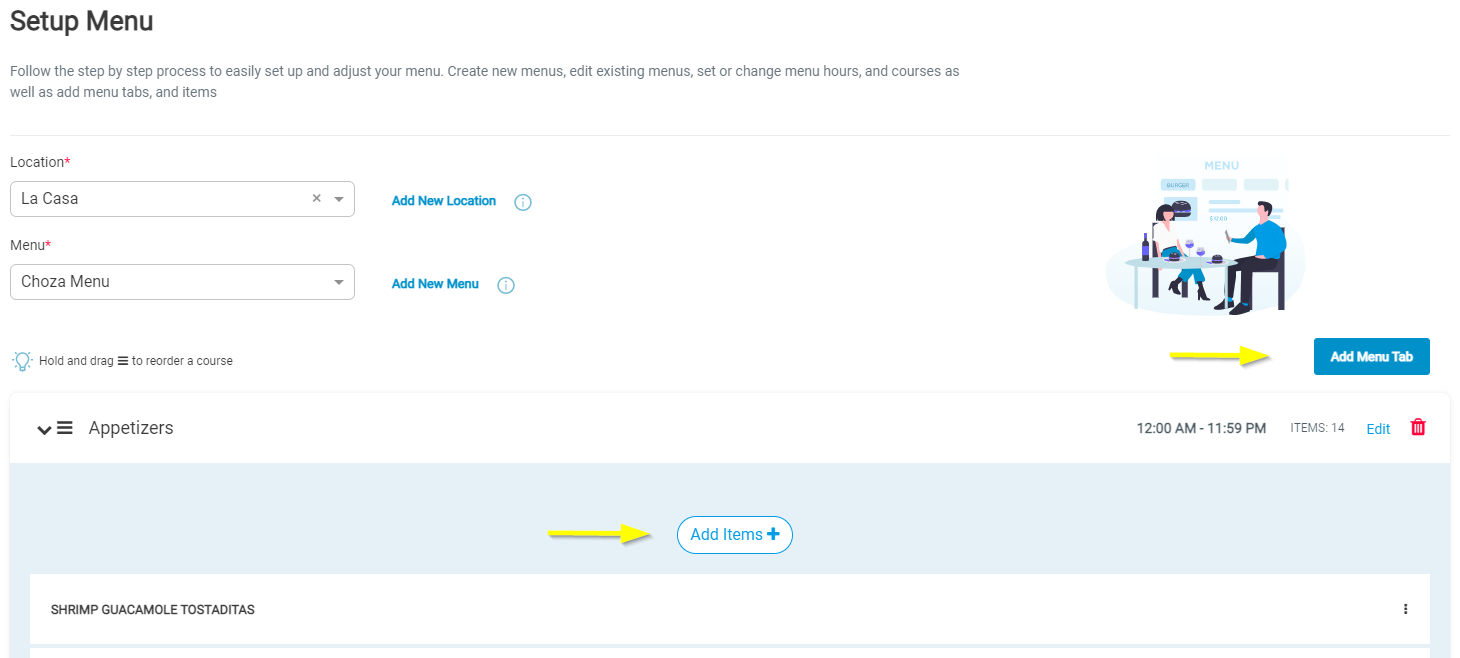
- Click the Add Menu Tab on the right side of your screen
- Set the Start & End Time for the menu tab to be displayed on the Menu. Please be aware that incorrect hours can result in order cancellations and deactivation from the platform, so ensure that your menu hours are always correct on an ongoing basis.
- If this tab needs to be temporarily removed from the menu (for example, it’s a seasonal category like “Crab Fest”), Toggle the Activate button to deactivate.
- Click Save to save your new menu tab.
You can slide the Activate option to the off position if you wish to disable a menu tab. For example, you’ve created a seasonal category and want to make it unavailable for a long period of time. If you add a menu tab by mistake, tap on the red delete button to delete.
Note: If you tap and hold on a menu tab Pickup bars, you can rearrange the order of your menu tabs.
Adding Items to Menu Tab
Once the menu tab is created you can now add items to it.
From the Menu Tab list, click on the arrow provided to view more options.
- Select ‘Add Items +’ which will take you to another screen listing the existing items.
- Select the Items to be added to the category and click ‘Select Item’. All the items selected will be added to the category.
Note: If you tap and hold on a menu item Pickup bars, you can rearrange the order of your menu items.
Adding Items to Menu Tab
86ing a Menu Item
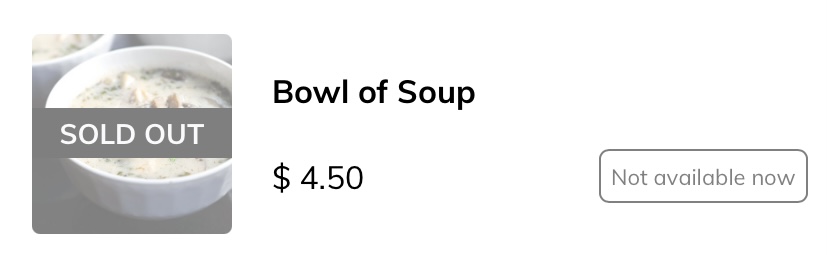
For the menu items which is temporarily unavailable, Tikt can let the guests know that the item is no longer available. For instructions on how to do this, follow the steps below.
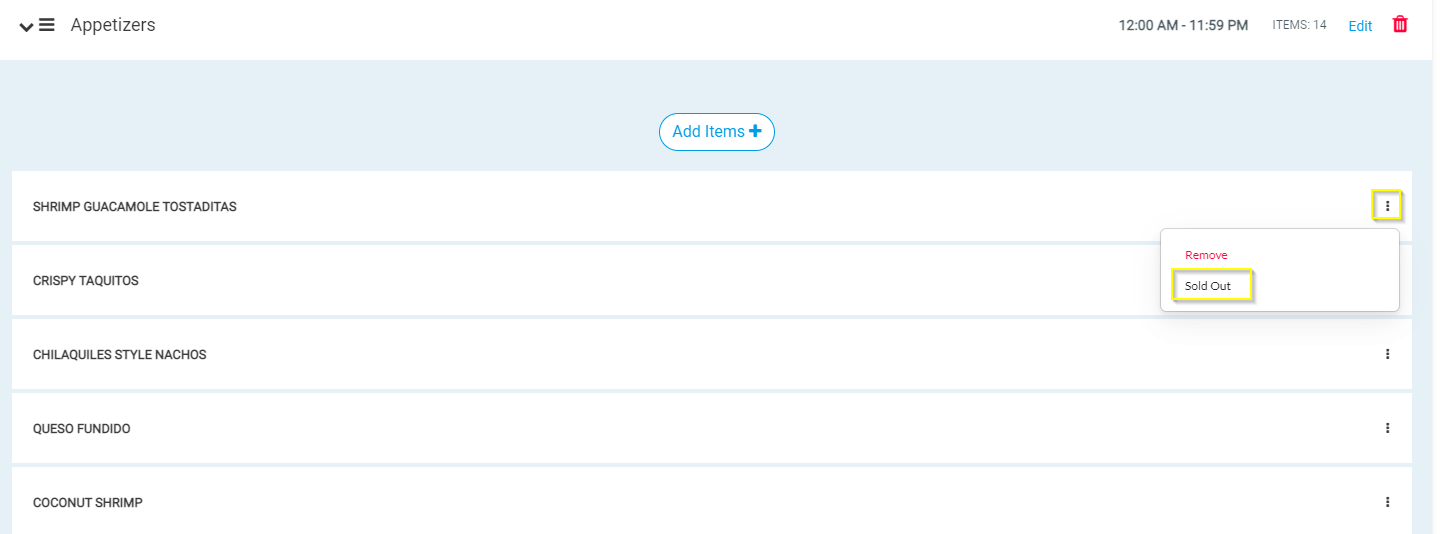
- From the home page navigate to ‘Menu’ on the left-hand menu bar icon which will take you to the Menu Settings page.
- From the Item list under the menu tab, click on the 3 dots provided to view more options.
- Select 'Sold Out'. This will instantly get updated on the Tikt application. The item will be marked as 'Not Available Now' and will be greyed out with the SOLD OUT tag. You can also set this up through the Servio POS.
Items
All the items created will be listed here with the Item Name, Printer Category, Price and an option to modify/delete. For instructions on how to create a new item, follow the steps below.
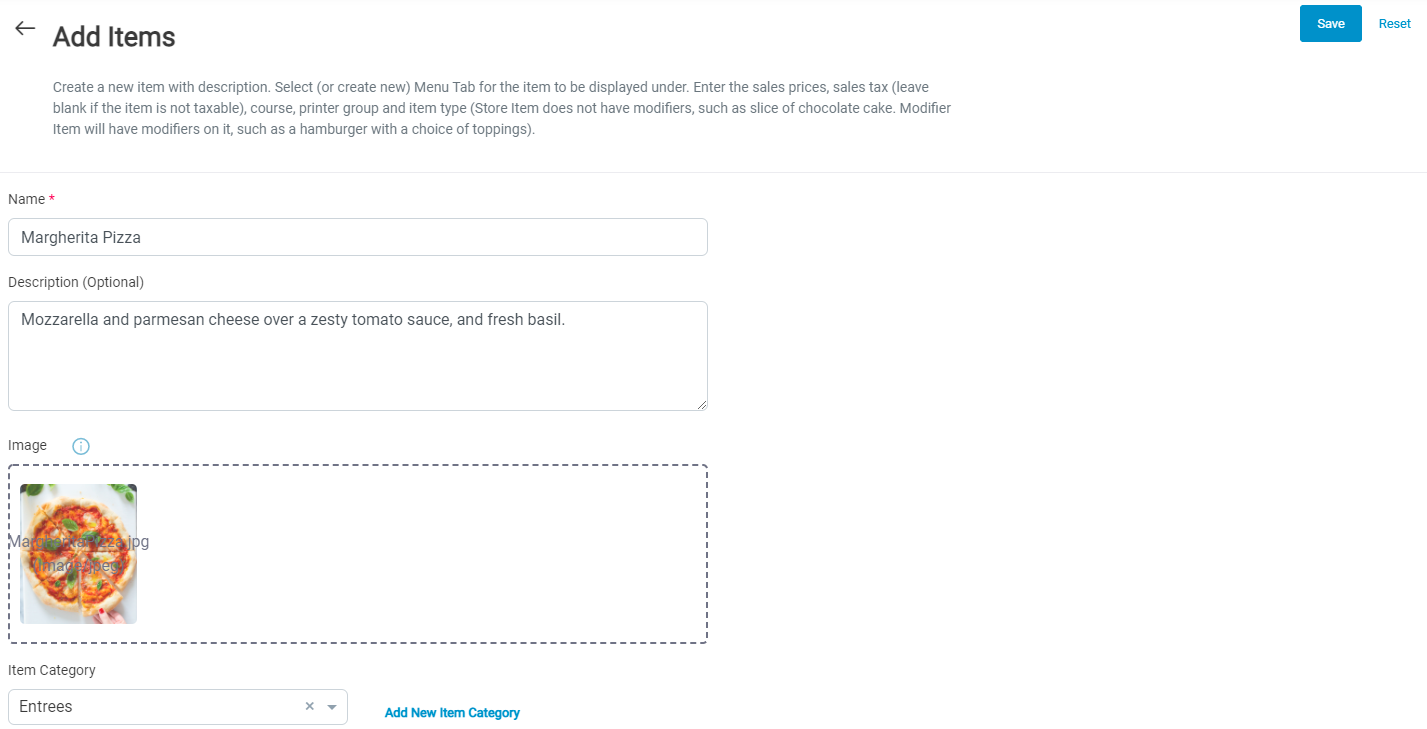
Adding New Item
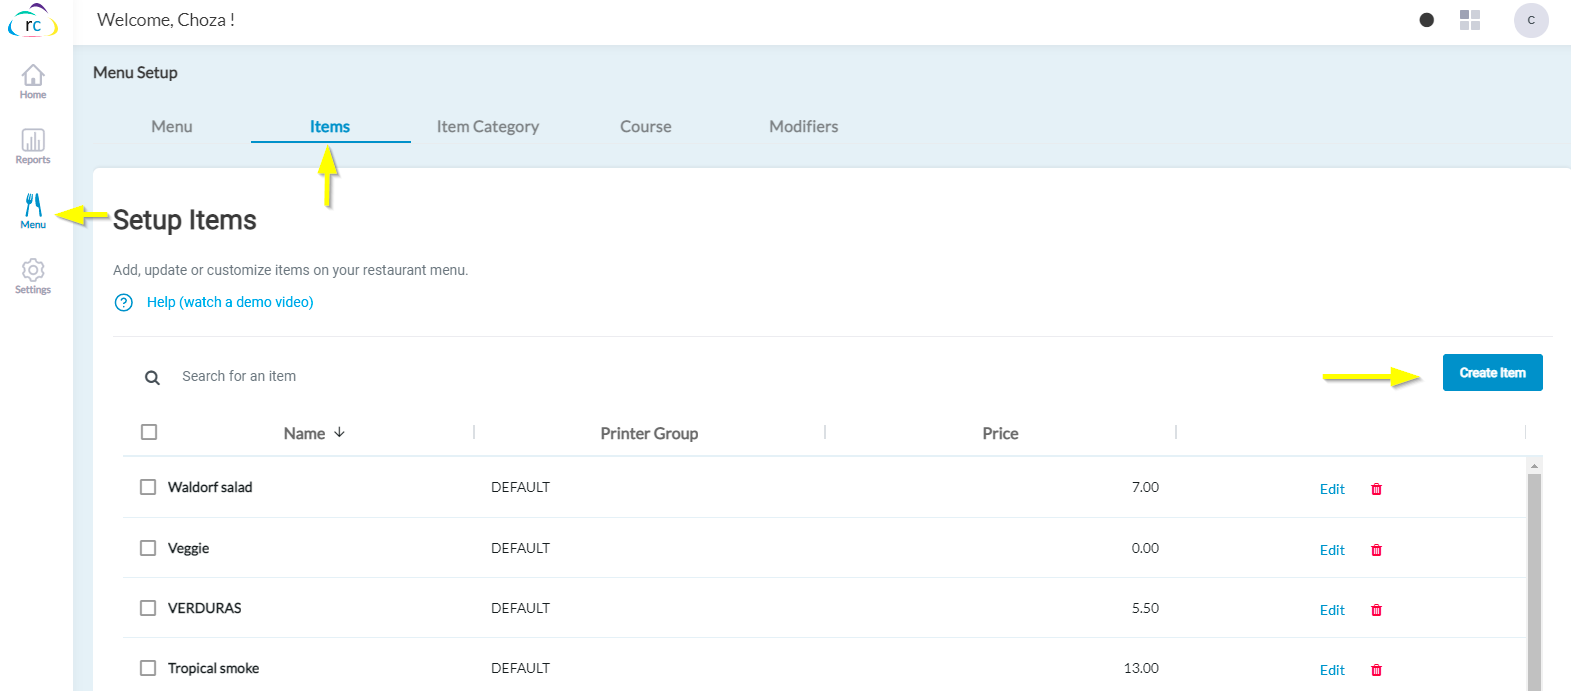
- Click Create Item at the top of the Item list on the right side of your screen.
- Type in the text box to add the Name, Description, and Price of the new Item. Fill in the general information needed for this item, If an item does not require any information in one of these fields, that field can be left blank.
- Item Image can be uploaded by browsing the file or simply drag and drop.
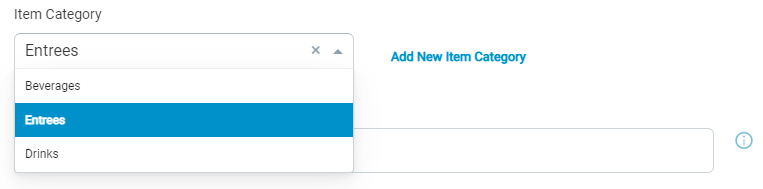
- Item Category can be assigned by selecting the category from the dropdown (This will show only the category you already created through Menu--> Item category)or if you haven't created an item category you can also create a new category here by clicking on the Add New Item Category link.
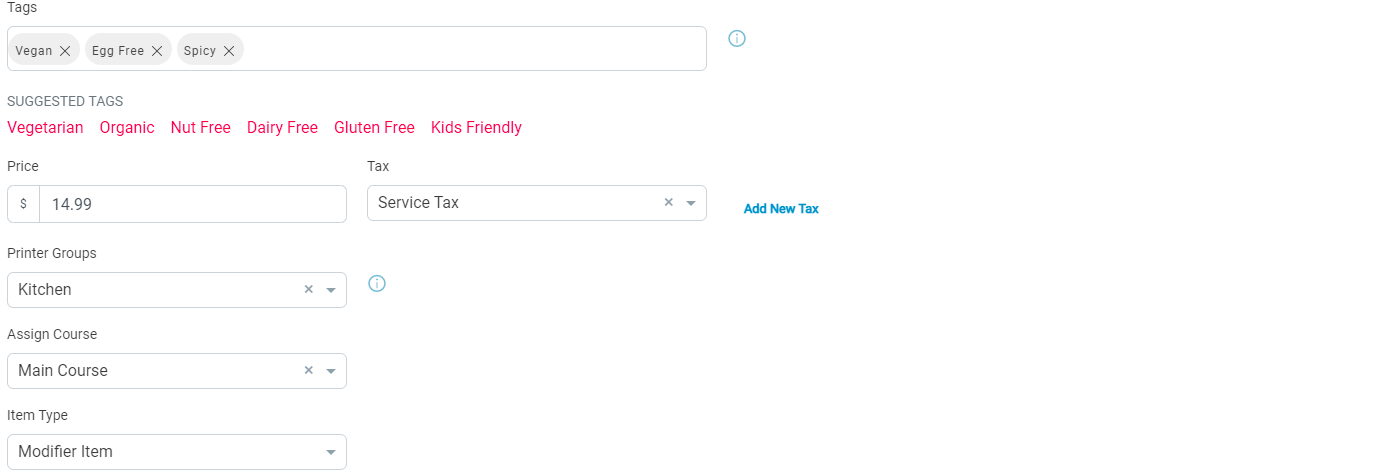
- Tags can be assigned for items by simply clicking on the suggested tags. These tags can be used for quick search/emoji search on the Tikt application.

- Choose the Tax for the Item from the dropdown box or you can also create a new tax by clicking on the ‘Add New Tax’ near the test box.
- Select the Course, Printer Category, and Item Type from the dropdown options if you have already set them up.
- If your item has modifiers, select the Item Type as ‘Modifier item’ and add Modifiers and Options to the new item, click + Add New Modifier & add option details below the description text box. Please find the detailed instructions on how to set up modifiers in the below section.
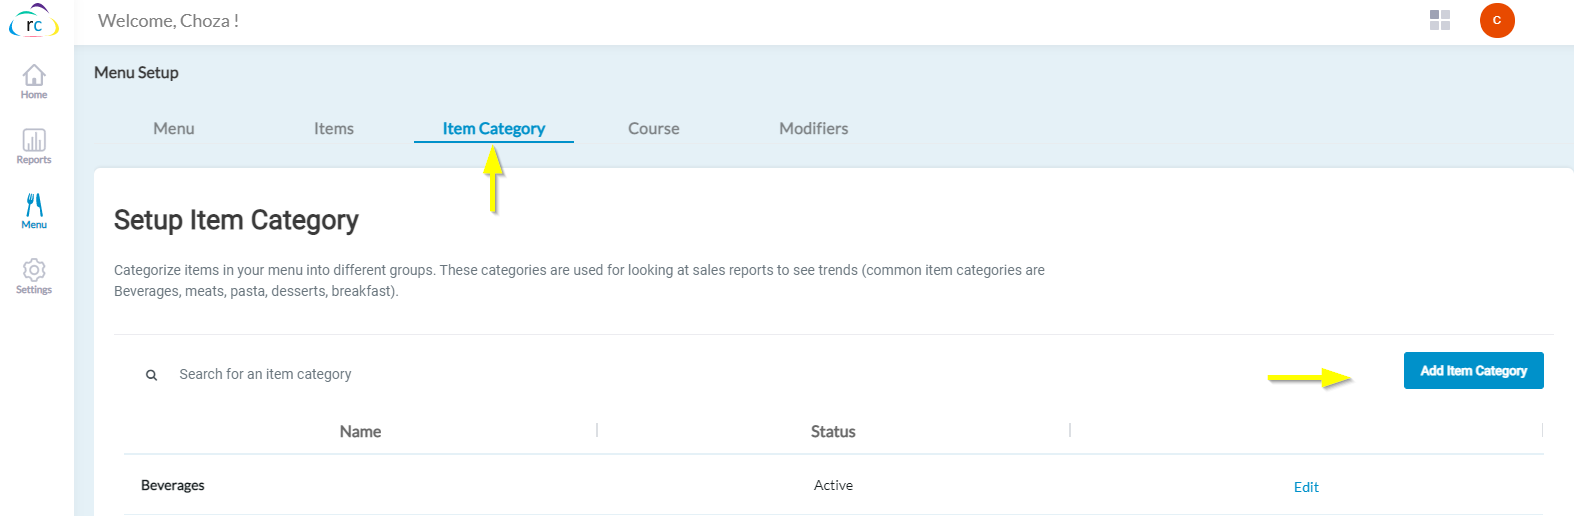
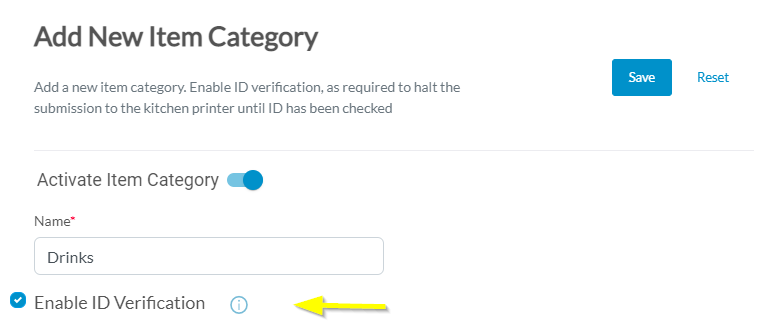
Item Category
Create multiple item categories here. If your restaurant offers age-restricted products you can create a separate category for that and enable the ID Verification for that particular category. Once the flag is set, every item in that category will prompt with the message in the Tikt app to confirm the age before placing the order.
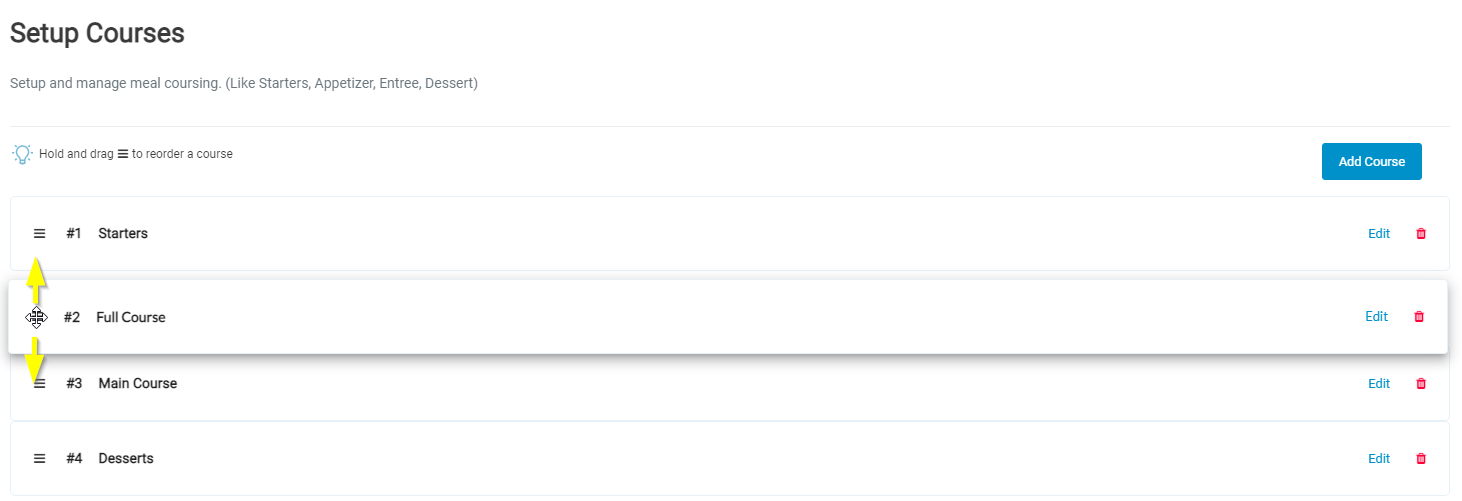
Courses
Meal Courses can be set up and managed here. For instructions on how to create a new course, follow the steps below.
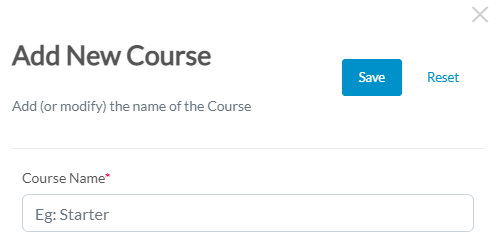
Adding New Course
- Click Add Course at the top of the course list on the right side of your screen.
- Type in the text box to add the Course Name.
- Click Save to save your new course.

If you tap and hold on a menu course Pickup bars, you can rearrange the order of your courses.
Modifiers
Modifiers allow you to customize orders and provide options for your customers to select variations.
Follow the instructions below to create modifiers :
Adding new modifiers to items to your menu
Existing modifiers will be listed here. Click the Edit button that you would like to edit.
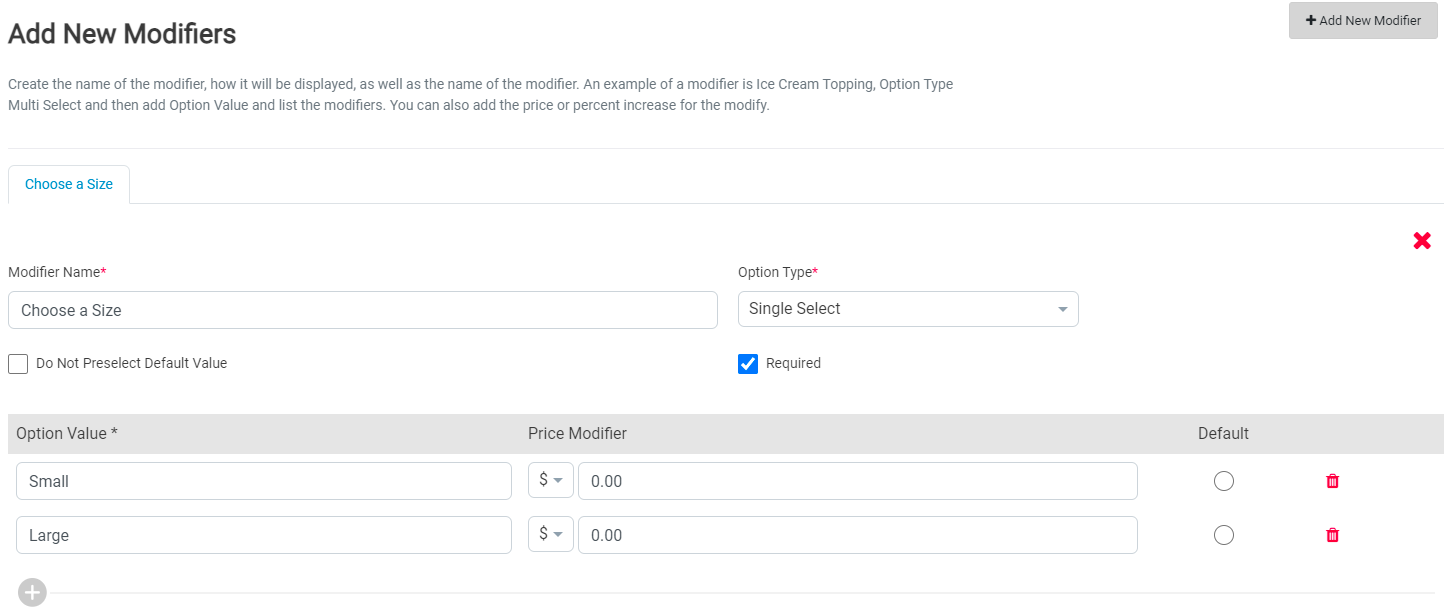
If you would like to create a new modifier, Click Add Modifier at the top of the modifier list on the right side of your screen. Fill out the new Modifier name, Option values, and prices and click Save.
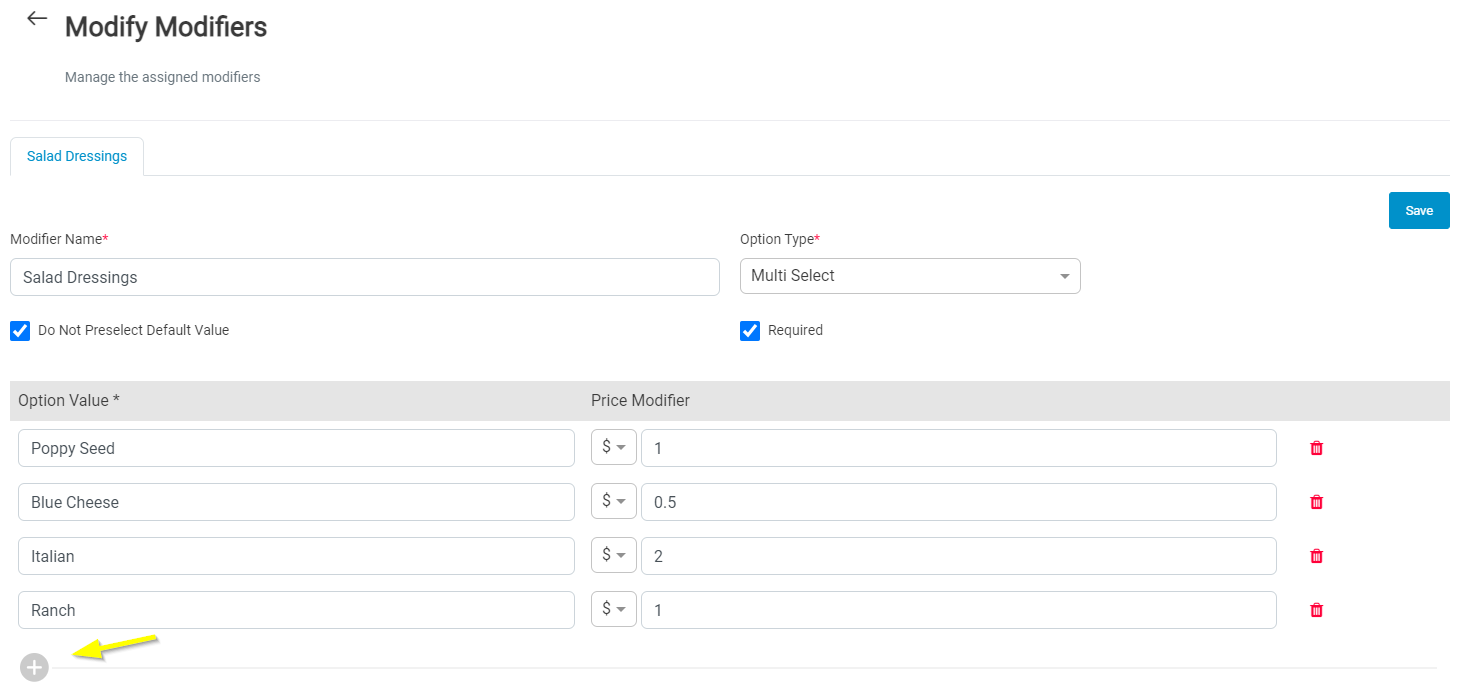
Modifier Name: Enter a name for the option. Ex: Sides, Extras, Add Ons, Drinks…
Field Type: Select the option type from the drop-down box. There are 4 option types available ;
Single Select: This allows you to select only one particular option at a time from the option list.
Multiple Select: This allows users to select multiple items from the option list.
Button: This creates options as buttons.
Text Box: This creates options as a text box.
Do not Preselect Default Value: Check the box if you don't want to pre-select the default option.
Required: Check the box for mandatory option selection.
Click on ‘+’ button to add a new option value.
Enter the Price for the modifier option.
Check the box if you want to pre-select the particular option as default.
Delete button to remove option value from the list.
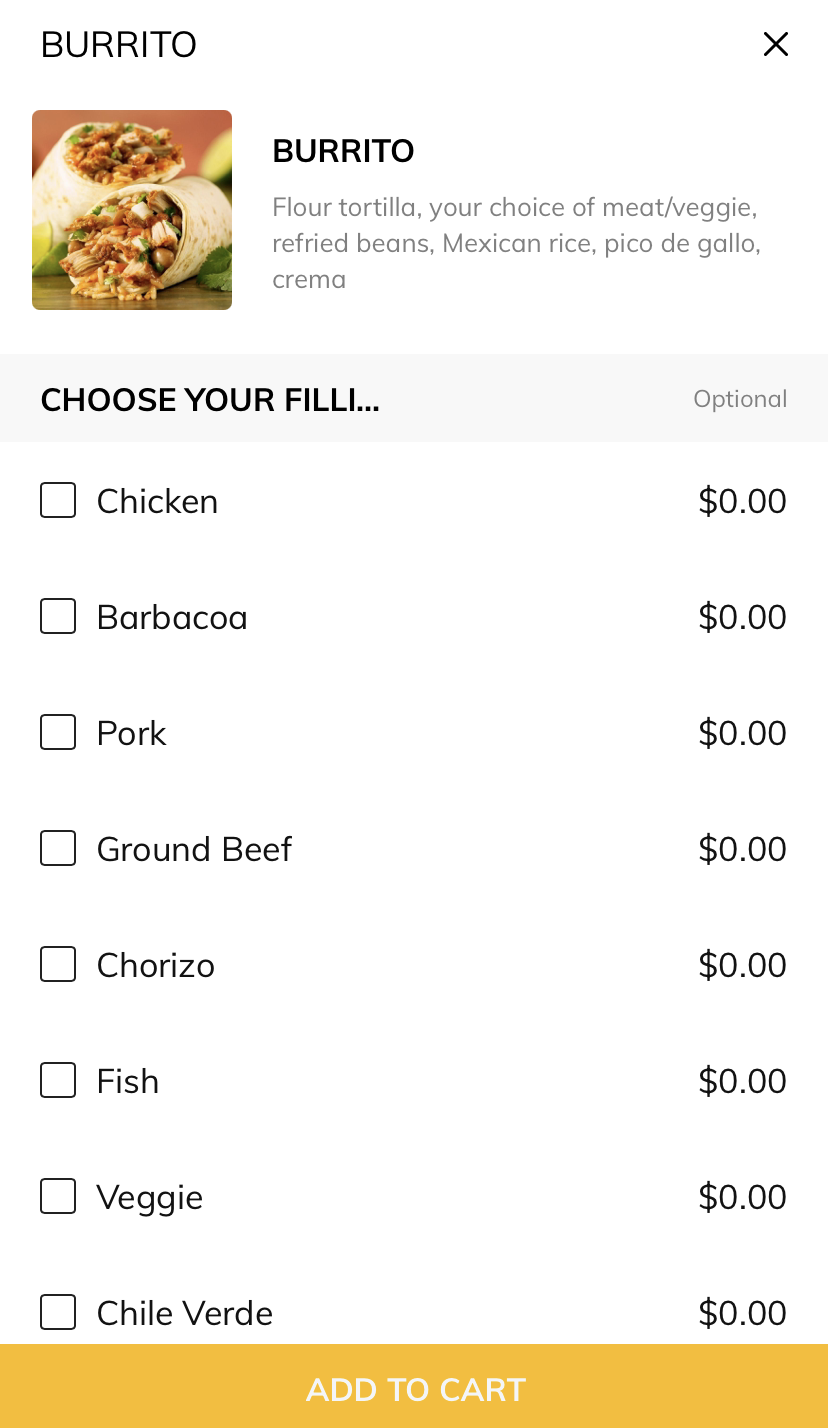
Modifiers on Tikt UI
Articles in this section
- Overview
- Tikt Merchant Portal
- Tikt Configurations
- Open Auths
- How to Add Transaction Fee?
- Pick-Up Orders
- Menu Creation & Setup
- How Tikt Works?
- Scan the QR Code on the Table
- Guest Count & Contact Tracing
Comments
Please sign in to leave a comment.