Replicate your restaurant floor plan on your POS for increased efficiency and assign orders to tables to make meal distribution effortless.
Layout Setup
This feature allows you to easily create sections, tables and assign tables to every new order.
From the Home screen, scroll from the left side in or press on the RC Settings in the upper left → click on ‘Assign Tables’.
Click on the Add Section button, enter the Section Name and click 'Ok' to save.
To add tables to the section, click on the '+' sign, enter the table name, select the table shape (rectangle/round) and click 'Ok' to save.
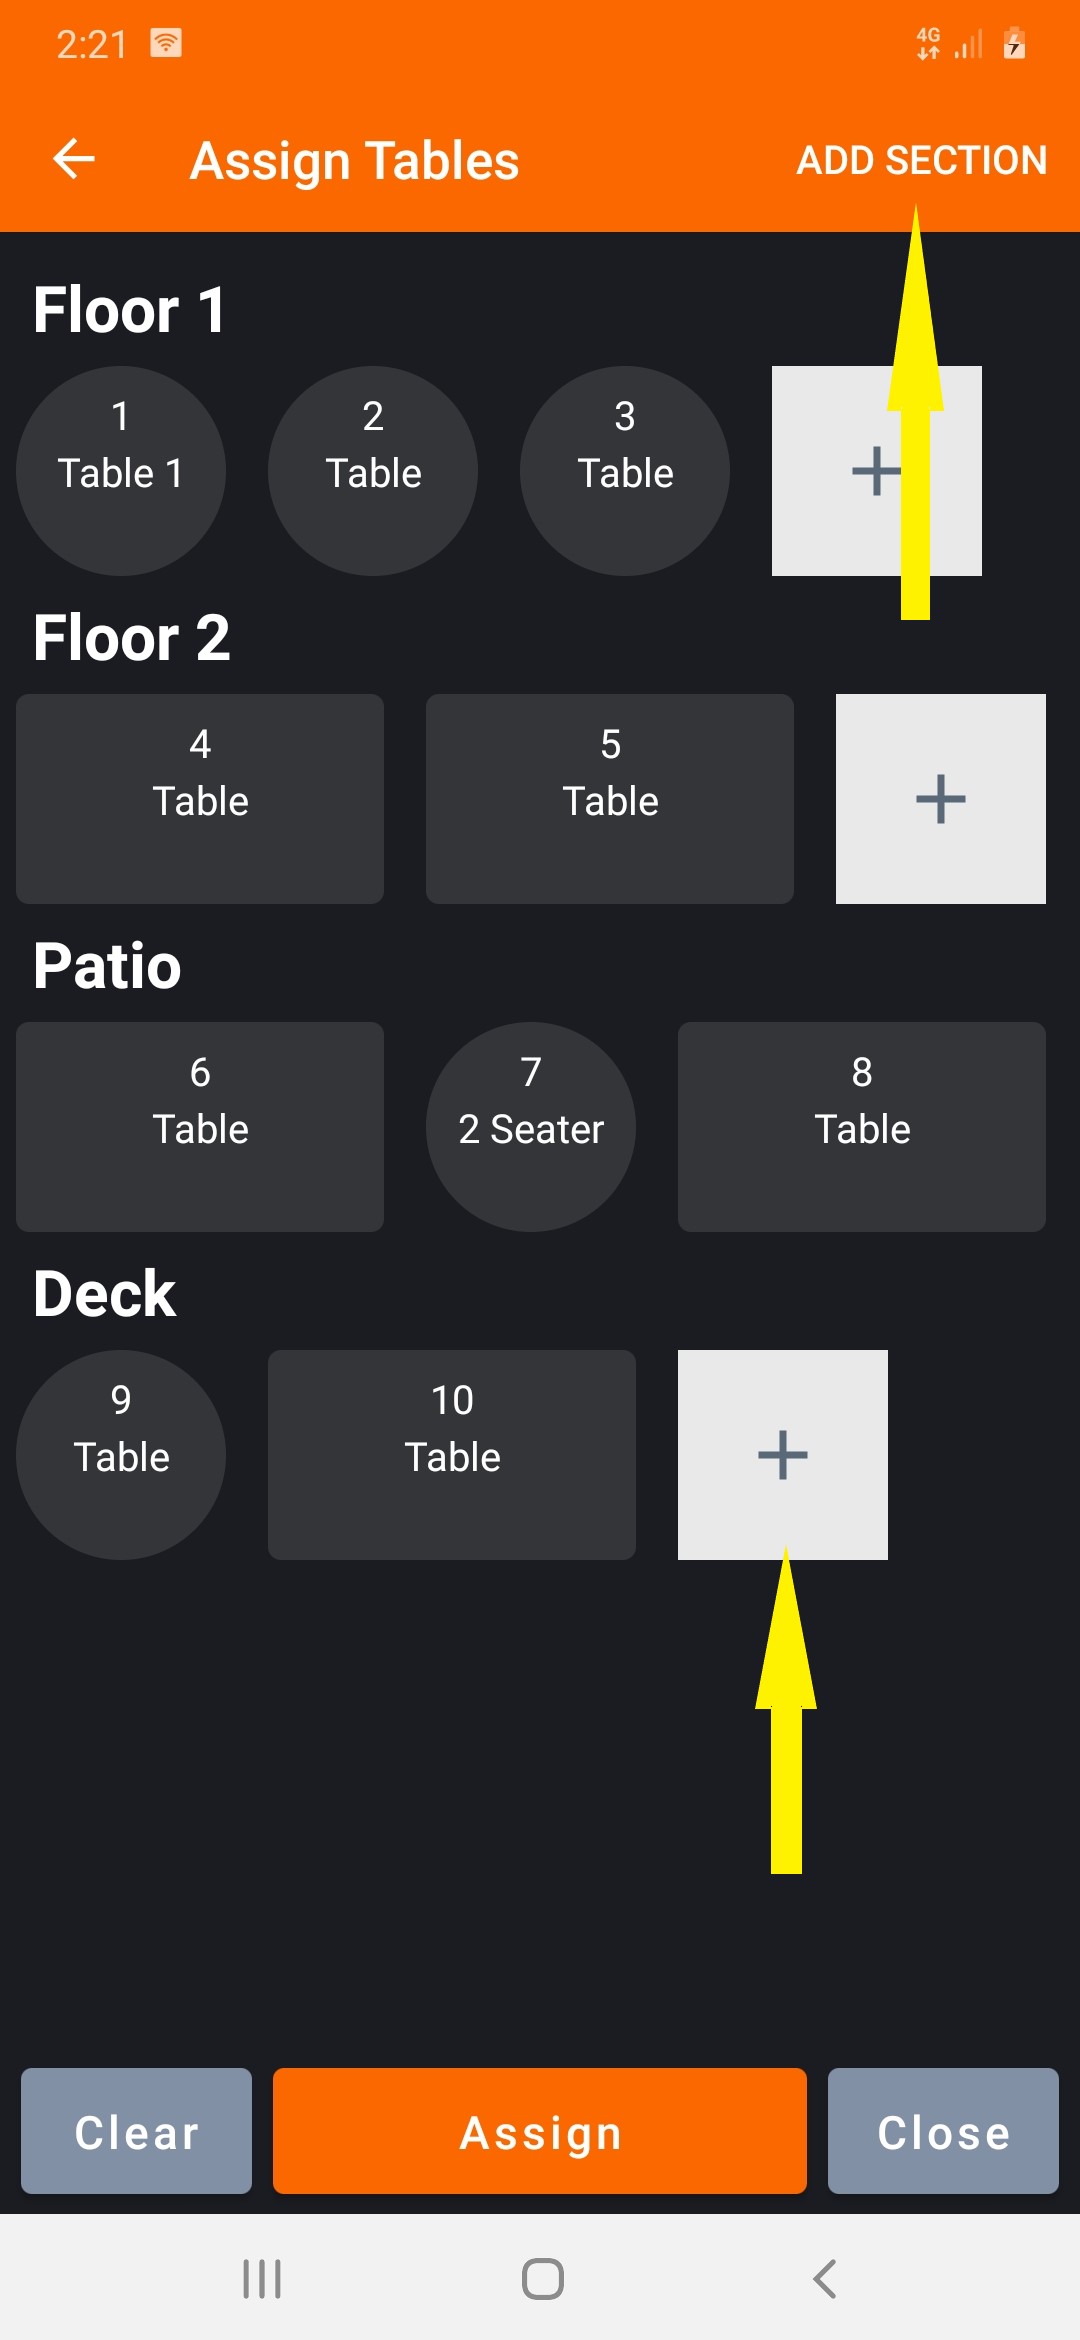
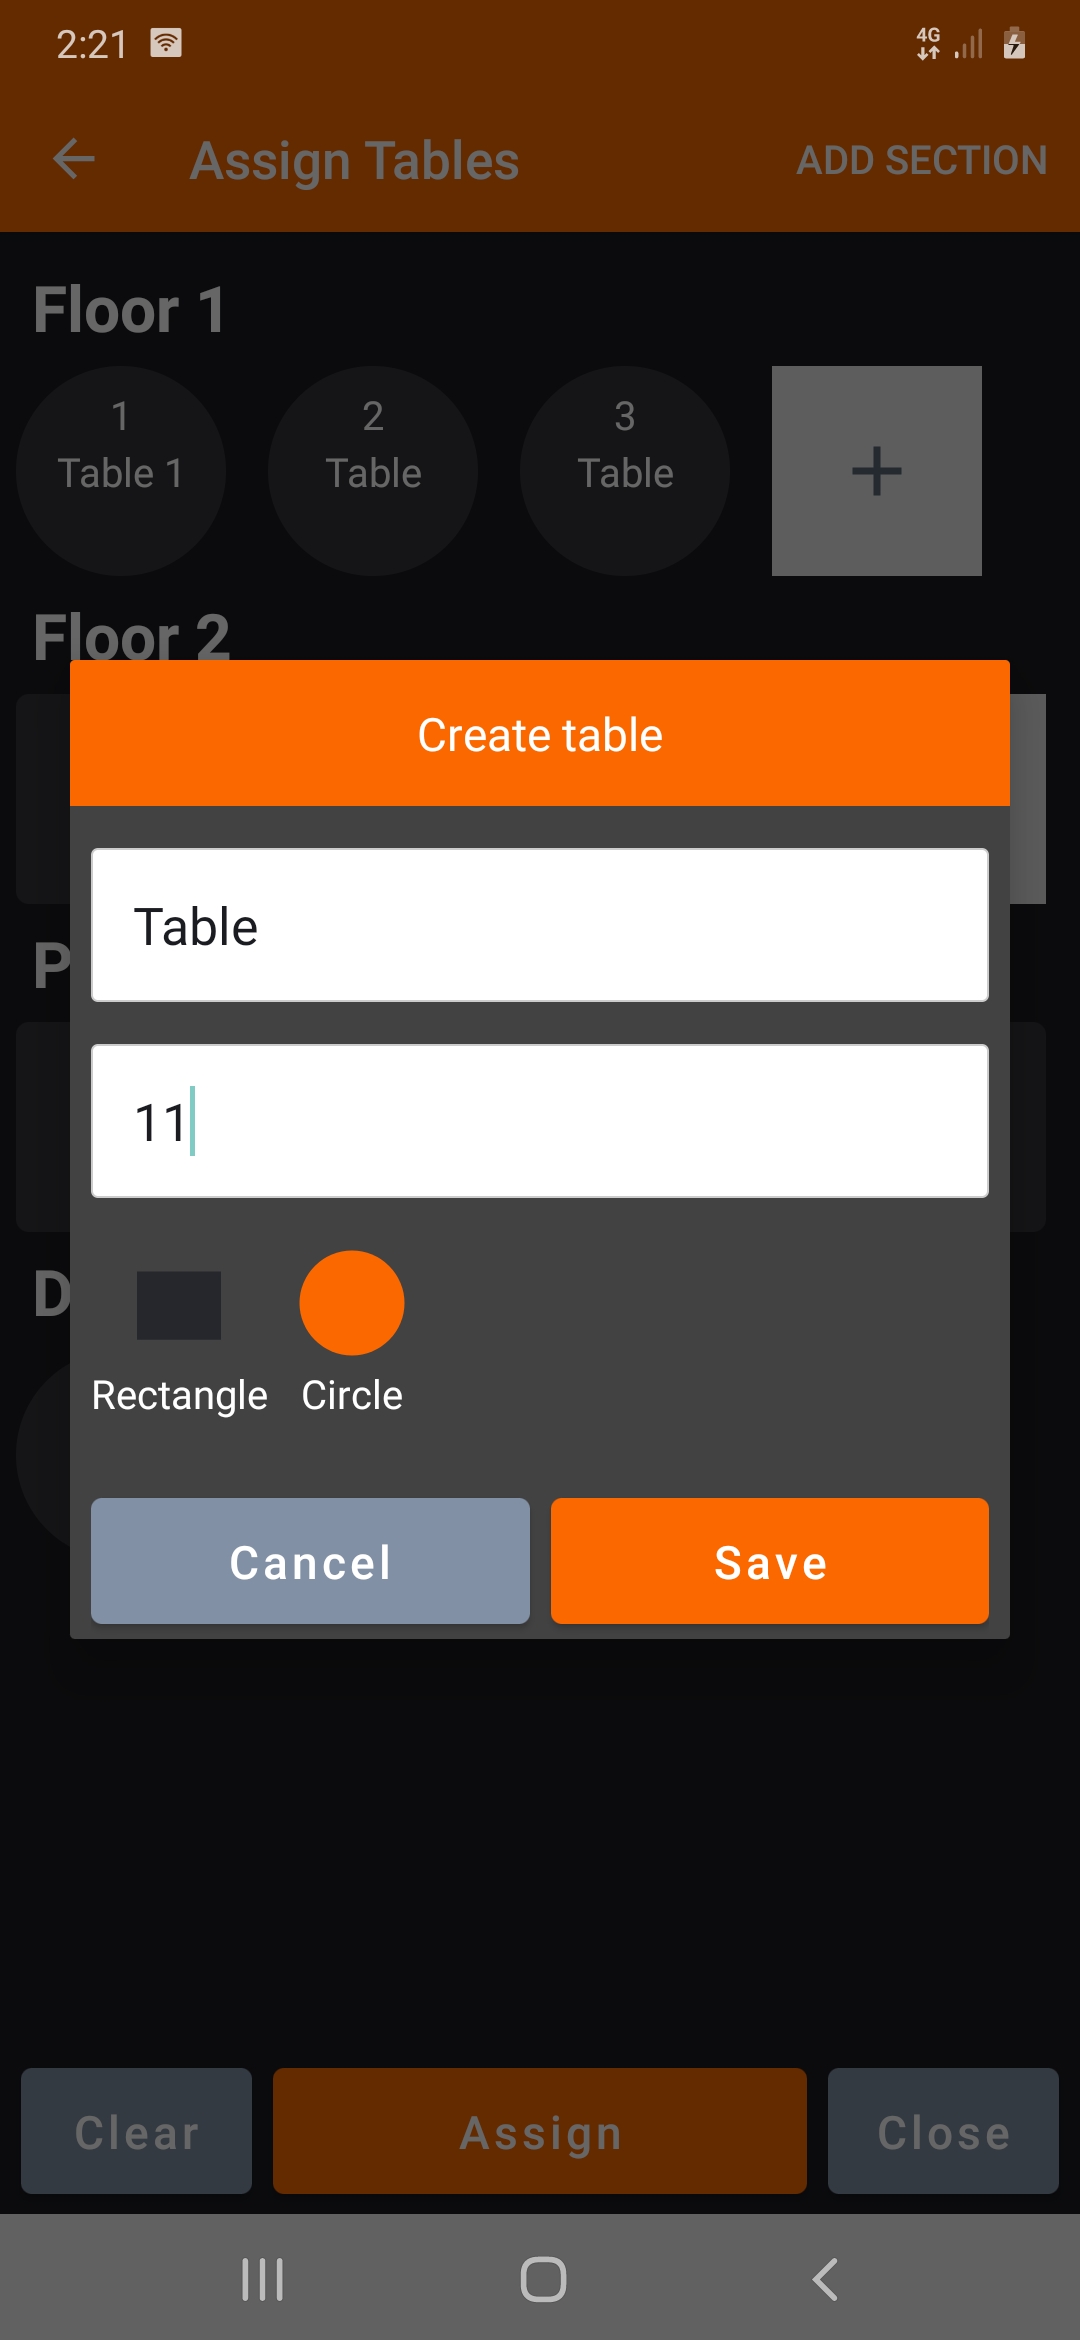
Table Legend
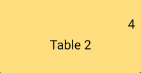
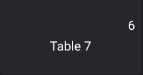 Unoccupied Table with Table name (Table 7) and no of seats (6).
Black
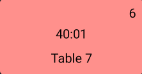
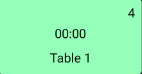 Order Assigned with the Table name (Table 1), no of seats (4) and time (00:00)
Green
 After the time slab (default 60 minutes). Configurable through settings.
Red
 Allocated Table (Helps identify already taken/selected tables from multiple Yellow pos registers.
Holding a Table
Before placing an order, go to the navigation bar -->Assign Table and select the table to assign to the ticket. The selected table will be highlighted.
At the bottom, there are three buttons - Assign, Clear, Close.
Clear : Clear all the table information(selected/assigned) saved for an order.
Assign : Assigns a table for the particular order.
Close : Closes the Assign table page and navigates to the home screen.
Releasing a Table
After completing a successful order transaction the table will be deselected.
Articles in this section
- Servio Self Checkout KIOSK
- Overview
- Getting Started
- Servio Certified Hardware
- Registration & Setup
- Setup Products and Modifiers
- Quick Pick / Menu Assignment
- App Modes
- Placing Orders & Managing Checks
- Placing Online Orders
Comments
Please sign in to leave a comment.