Servio's seamless order processing system helps to perform faster restaurant operations, allowing servers to tap in an order via a handheld device at the table, eliminating the need to rush to the POS station.
Enable Orders
To Enable order processing mode, go to Settings --> Configurations --> General --> Enable Orders.
Placing Open Orders
- Start adding items to the cart by simply clicking on the item from the 'All Items ‘ list or Quick Picks from the home screen.
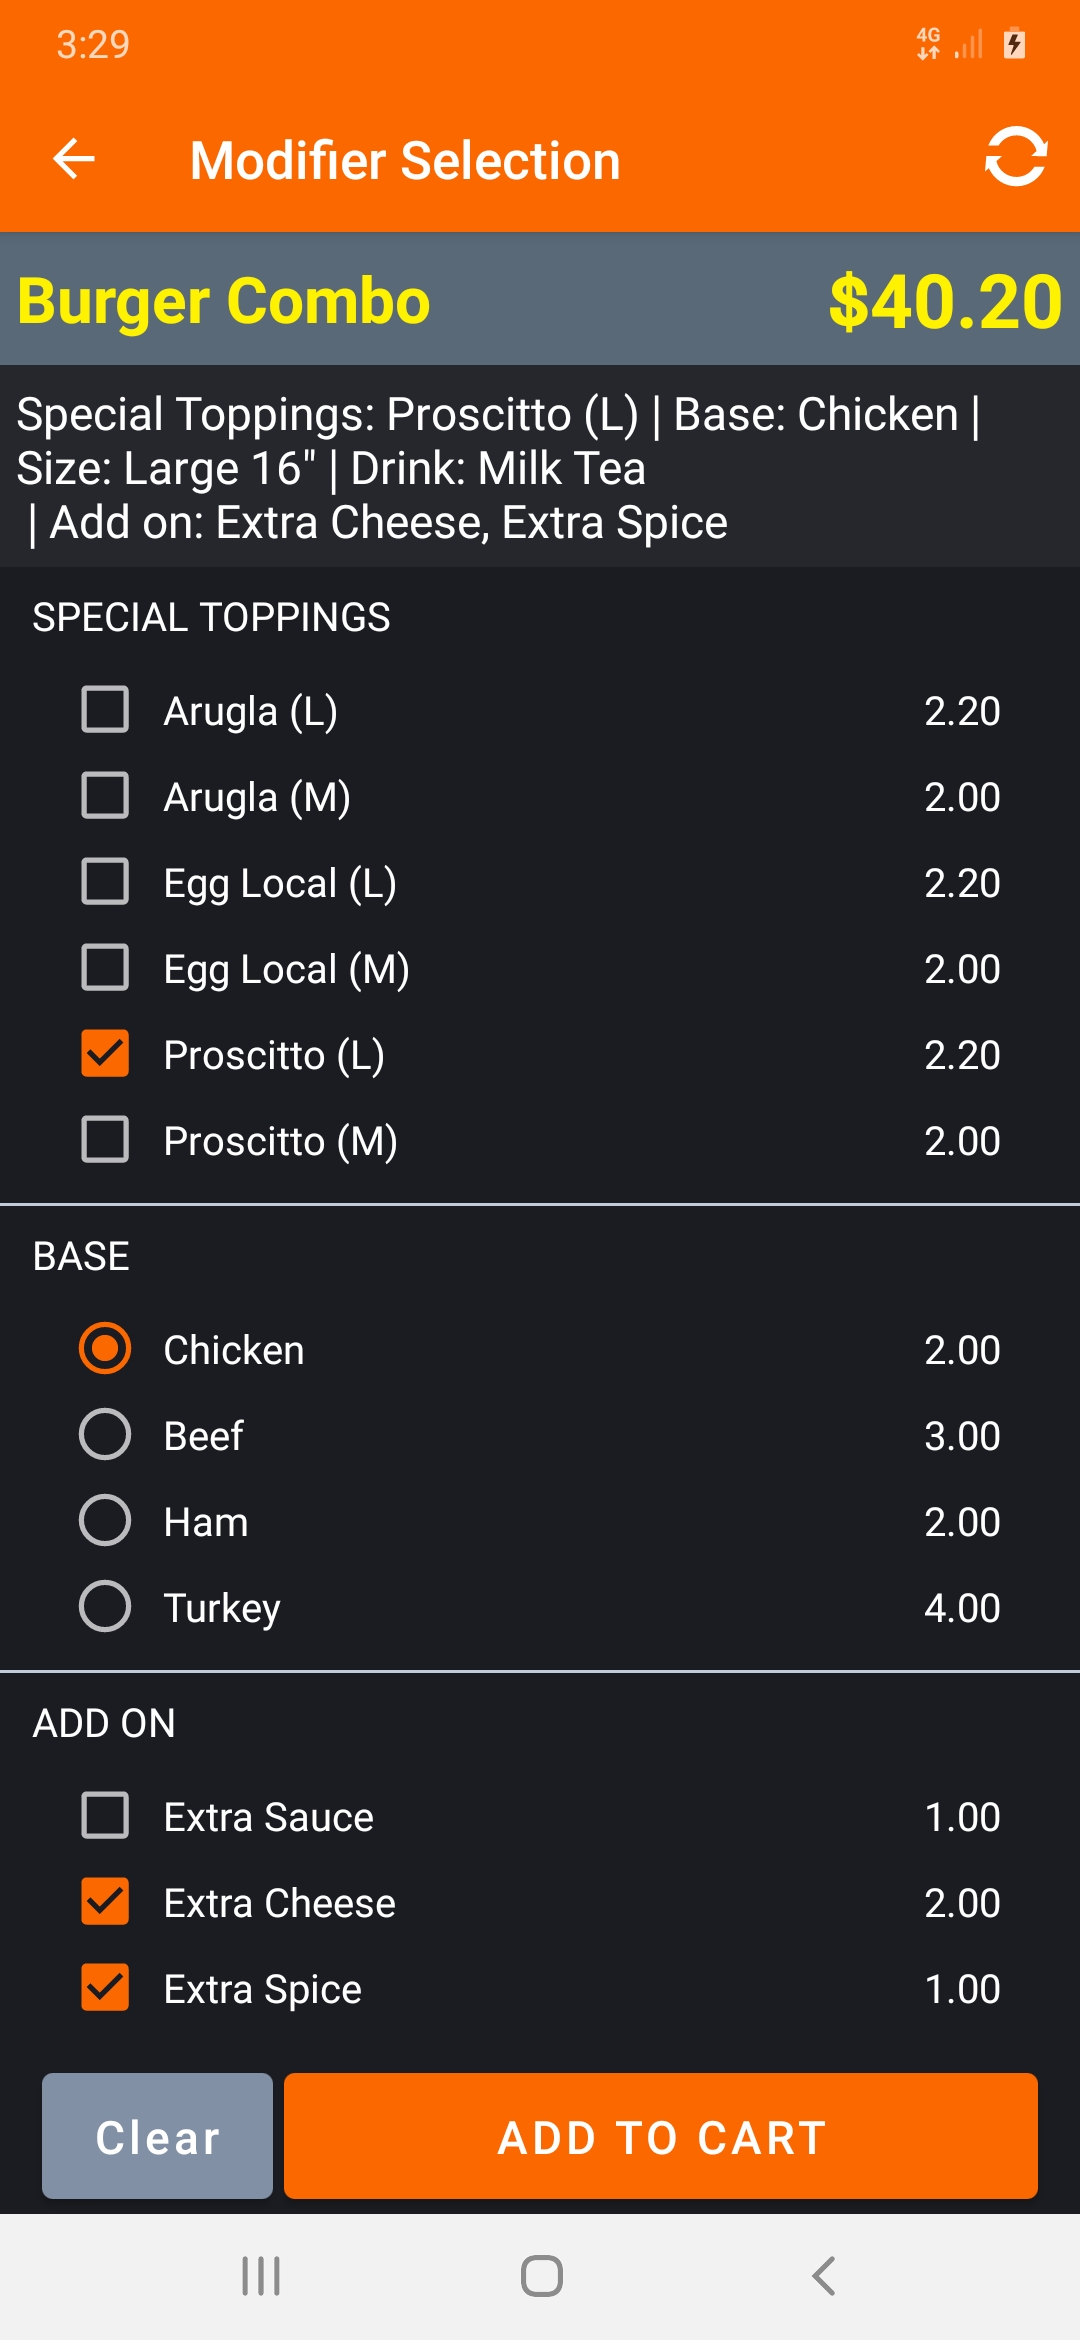
- When items with modifiers are added, it will lead to a modifier option selection screen.
- Choose the modifier options needed and click on ‘Add to Cart’.
- Click on the ‘HOLD’ button to initiate the order and this will automatically send order details to the KDS screen if KDS is configured.
After the server taps "Hold" on the handheld device, the order automatically populates onto the Open Order list which can be immediately sent to the kitchen/KDS so they can fulfill it.

Click here to know how to setup modifiers
Click here to know more about KDS Application.
View Orders
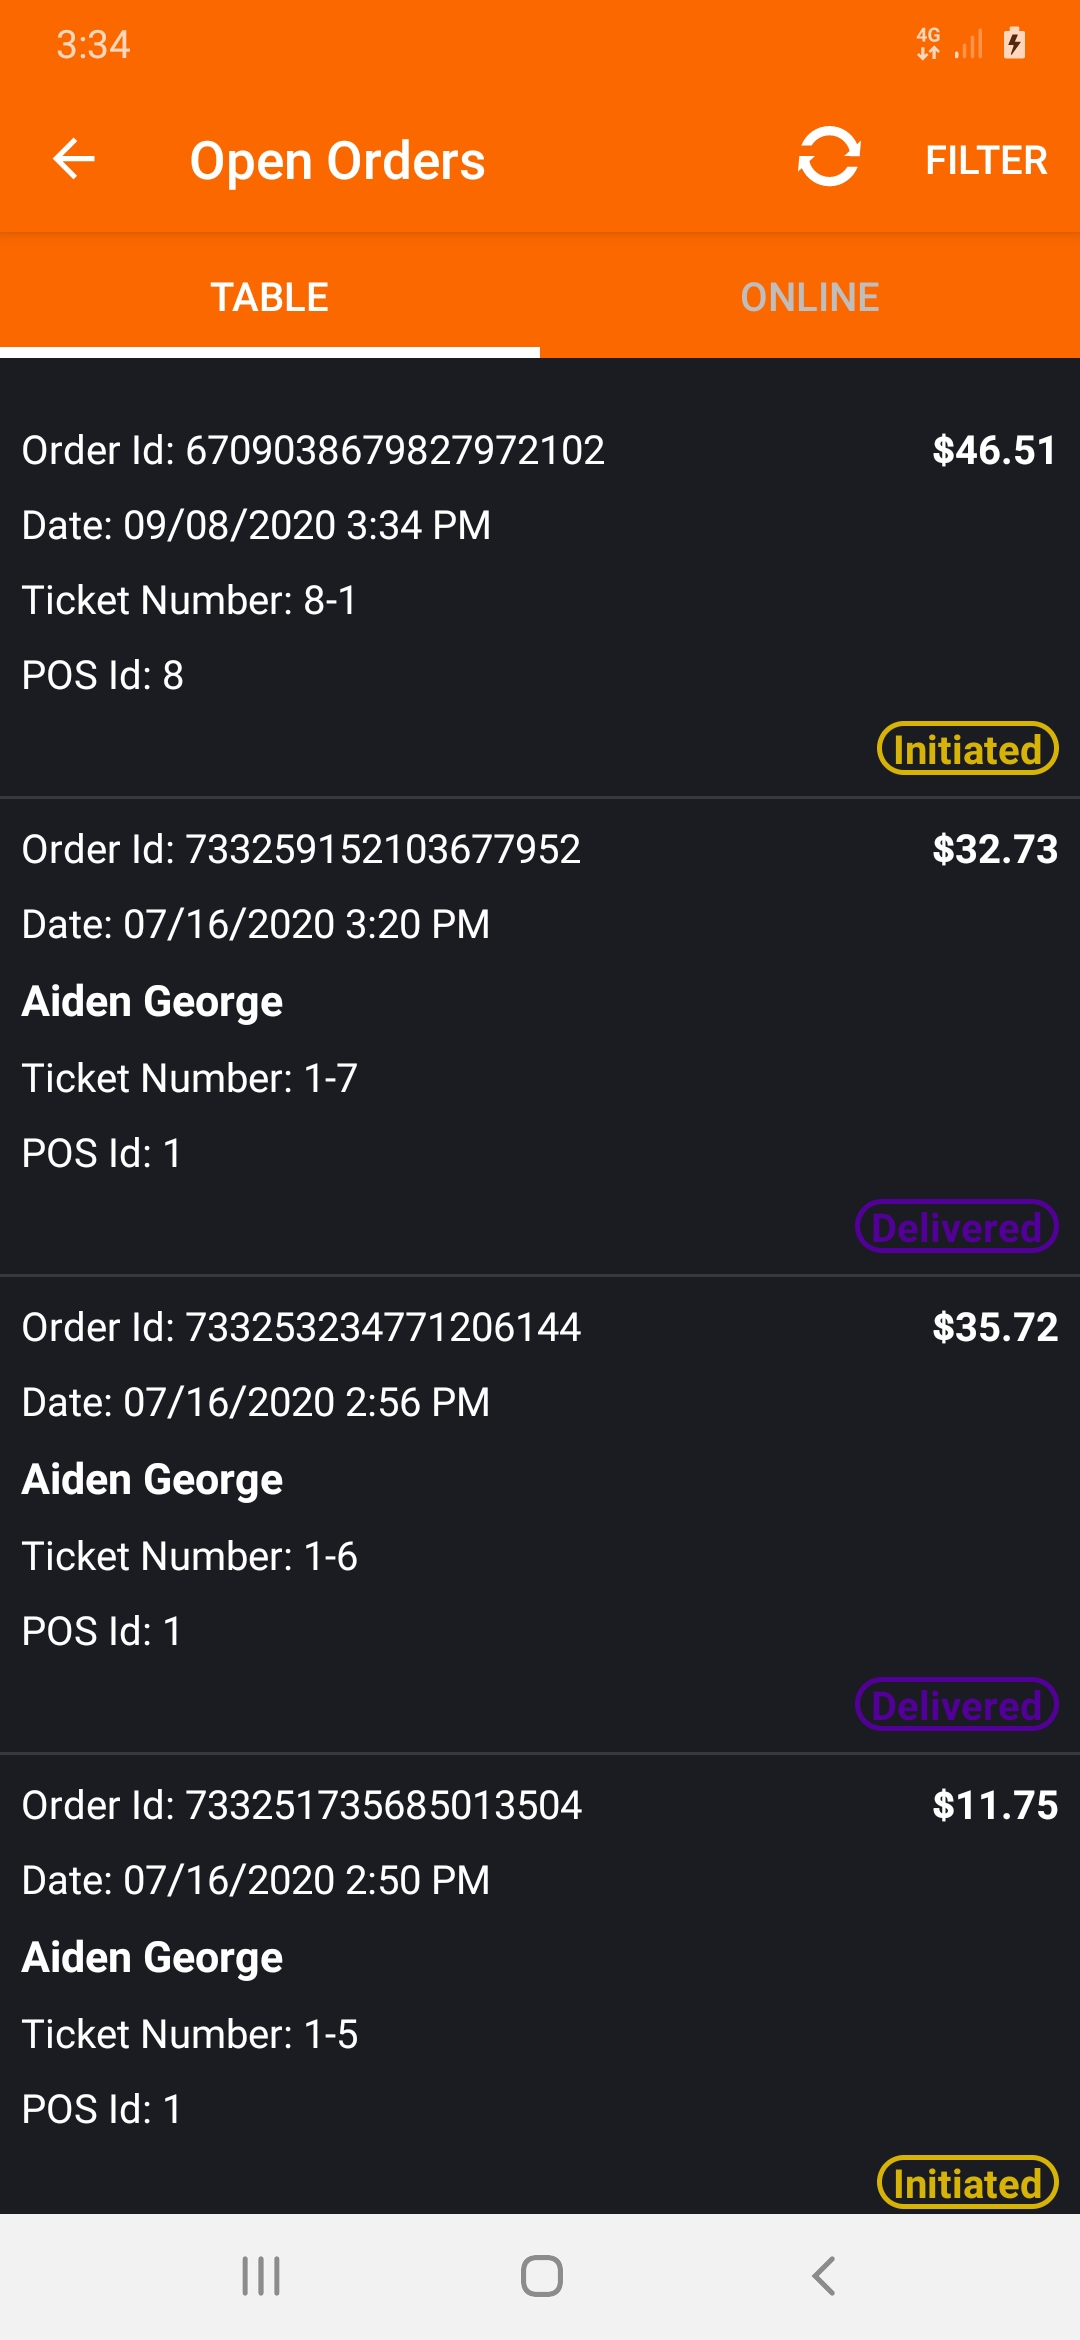
View all the In-Store and Online orders and start managing orders as they’re prepared in the kitchen and print receipts right from the pos terminal.
From the Home screen, scroll from the left side in or press on the RC Settings in the upper left → click on ‘Open Orders’. Placed orders will be listed on this page. The two tabs, 'Table' and 'Online' separate the orders by in-store order and online orders. Select the order to view the order details and order status.
- Created orders will be listed in this page, select the order to view the order details and order status.
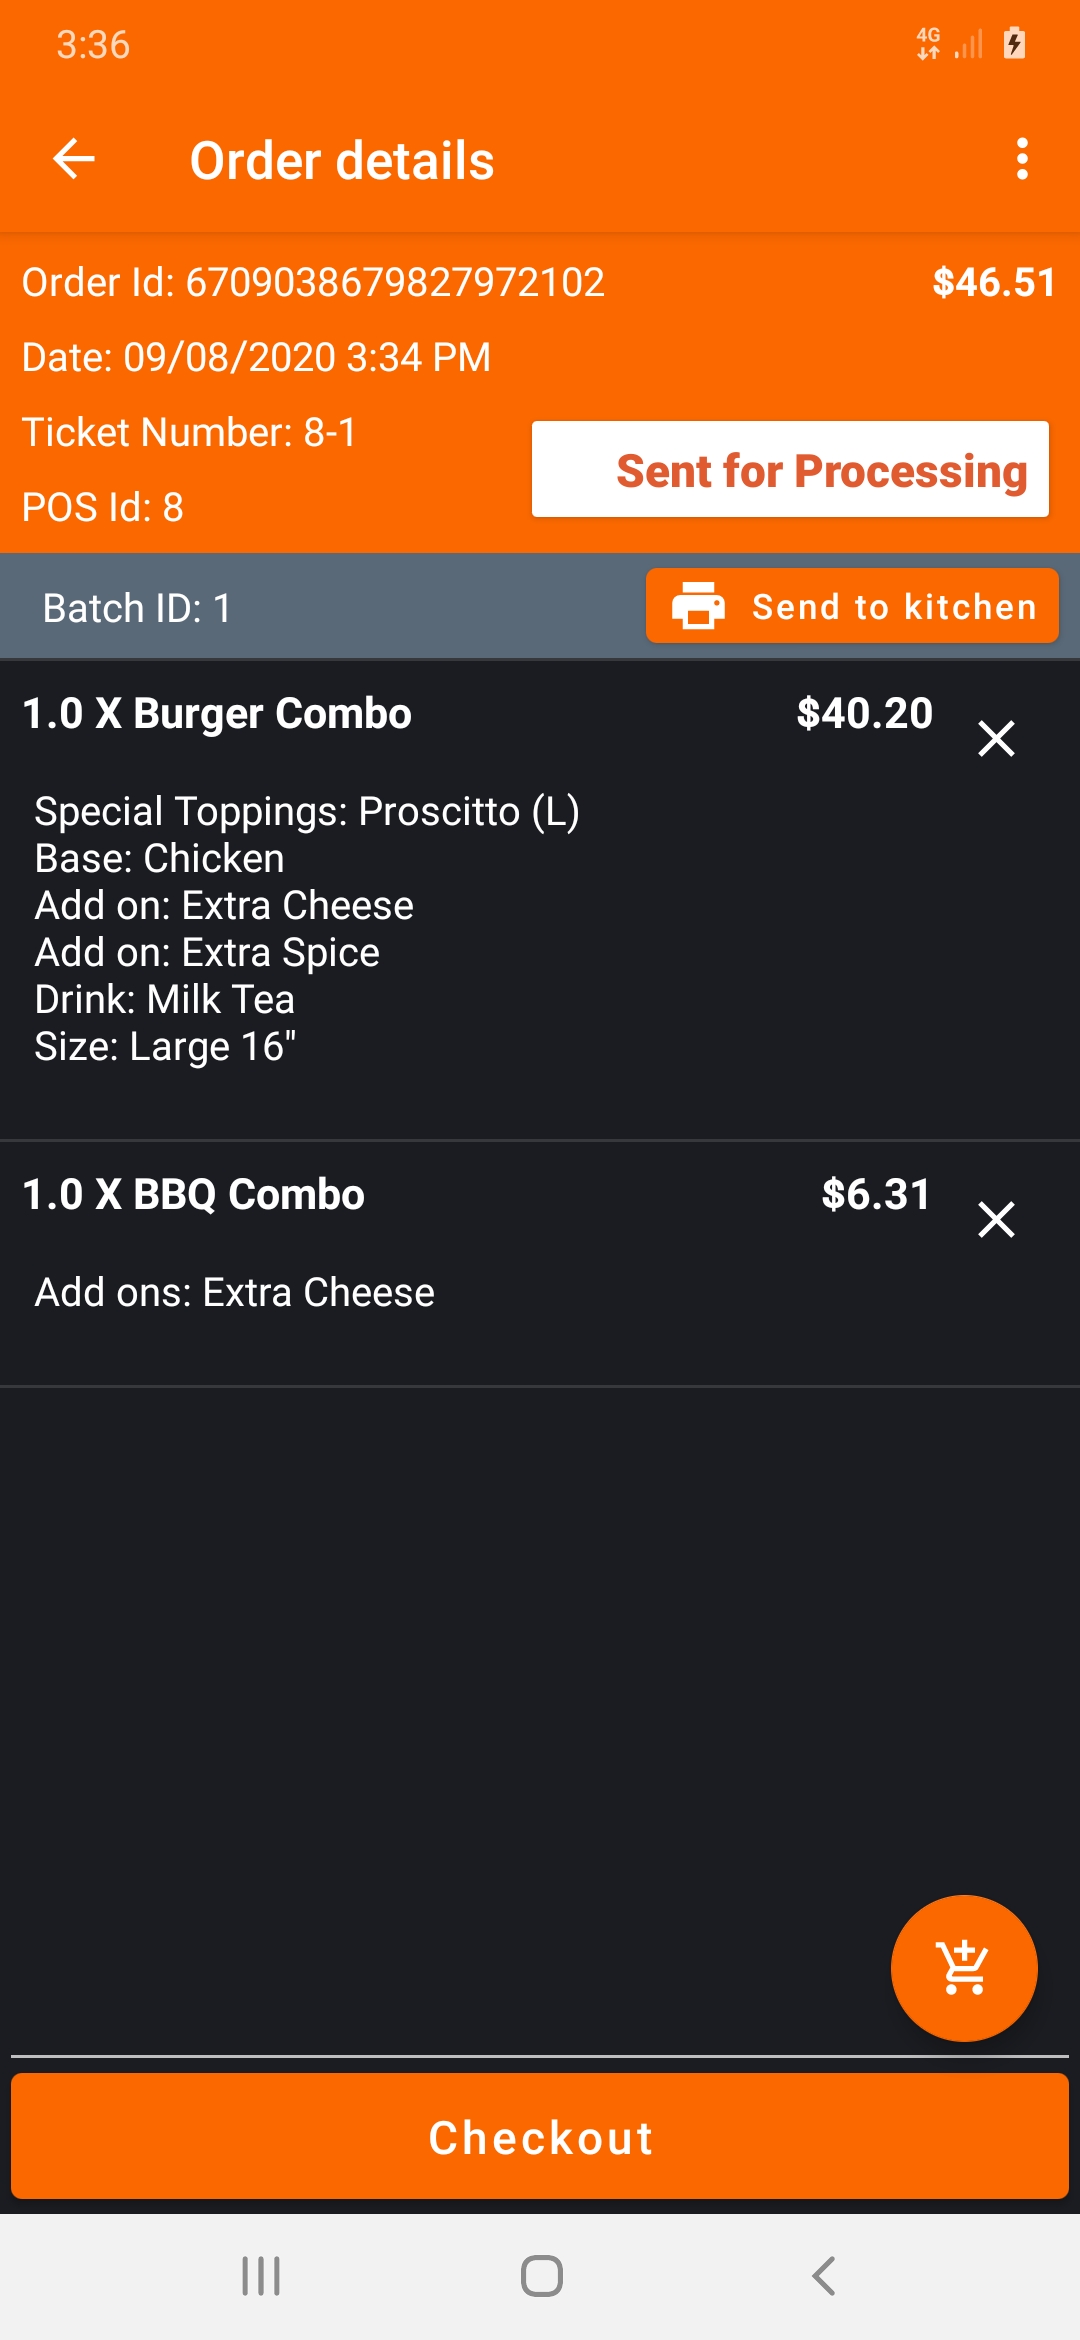
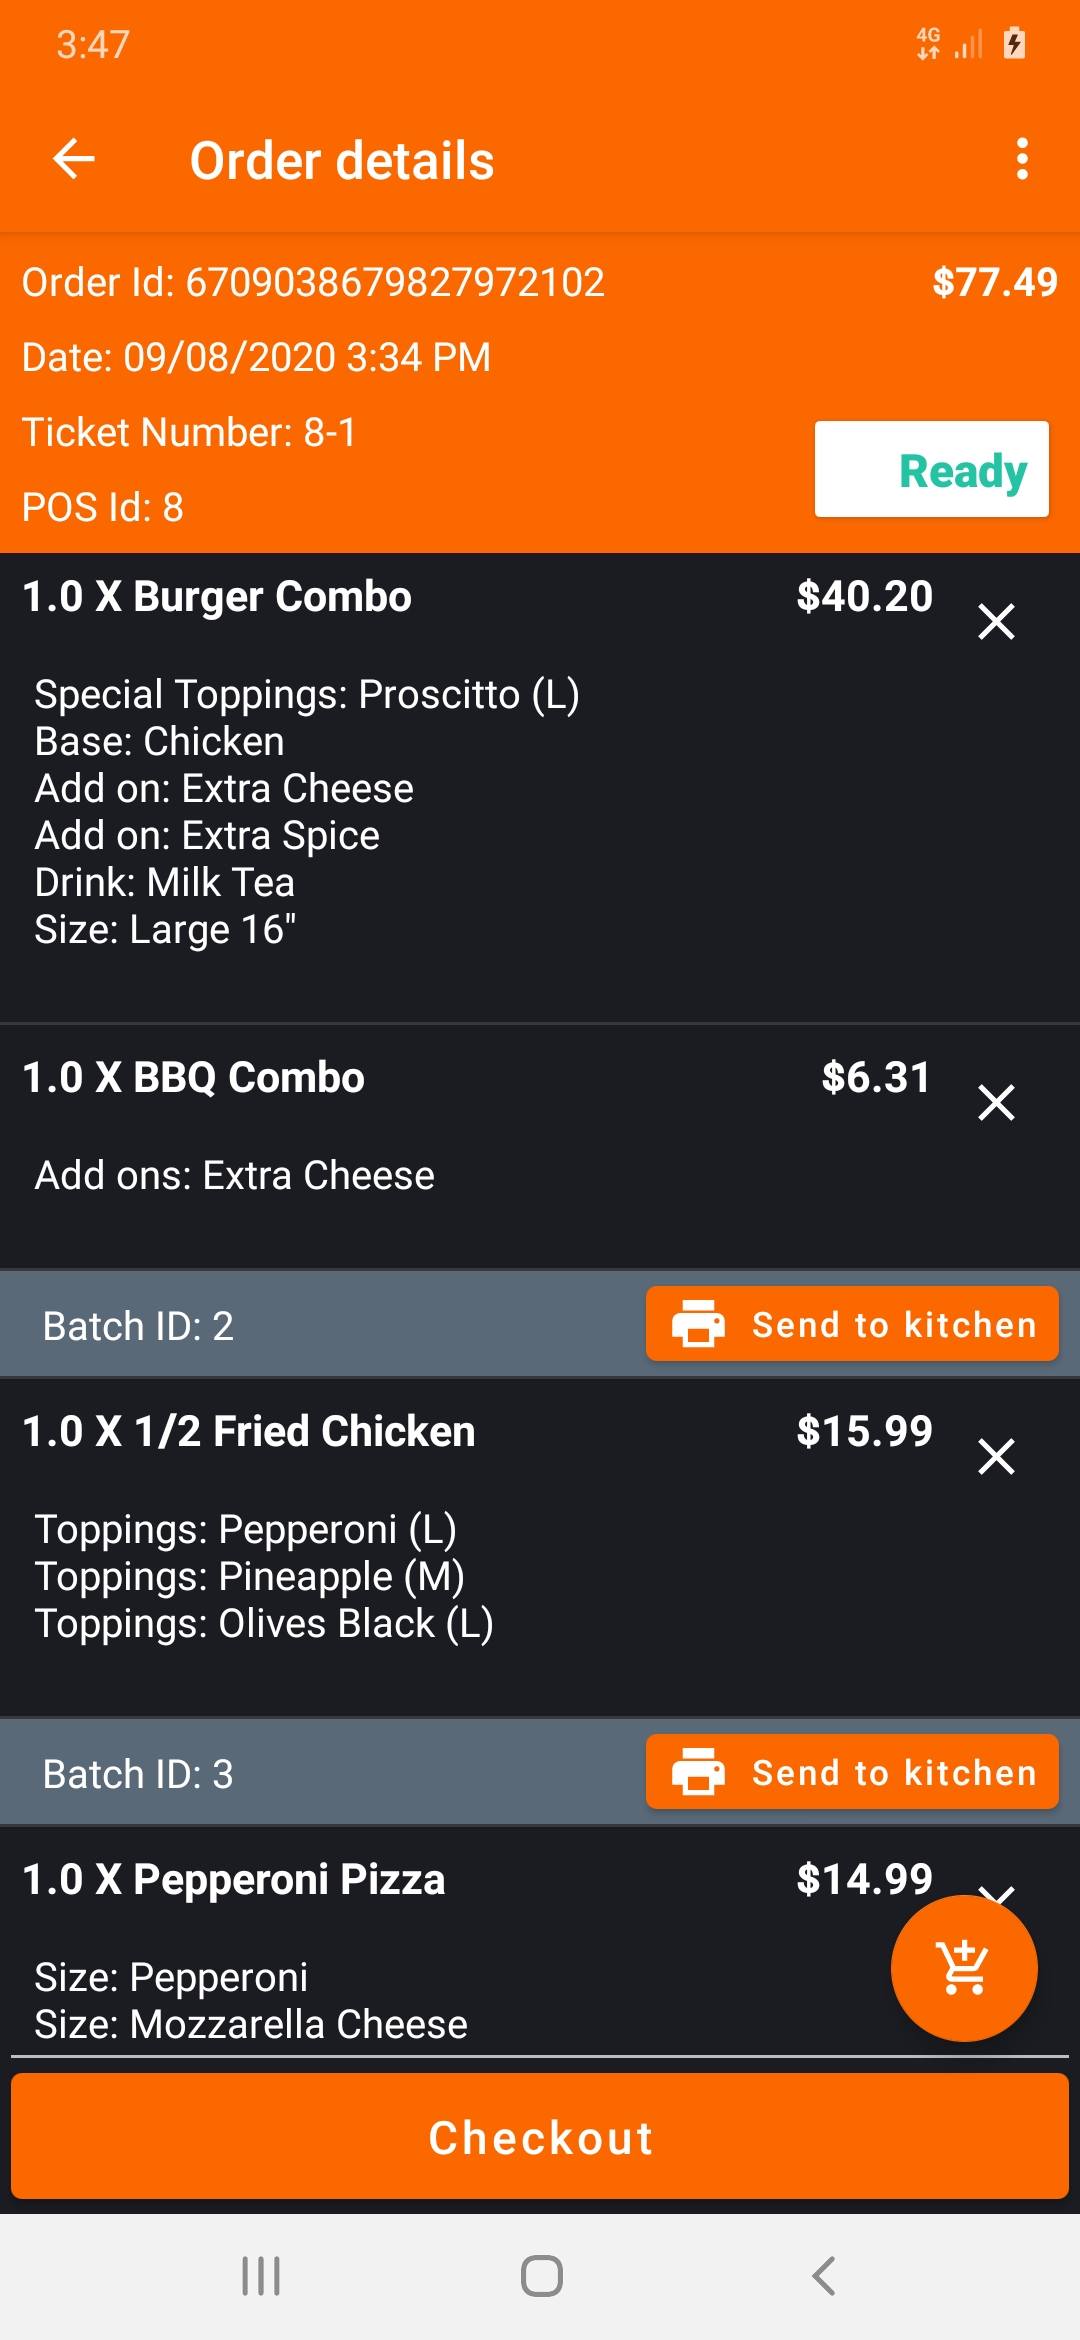
- Order Details include; Order ID, Date, Time, POS Id, Items details and Price.
- To change the status of the order, click on the ‘Initiated’ button which will display the available statuses. They are :
- Initiated
- Sent For Processing
- Processing
- Ready
- Delivered
- Canceled
- Merged
Select from the options to change the status.
Send to Kitchen : Click on the 'Send to Kitchen' button to send the order by batch to the kitchen printer and KDS.
Ticket Numbers are automatically assigned to orders when placed.
Additional Courses
For incrementing orders, from the Home screen, scroll from the left side in or press on the RC Settings in the upper left → Click on ‘Open Orders’.
- Select the order to view the order details and order status.
- Click on the ‘+ cart’ icon at the bottom of the screen and select the items.
- Click on the ‘Add To The Order’ button at the bottom of the screen to add more items as a new batch to the order.
- Batches of the orders can be Send to Kitchen partially or as a whole.
- Reprint Receipt: You have the option to reprint the specific portion or full order to the kitchen. To reprint, click on the 3 dots at the top right corner and click 'Reprint Receipt'.
- Once the order is delivered, click on the ‘Checkout’ button, select the tender type and proceed to checkout.
Printing Guest Check
From the Order details screen, click on the 3 dots at the top of the screen --> click on 'Print Guest Check'.

Checkout
- Click on the checkout button from the order details screen, which will show all the cart items with details.
-
Click on the 3 dots at the top of the screen to view More Options (Apply Discount, Exempt Tax, Clear Cart)
To add a transaction level Discount to the sale, click on the More Options button(3 dots) → Apply Discount → Select the discount from the dropdown box → Click Apply.
To exempt or include a tax during a sales transaction, click on the More Options button(3 dots)
→ Exempt Tax
To clear the items from the transaction cart, click on the More Options button(3 dots)
→ Clear Cart. (This void the sales transaction)
-
The tender buttons at the bottom of the transaction cart will get auto-populated with the total amount to be paid. Select the tender type--> Proceed to Checkout.
-
Provide the phone number and email id in the field provided and click on the Send & Email button to send the receipt by SMS or email ( receipt will not be printed).To print the receipt, click on ‘Print Receipt’.
- Click on ‘Start a New Sale’ to exit the screen and start a new sale.
Customer Feedback
When a sales transaction is completed, the customer has the opportunity to provide feedback to the merchant, through a 5-star rating.
If our mobile application, nGauge is downloaded, you will get instant notification of all poor ratings. This gives the manager or owner the unique opportunity to address the customer's problem at the time of the sale before they post their discontent on social media.
Feedback is automatically enabled. If the merchant does not want the feature, please contact support@retailcloud.com to disable.

Articles in this section
- Servio Self Checkout KIOSK
- Overview
- Getting Started
- Servio Certified Hardware
- Registration & Setup
- Setup Products and Modifiers
- Quick Pick / Menu Assignment
- App Modes
- Placing Orders & Managing Checks
- Placing Online Orders
Comments
Please sign in to leave a comment.